I’ll be honest — I ate half the batch before anyone else got to try it, and that’s because this recipe is an absolute knockout. It all started on a rainy Tuesday when I tried to impress a friend with a “quick” almond dessert, only to end up with a dry, crumbly mess that tasted like a sad, over‑cooked cookie. I swear I heard the batter sigh in defeat, and that moment sparked a fierce determination: I would create the ultimate almond bar that melts in your mouth like butter on a hot pancake, with a glaze so sweet it could coax a smile out of a stone‑cold statue.
Picture yourself in a sun‑lit kitchen, the oven humming like a contented cat, the air thick with the warm perfume of toasted almonds and caramelized sugar. You can hear the gentle crackle as the butter hits the pan, see the golden‑brown edges forming a delicate crust, feel the buttery dough yielding under your fingertips, and already taste that first bite—crunchy, nutty, and then a silky wave of sweet glaze that drapes over the bar like a silk scarf. That sensory overload is exactly why I’m so excited to share this version; it’s not just a treat, it’s a full‑on experience that turns an ordinary snack into a celebration.
Most recipes get this completely wrong. They either skimp on the butter, resulting in a dry, crumbly texture, or they drown the almond flavor with an over‑sweet glaze that masks the nutty heart. Here’s what actually works: a perfect balance of creamy almond paste, a dash of almond extract for that extra punch, and a glaze that’s thick enough to cling but light enough to melt away. I also throw in a secret step—briefly chilling the dough before baking—that gives the bars a tender crumb that literally falls apart with the lightest touch.
Okay, ready for the game‑changer? I’m about to walk you through every single step—by the end, you’ll wonder how you ever made it any other way. I dare you to taste this and not go back for seconds. Let’s dive in and create something that will have your friends begging for the recipe, and your taste buds doing a happy dance.
⚡ What Makes This Version Stand Out
- Texture: The bars boast a buttery, melt‑in‑your‑mouth crumb that shatters like thin ice when you bite, thanks to the perfect butter‑to‑flour ratio.
- Flavor: A deep almond essence shines through, amplified by almond paste and a whisper of almond extract that makes each bite sing.
- Glaze: The sweet glaze is silk‑smooth, coating the bars like a glossy finish on a masterpiece, yet it never overpowers the nutty base.
- Simplicity: Fewer than ten ingredients, all pantry‑friendly, and a method that even a novice can nail without a kitchen disaster.
- Make‑Ahead Potential: These bars keep beautifully for days, and the glaze actually improves after a night in the fridge.
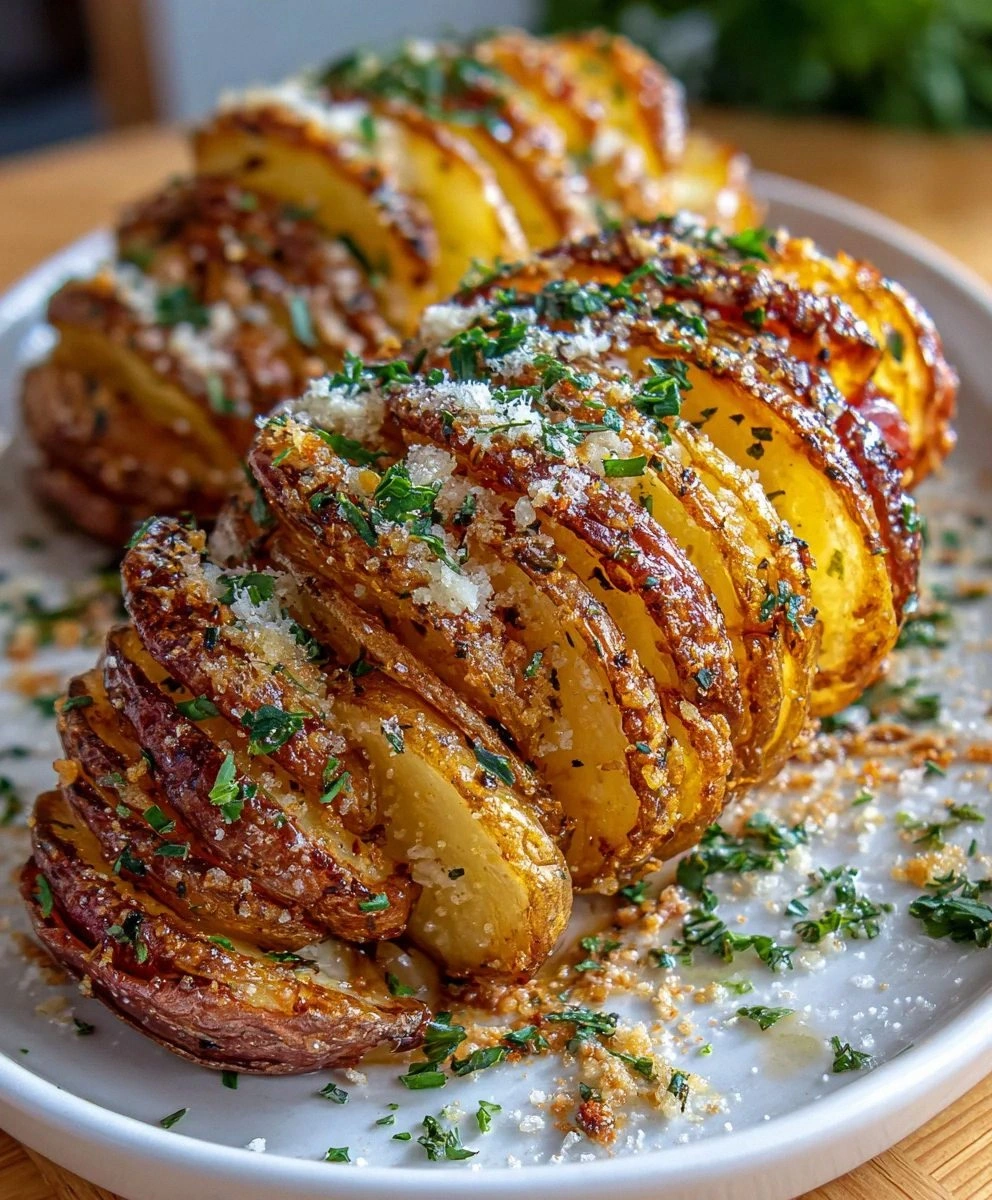
- Visual Appeal: The glossy glaze and toasted almond slices create a picture‑perfect finish that looks as good as it tastes.
- Crowd Reaction: Expect a chorus of “Wow!” and “Can I have another?”—they’re practically a party starter.
- Ingredient Quality: Using real almond paste and high‑quality butter turns a simple bar into a luxurious treat.
🍋 Inside the Ingredient List
The Flavor Base
The star of the show is the 8 oz Almond Paste. This concentrated almond goodness provides a rich, buttery depth that powdered almond extract alone could never achieve. If you skip it, the bars lose that luxurious, almost marzipan‑like core and become just a plain butter cookie. A good swap is high‑quality marzipan, but be prepared for a slightly sweeter profile. When buying, look for almond paste that’s smooth and free of grainy texture—your palate will thank you.
1 tsp Almond Extract adds an aromatic punch that lifts the whole bar. A little goes a long way; too much can turn the flavor into an artificial “almond perfume” that overwhelms. If you’re allergic to extracts, a splash of almond‑flavored liqueur works wonders, though it adds a subtle boozy note.
The Texture Crew
1 cup Unsalted Butter (plus an extra 1/4 cup for the glaze) is the backbone of both the crumb and the glaze. Butter’s milk solids brown beautifully, giving those golden edges that whisper “caramel”. If you’re out of butter, use a 1:1 swap with clarified butter for a cleaner flavor, but you’ll miss the slight nutty undertones from the milk solids.
2 cups All‑Purpose Flour creates the structure. Too much flour makes the bars dense; too little leaves them fragile. Sifting the flour with the sugar ensures an even distribution and a lighter crumb.
1 large Egg acts as a binder, giving the bars a subtle lift while keeping them moist. If you’re vegan, replace with a flax‑egg (1 tbsp ground flax + 3 tbsp water) but expect a slightly earthier flavor.
1 cup Granulated Sugar sweetens the base and helps with caramelization. For a deeper flavor, swap half the granulated sugar with brown sugar—this adds a hint of molasses that pairs beautifully with almonds.
The Unexpected Star
1/4 cup Heavy Cream enriches the glaze, giving it that glossy, velvety sheen. Skipping the cream makes the glaze thin and prone to running, losing that perfect coating. If you’re dairy‑free, coconut cream works, but it will add a faint coconut note.
2 cups Confectioner’s Sugar provides the sweet, silky texture of the glaze. Sift it well to avoid lumps; a lumpy glaze is a visual and textural disaster.
The Final Flourish
1/2 cup Sliced Almonds are toasted and sprinkled on top for crunch and visual appeal. They add a toasty contrast to the soft interior. If you’re allergic to nuts, toasted pumpkin seeds make a surprising and delightful alternative.
Everything's prepped? Good. Let's get into the real action…

🔥 The Method — Step by Step
First, preheat your oven to 350°F (175°C). While the oven warms, line a 9‑inch square pan with parchment paper, allowing the paper to overhang for easy lift‑out later. This step ensures the bars won’t stick and gives you a clean, professional finish. The anticipation builds as the kitchen starts to warm—trust me, that aroma is a promise of greatness.
In a large mixing bowl, cream together 1 cup unsalted butter and 1 cup granulated sugar until the mixture is light, fluffy, and pale yellow—about 3‑4 minutes with an electric mixer on medium speed. This aeration is crucial; it traps air that later expands in the oven, giving the bars a tender crumb. Watch out: Over‑mixing can cause the butter to separate, leading to a greasy texture later.
👀 Watch Out: If the mixture looks curdled, add a splash of milk and continue mixing—this rescues the emulsion.Next, beat in 1 large egg and 1 tsp almond extract. The egg should blend in smoothly, creating a glossy batter that looks like liquid gold. At this point, the batter will start to thicken—this is the perfect moment to feel the excitement building.
🪄 Kitchen Hack: Add the egg at room temperature; it incorporates faster and prevents the batter from curdling.Fold in the 8 oz almond paste using a spatula. The paste should melt into the batter, turning it a beautiful amber hue. Take a moment to admire the glossy, nutty swirl—this is the flavor foundation you’ve been waiting for. If any lumps remain, gently warm the mixture for 10 seconds in the microwave; it’ll smooth out without cooking the batter.
Sift together 2 cups all‑purpose flour and a pinch of salt, then gradually add to the wet mixture. Stir just until combined; over‑mixing will develop gluten and make the bars tough. The dough should feel slightly sticky but manageable—think of soft play‑dough you could easily roll out.
Transfer the dough to the prepared pan, spreading it evenly with a spatula. Press the surface gently to create a uniform thickness; this ensures even baking. Power transition: Now the fun part—topping the bars with toasted almond slices. Sprinkle 1/2 cup sliced almonds over the surface, pressing lightly so they adhere.
Slide the pan into the oven and bake for 20‑25 minutes, or until the edges turn a light golden brown and a toothpick inserted in the center comes out clean. You’ll hear a faint crackle as the butter caramelizes—That sizzle when it hits the pan? Chef's kiss. Keep a close eye on the top; if the almonds start to darken too quickly, loosely cover with foil.
While the bars bake, prepare the glaze. In a small saucepan, combine 2 cups confectioner’s sugar, 1/4 cup unsalted butter, 1/4 cup heavy cream, and 1/2 tsp almond extract. Heat over low, whisking constantly until the mixture is smooth, glossy, and just starts to bubble—about 3‑4 minutes.
🌎 Fun Fact: The glaze’s glossy finish comes from the sugar’s crystallization, which is slowed by the fat in butter and cream.When the bars are done, remove them from the oven and let them cool in the pan for 5 minutes. Then, using the parchment overhang, lift them onto a cooling rack. While they’re still warm (but not hot), drizzle the glaze evenly over the top, letting it pool and seep into the cracks. The glaze will set within 10‑15 minutes, forming a glossy, sweet crust that shatters like delicate glass when you bite.
Finally, let the glazed bars cool completely before cutting into squares. Use a sharp, warm knife for clean cuts—this prevents the glaze from cracking. Serve at room temperature, or warm slightly in the microwave for a gooey interior that truly melts in your mouth. I dare you to taste this and not go back for seconds. That’s it — you did it. But hold on, I’ve got a few more tricks that'll take this to another level…
🏆 Insider Tricks for Flawless Results
The Temperature Rule Nobody Follows
Never bake almond bars straight from a cold fridge. Let the dough sit at room temperature for 10‑15 minutes after mixing; this lets the butter soften just enough to spread evenly without melting. I once tried skipping this step, and the bars baked unevenly, leaving a soggy center. The rule of thumb: if the dough feels like firm dough rather than a sticky ball, you’re good to go.
Why Your Nose Knows Best
The moment the edges start to pull away from the pan and you catch a faint toasty almond scent, the bars are ready. Trust that aroma more than the timer; ovens vary, and the nose is a reliable gauge. One time I left them in too long because I trusted the timer, and the glaze turned bitter. A quick sniff saves you from a disaster.
The 5‑Minute Rest That Changes Everything
After glazing, let the bars rest uncovered for exactly five minutes before cutting. This short rest allows the glaze to set just enough to hold its shape while still being soft enough to give that melt‑in‑your‑mouth sensation. If you cut too early, the glaze will smear; wait too long, and it hardens into a brittle shell.
The Slice‑And‑Serve Secret
Warm the knife under hot water, dry it, then slice. The warm blade cuts through the glaze cleanly, producing crisp edges that look professional. A cold knife will crush the glaze, making it look sloppy and ruining the visual appeal.
The Double‑Layer Glaze Upgrade
If you’re feeling extra indulgent, apply a thin first glaze, let it set for 5 minutes, then drizzle a second glaze with a pinch of sea salt. The salt adds a subtle contrast that elevates the sweet‑almond flavor, turning a simple bar into a gourmet bite.
The “Don’t Panic” Cooling Trick
If you’re in a rush, place the pan on a cooling rack instead of the countertop. This speeds up the cooling process without compromising texture, so you can serve the bars within 30 minutes of pulling them out of the oven. Just keep an eye on the glaze—too rapid cooling can cause it to crack.
🎨 Creative Twists & Variations
This recipe is a playground. Here are some of my favorite ways to switch things up:
Chocolate‑Almond Fusion
Melt ½ cup dark chocolate and swirl it into the glaze before drizzling. The bittersweet notes balance the almond sweetness, perfect for chocolate lovers who still want that nutty crunch.
Citrus Zest Spark
Add 1 tsp finely grated orange zest to the batter and a splash of orange extract to the glaze. The citrus brightens the flavor profile, making the bars feel lighter and perfect for spring brunches.
Spiced Autumn
Incorporate ½ tsp ground cinnamon, a pinch of nutmeg, and a dash of clove into the batter. Pair with a maple‑infused glaze for a cozy, fall‑ready treat that pairs beautifully with a cup of chai.
Nut‑Free Delight
Swap almond paste for sunflower seed butter and use toasted pumpkin seeds instead of sliced almonds. The flavor shifts to a mellow, earthy tone that still delivers that satisfying crunch.
Berry‑Burst Surprise
Fold in ½ cup fresh raspberries into the batter before baking. The berries burst during cooking, leaving pink flecks and a subtle tartness that cuts through the sweetness.
❄️ Storing & Bringing It Back to Life
Fridge Storage
Place the cooled bars in an airtight container and store in the refrigerator for up to 5 days. The glaze stays glossy, and the bars retain their buttery crumb. Before serving, let them sit at room temperature for 10 minutes to soften the glaze.
Freezer Friendly
Wrap each bar individually in plastic wrap, then place them in a zip‑top freezer bag. They freeze beautifully for up to 2 months. To reheat, microwave for 15‑20 seconds, adding a tiny splash of water to the glaze—this steams it back to perfection.
Best Reheating Method
For the ultimate melt‑in‑your‑mouth experience, warm the bars in a 300°F (150°C) oven for 5‑7 minutes. The glaze softens, the interior becomes warm and gooey, and the aroma fills the kitchen like a warm hug.