Picture this: it's Sunday afternoon, I'm still in my pajamas, and I'm staring into the fridge like it owes me something. The rain is tapping against the kitchen window, my stomach is growling louder than the neighbor's dog, and all I've got is a sad can of white beans, a lemon that's seen better days, and some rosemary that's somehow still alive in the back of the crisper. Most people would order takeout. I decided to make magic happen. What followed was a soup so ridiculously good that I actually did a little dance in my kitchen — the kind of dance you do when nobody's watching but you still hope your neighbors aren't home to witness your culinary euphoria.
Here's the thing about most white bean soups — they're bland, they're boring, and they taste like someone was trying to punish you for being poor in college. But this version? This version will make you want to write poetry about beans. The combination of bright lemon and earthy rosemary creates this symphony of flavors that makes your taste buds sit up and pay attention. It's like someone took the concept of comfort food and gave it a sophisticated makeover that still knows how to give you a warm hug from the inside out.
I know what you're thinking — "It's just bean soup, how good can it be?" But I dare you to taste this and not go back for thirds. The first spoonful hits you with that citrusy brightness that makes your mouth water, then the rosemary sneaks in with its piney perfume, and finally the creamy beans create this luxurious texture that coats your tongue like velvet. It's the kind of meal that makes you close your eyes involuntarily because your brain needs all its processing power to handle the flavor explosion happening in your mouth.
What makes this recipe absolutely genius is that it transforms humble pantry staples into something that tastes like it came from a fancy bistro where the chef has strong opinions about everything. You don't need fancy equipment, you don't need hard-to-find ingredients, and you definitely don't need to spend hours slaving over a hot stove. In fact, the whole thing comes together in under 45 minutes, which means you could be eating this tonight instead of whatever sad desk lunch you were planning. Stay with me here — this is worth it.
What Makes This Version Stand Out
Citrus Explosion: Most bean soups are heavy, dense affairs that sit in your stomach like a brick. This version uses lemon juice and zest to create a bright, almost effervescent quality that lifts the entire dish. The acid cuts through the creaminess of the beans and makes each spoonful feel light and refreshing rather than stodgy and overwhelming.
Herb Game Strong: While other recipes might suggest a pinch of dried rosemary, we're going full send with fresh herbs that actually taste like something. The rosemary gets fried in olive oil first, which releases its essential oils and creates this incredible aromatic base that perfumes your entire kitchen. It's like having a tiny Christmas tree in your soup pot.
Texture Perfection: Instead of the usual "blend everything into baby food" approach, we leave some beans whole for satisfying pops of texture while partially mashing others to create a naturally creamy base. This creates a soup that has body and substance without being gluey or pasty — the difference between silk and sandpaper.
Zero Waste Magic: That lemon you zested? We're using every last bit of it. The juice goes in for brightness, the zest adds perfume, and even the squeezed-out halves get simmered in the broth to extract every drop of flavor. It's frugal cooking that tastes anything but cheap.
One Pot Wonder: Everything happens in a single pot, which means fewer dishes and more time for important activities like eating soup in your favorite mug while binge-watching cooking shows. The same pot that sautes your aromatics becomes your simmering vessel, which means more flavor and less cleanup.
Crowd Pleaser: I've served this to picky toddlers, food snobs, and people who claim they "don't like healthy food" — they all licked their bowls clean. It's vegetarian but satisfying, healthy but indulgent, sophisticated but approachable. It's basically the Switzerland of soups.
Alright, let's break down exactly what goes into this masterpiece...
Inside the Ingredient List
The Flavor Foundation
Olive oil is your first building block, and please don't use that bottle you bought three years ago that's been sitting next to the stove oxidizing into sadness. You want something fruity and peppery that actually tastes like olives, not like old crayons. When it hits the hot pot and starts shimmering, that's your cue that the flavor party is officially starting.
Garlic is non-negotiable here — we're talking four fat cloves, minced so fine it almost becomes a paste. When it hits that hot oil, it should sizzle excitedly but not aggressively. If your garlic burns, you'll know because your kitchen will smell like disappointment and regret. The goal is golden and fragrant, not bitter and brown.
Onion provides the sweet, savory backbone that makes everything else taste more like itself. Dice it small enough that it melts into the soup but not so tiny that it disappears entirely. You want little jewels of sweetness that burst between your teeth, not onion water.
The Bean Brigade
Canned white beans are absolutely fine here — in fact, they're preferable because they've been cooked to that perfect creamy consistency that would take you hours to achieve from dried. Look for cannellini or Great Northern beans, and don't you dare drain and rinse them like some recipe robot. That starchy liquid in the can is liquid gold for thickening your soup.
The quality of your beans matters more than you think. Cheap beans often have tough skins and mealy interiors, while good ones are creamy throughout with skins so tender you barely notice them. If you've ever wondered why some bean soups taste like they're full of tiny pieces of paper, blame the beans.
Size matters here — you want the big, plump beans that feel substantial in your spoon, not the tiny ones that get lost in the broth. Think of them as the meat in this vegetarian masterpiece; they need to have presence and personality.
The Aromatic Avengers
Fresh rosemary is absolutely essential — dried rosemary is like the cardboard version of the real thing. It should smell like you've just walked through a pine forest after rain, with hints of eucalyptus and something slightly floral. Strip the leaves off the woody stems and chop them roughly; you want distinct pieces that won't disappear into the soup.
Lemon zest is where the magic lives — those tiny flecks of yellow packed with essential oils that taste like sunshine and happiness. Use a microplane or the finest side of your grater, being careful to get only the yellow part, not the bitter white pith underneath. One lemon should give you about a tablespoon of zest, which is exactly what you need.
Bay leaf is the quiet overachiever of the herb world. It doesn't scream for attention, but without it, something indefinable is missing. It's like the bass player in a band — you might not notice it's there, but you'd definitely notice if it disappeared.
The Final Flourish
Vegetable broth is your canvas — use a good one that actually tastes like vegetables, not like salty water with vague vegetable undertones. If you wouldn't drink it on its own, don't put it in your soup. Better yet, make your own and freeze it in ice cube trays for flavor emergencies.
Lemon juice goes in at the very end because vitamin C is delicate and heat destroys it. You want that bright, fresh acidity that makes your mouth pucker slightly and your eyes open wider. Add it gradually, tasting as you go, because lemons vary in acidity and you might need more or less.
Olive oil for finishing is optional but recommended — a good drizzle of the fancy stuff right before serving adds fruitiness and makes the soup look glossy and restaurant-worthy. It's like putting on lip gloss before a date; technically unnecessary but it makes everything better.
Everything's prepped? Good. Let's get into the real action...
The Method — Step by Step
Heat your largest, heaviest pot over medium heat and add three tablespoons of olive oil. When the oil shimmers like a mirage on hot pavement, it's ready for the aromatics. Add your diced onion with a generous pinch of salt — the salt helps draw out moisture and prevents burning while encouraging the onions to release their natural sweetness. Stir occasionally for about five minutes until the onions turn translucent and start to look like they're made of edible glass.
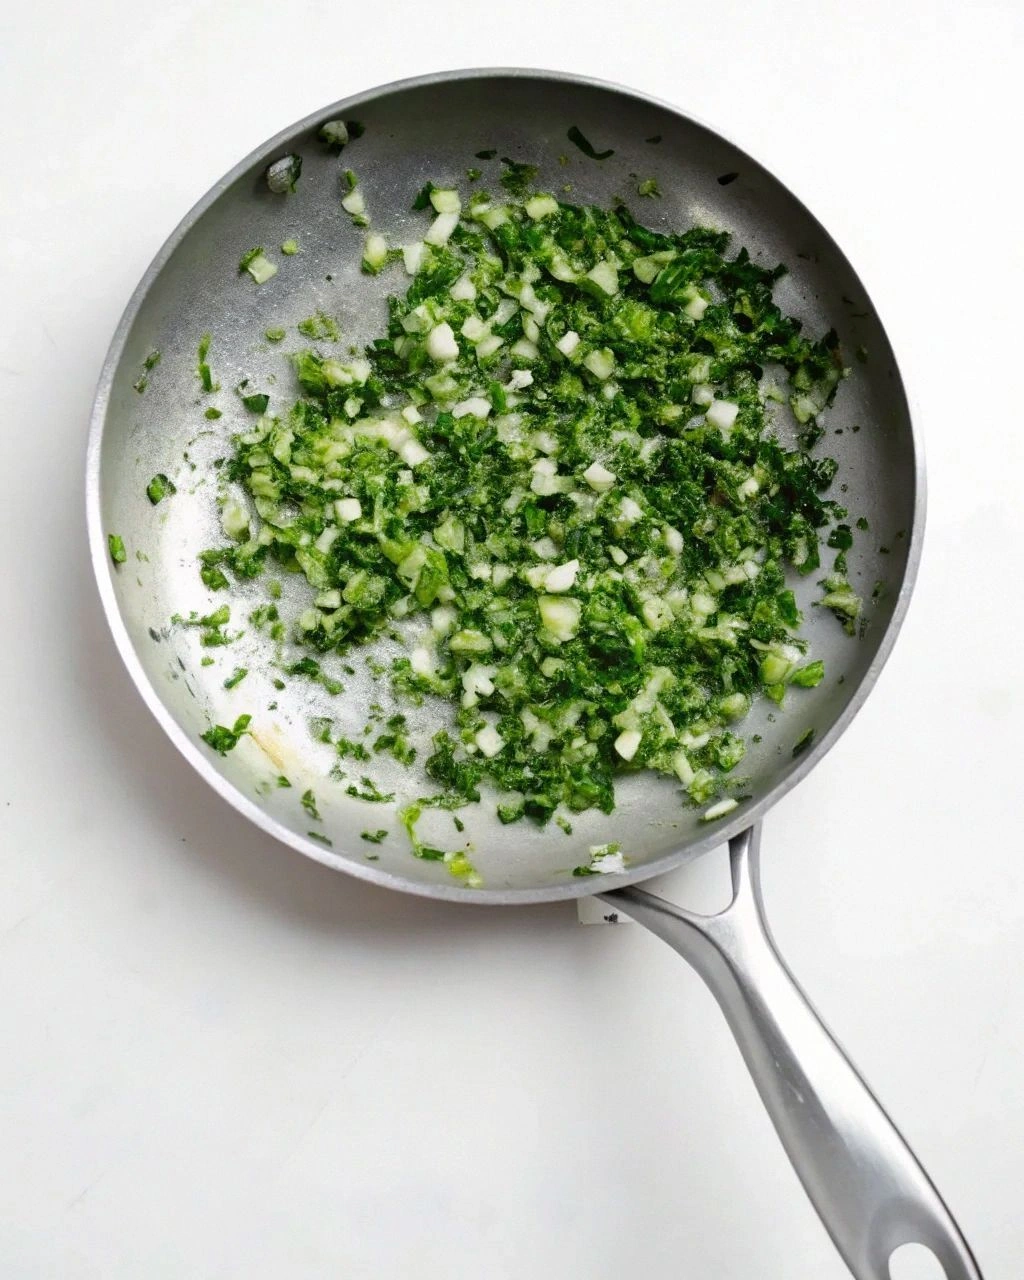
Now comes the moment of truth — add your minced garlic and chopped rosemary together. The garlic should hit the pan with a satisfying sizzle, and within seconds your kitchen will smell like you've been transported to a Mediterranean hillside. Stir constantly for about 30 seconds; this is not the time to check Instagram. The garlic should turn golden but not brown, and the rosemary will darken slightly and become intensely fragrant. If your smoke alarm goes off, you've gone too far.
Add your beans, including all that starchy can liquid, to the pot. I know it looks murky and unappetizing, but trust me — that's flavor concentrate that's going to make your soup silky and thick without any added cream. Stir everything together and let it cook for about two minutes so the beans can absorb some of the garlic-rosemary goodness. The beans should start to look glossy and well-coated with the oil and aromatics.
Pour in your vegetable broth — it should be enough to cover the beans by about an inch. Add your bay leaf and bring everything to a gentle simmer. You want lazy bubbles, not a rolling boil that will turn your beans to mush. Once it's simmering, reduce the heat to low and let it bubble away for about 15 minutes. This is when the magic happens — the flavors marry, the broth thickens slightly, and your kitchen starts smelling like you know what you're doing.
Now comes the fun part — taste your soup and season aggressively with salt and pepper. Beans need more salt than you think, and under-seasoned soup is a tragedy that can be avoided with a heavy hand. Remember that you're going to add lemon juice at the end, which will brighten everything, so don't worry if it tastes a little flat right now. The flavors will come together like a band that needs one more rehearsal before they nail their performance.
Remove the bay leaf (unless you enjoy the sensation of eating a piece of dried leaf) and add your lemon zest. Stir it in and let it cook for about 30 seconds — just enough to release those aromatic oils but not so long that they evaporate into nothingness. The zest should distribute evenly throughout the soup, creating tiny flecks of yellow that look like captured sunshine.
Remove the pot from heat and add your lemon juice, starting with half a lemon and tasting as you go. You want bright and refreshing, not mouth-puckering sour. The acid should make all the other flavors snap into focus like adjusting the lens on a camera. If your soup was a painting before, now it's in high definition with all the colors popping.
Let the soup rest for five minutes — this is crucial and most people skip it. During this time, the temperature evens out, the flavors settle, and the soup transforms from "pretty good" to "I need to sit down, this is incredible." Serve it in wide, shallow bowls that show off the beautiful bean-studded broth, drizzled with your best olive oil and maybe some crusty bread on the side for scooping.
That's it — you did it. But hold on, I've got a few more tricks that'll take this to another level...
Insider Tricks for Flawless Results
The Temperature Rule Nobody Follows
Here's what separates amateur soup from restaurant-quality: temperature control. Your soup should never boil aggressively — it should just barely whisper with tiny bubbles around the edges. High heat is the enemy of bean texture, turning your creamy beans into grainy little pebbles that feel like eating gravel. Keep it low and slow, and your beans will stay intact but tender, like little pillows of perfection.
I'll be honest — I ate half the batch before anyone else got to try it because I couldn't stop "tasting" to check the seasoning. If you find yourself doing the same, you're doing it right. Just remember that the flavor intensifies as the soup cools, so stop adding salt about 30 seconds before you think you should.
Why Your Nose Knows Best
Your sense of smell is your most powerful tool here. When the garlic and rosemary hit the oil, you should smell them immediately — if you don't, your heat is too low. When you add the broth, take a deep breath — it should smell like something you want to dive into face-first. If at any point your kitchen doesn't smell like the best restaurant in town, adjust your seasoning or heat accordingly.
Most recipes get this completely wrong — they treat smell like a side effect instead of the main event. But with aromatics like rosemary and lemon, your nose is actually the best thermometer and seasoning guide you have. Trust it, and you'll never make bland soup again.
The 5-Minute Rest That Changes Everything
This is the step that separates good cooks from impatient ones. After you add your lemon juice, let the soup sit off heat for exactly five minutes. During this time, the acid mellows slightly, the temperature evens out so you don't burn your tongue, and the beans absorb just enough broth to become perfectly plump. It's like the soup equivalent of letting a steak rest — skip it, and you're missing out on the best version of what you just made.
A friend tried skipping this step once — let's just say it didn't end well. The soup was too hot to taste properly, the lemon was harsh and aggressive, and the beans hadn't had time to absorb all the flavors. Five minutes is the difference between "this is good" and "I need to write a thank-you note to whoever invented beans."
The Secret Ingredient You're Already Using
That starchy liquid from the bean can? It's not just thickener — it's pure bean flavor concentrate that adds body and silkiness you can't get any other way. Professional chefs call it "aquafaba" and use it to make vegan meringues, but in soup it's your best friend for creating richness without cream. Don't you dare rinse those beans and throw away liquid gold.
Presentation That Makes People Hungry
Ladle the soup into warm bowls — not cold ones straight from the cabinet. Cold bowls steal heat from your soup faster than a teenager steals your fries. Warm them by filling with hot water while the soup simmers, then empty and dry before serving. The difference in temperature retention is dramatic, and your soup stays at that perfect eating temperature longer.
Picture yourself pulling this out of the oven, the whole kitchen smelling incredible, and your family or roommates appearing like magic at the smell. That's the power of properly timed aromatics and a well-timed dinner bell. Okay, ready for the game-changer?
Creative Twists and Variations
This recipe is a playground. Here are some of my favorite ways to switch things up:
Smoky Bacon Revolution
Add three strips of chopped bacon to the pot before the onions and cook until crispy. Remove the bacon bits and save for garnish, but cook everything else in the rendered fat. The smoky pork flavor adds incredible depth, and those bacon bits on top provide crunch that contrasts beautifully with the creamy beans. It's like this soup put on a leather jacket and became cooler.
Spicy Mediterranean
Add a teaspoon of red pepper flakes with the garlic and rosemary, then finish with a drizzle of chili oil. The heat plays beautifully against the lemon, and the capsaicin actually helps your body absorb more nutrients from the beans. Plus, breaking a light sweat while eating soup makes you feel like you're doing something good for your metabolism.
Creamy Tuscan Style
Stir in two cups of baby spinach and a quarter cup of heavy cream at the very end. The spinach wilts into silky ribbons, and the cream transforms the broth into something luxurious enough for date night but still healthy enough for your yoga instructor. It's like your soup got dressed up for a special occasion but didn't forget where it came from.
Protein Powerhouse
Add a can of tuna in olive oil, flaked into large chunks, during the last five minutes of cooking. The tuna adds protein and a briny ocean flavor that makes the soup taste like it came from a seaside village in Italy. Break up the tuna roughly so you get big, satisfying pieces that make this feel like a complete meal rather than just a starter.
Herb Garden Special
Replace half the rosemary with fresh thyme and add a handful of chopped parsley at the end. The thyme adds a more delicate herbal note, while the fresh parsley brightens everything up like adding highlights to your hair. It's perfect for spring when you want something that tastes green and fresh but still warming.
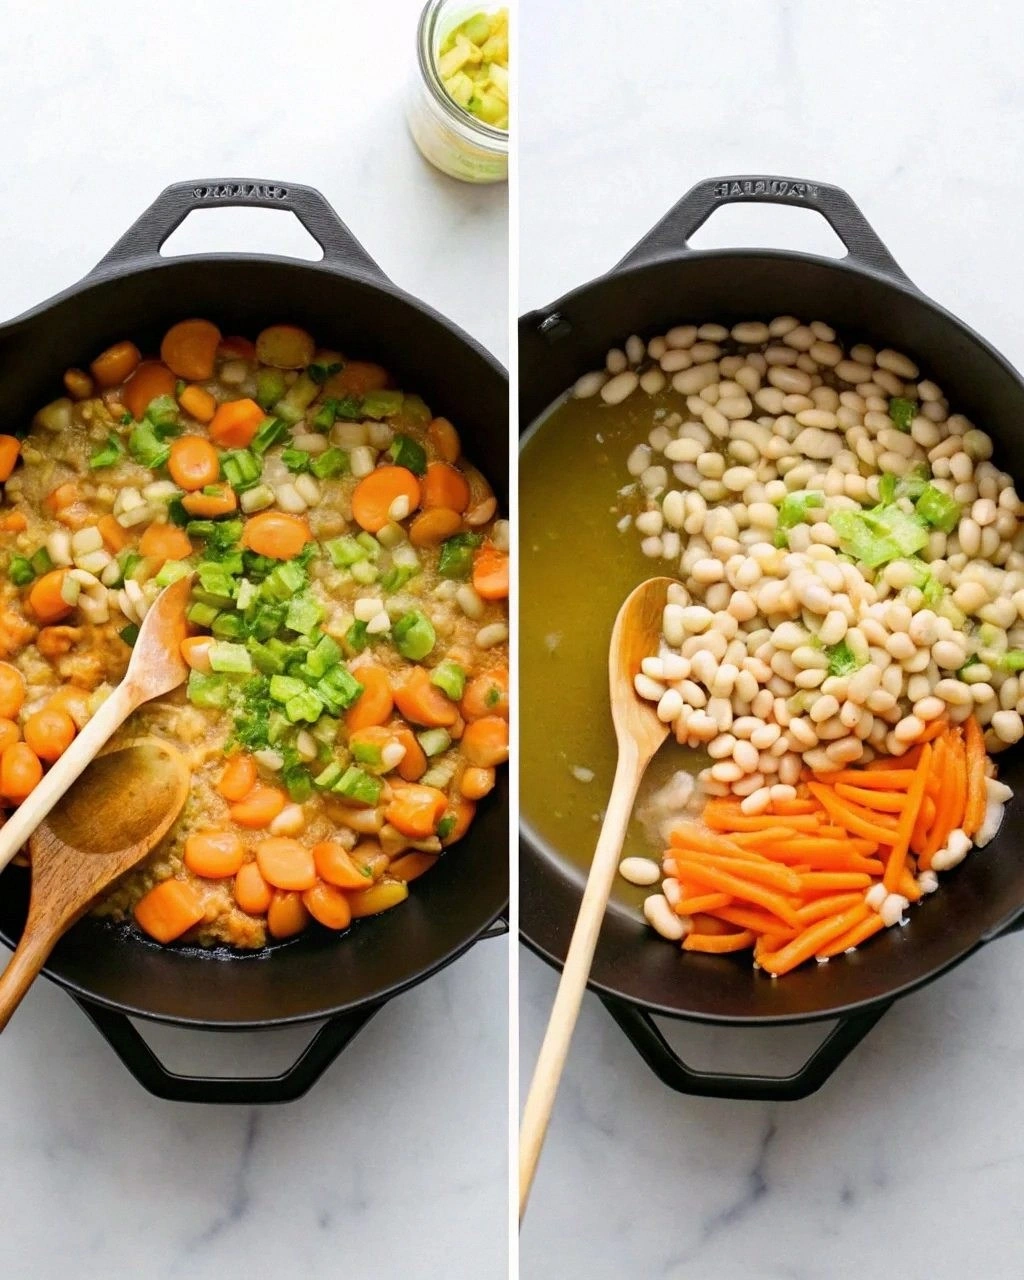
Roasted Vegetable Medley
Roast chunks of carrot, celery, and fennel at 425°F until caramelized, then add them to the soup in the final five minutes. The roasted vegetables add sweet, complex flavors and textural variety that makes each spoonful different. It's like having a surprise party in your bowl, but all the guests are vegetables.
Storing and Bringing It Back to Life
Fridge Storage
This soup actually gets better overnight as the flavors continue to marry and deepen. Store it in an airtight container in the fridge for up to four days, but fair warning — the beans will continue to absorb liquid, so it will thicken considerably. That's not a bug, it's a feature: you now have the base for an incredible bean dip or the start of a new soup by just adding more broth.
Always cool the soup completely before refrigerating, and don't leave it sitting out for more than two hours. Bacteria love bean soup as much as we do, but they're not the kind of guests you want at your dinner party. Portion it into smaller containers if you want grab-and-go lunches that will make your coworkers jealous.
Freezer Friendly
This soup freezes beautifully for up to three months, but here's the trick — freeze it without the lemon juice and zest. Add those fresh when you reheat for the brightest flavor. Freeze in portion-sized containers or ice cube trays for single servings that defrost quickly on busy nights. Label everything with masking tape and a Sharpie, because three months from now you'll have no idea what's in that mystery container.
Leave an inch of space at the top of your containers because liquids expand when frozen. Nothing ruins your day like cleaning exploded bean soup out of your freezer. And now the fun part — reheating it so it tastes as good as the day you made it.
Best Reheating Method
Always thaw frozen soup in the fridge overnight — never at room temperature unless you enjoy playing bacterial roulette. Reheat gently over medium-low heat, adding a splash of water or broth because the soup will have thickened. Add fresh lemon juice and zest after reheating to wake up the flavors and make it taste like you just made it.
Add a tiny splash of water before reheating — it steams back to perfection. Microwave works in a pinch, but stir every 30 seconds to prevent hot spots that can scorch the beans. And if you're feeling fancy, a fresh drizzle of olive oil and some chopped herbs make leftover soup taste intentional rather than desperate.