I’ll be honest — I was mid‑midnight, the house was silent except for the occasional cat meow, and a dare from my roommate had me rummaging through the pantry for “something that would blow my mind”. I grabbed a box of boxed brownies, a tub of cream cheese, and a bottle of caramel sauce that had been sitting on the shelf for months, and I thought, “Why not mash everything together and see what happens?” The first attempt was a disaster: the top sank like a sunken ship and the middle was as flat as a pancake, but that night taught me the golden rule of “layer, love, and let it rest”. Fast forward a few weeks, and I’ve refined the technique into a silky, layered masterpiece that screams “dessert royalty” with every fork‑tipped dive.
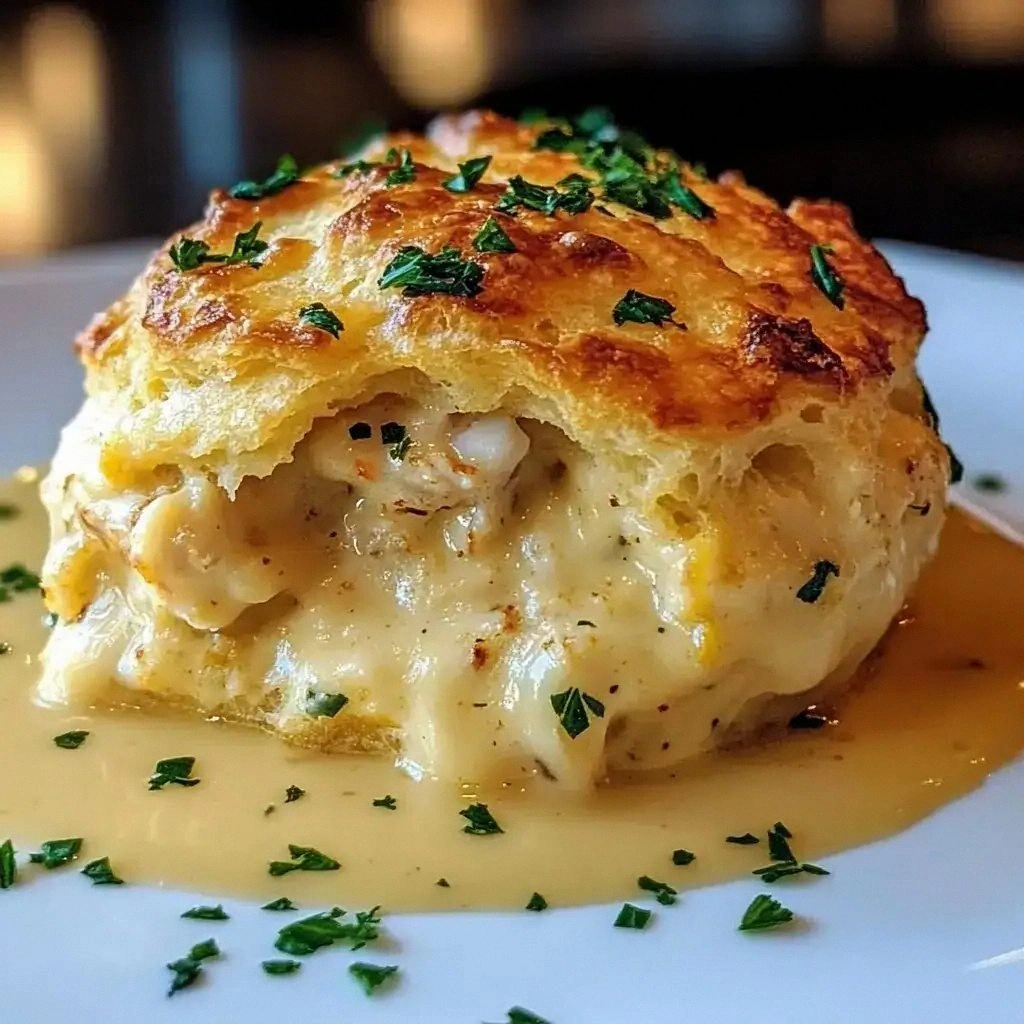
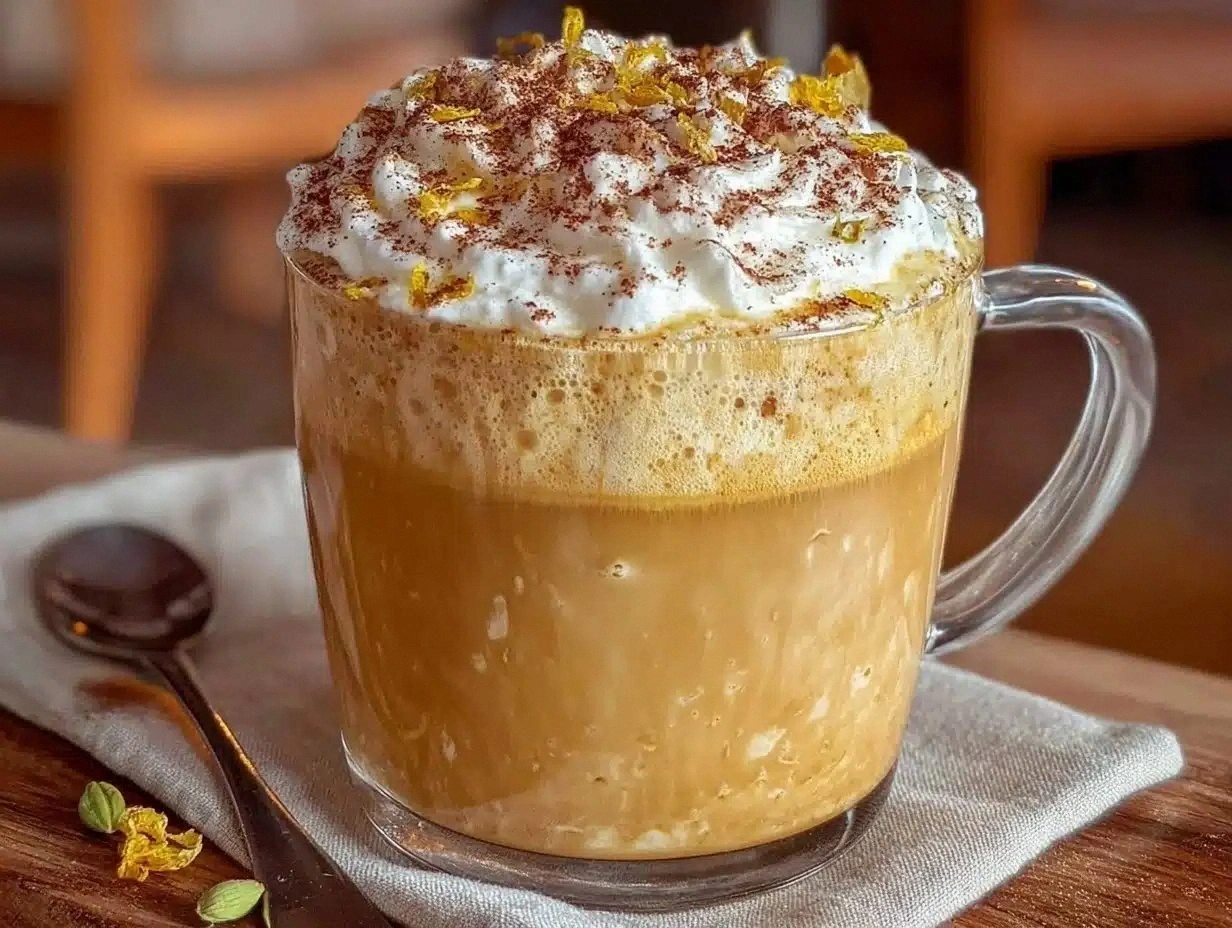
Picture yourself pulling this out of the oven, the whole kitchen smelling like a bakery on fire, the top golden‑brown with a glossy sheen that reflects the light like a mirror. The top layer of creamy cheesecake is topped with a generous river of buttery caramel that pools into the gaps of a fudgy, fudder‑filled base, while a swirl of whipped cream crowns the whole thing like a soft, fluffy snow‑capped mountain. When you cut into it, the first thing you notice is the contrast: the top gives a gentle give, the middle is luxuriously creamy, and the bottom offers a deep, chocolatey snap that shatters like thin ice under a footstep. The smell alone is a promise of indulgent decad‑tastic bliss, and the first bite? It’s a cascade of sweet, salty, and buttery notes that dance on your tongue like a well‑choreographed flash‑mob.
Most recipes get this completely wrong. They either drown the brownies in a sea of cheese, or they skip the crucial step of letting the base set a little before adding the creamy layer, resulting in a soggy mess that looks like a failed science experiment. Here’s what actually works: we bake the brownie base first, let it cool just enough to form a “skin” that holds the cheese, and then we gently swirl in a silky mixture of cream cheese, sour‑cream, and a splash of heavy cream to achieve that silk‑like texture. The final touch is a generous drizzle of caramel that pools into the crevices, topped with a light‑as‑air whipped cream and a sprinkle of chocolate shavings that melt on contact. I dare you to taste this and not go back for seconds; the combination is so addictive you’ll be writing a love letter to it in your diary.
Okay, ready for the game‑changer? The secret is a surprise ingredient that most people overlook: a spoonful of the very same boxed brownie mix folded into the cheesecake layer. This adds a subtle, deep‑brown depth that ties the two layers together like a bridge made of pure chocolate. Let me walk you through every single step — by the end, you’ll wonder how you ever made it any other way, and you’ll have a brag‑worthy dessert that will have friends begging for the “secret” (which, of course, you’ll reveal in a sly wink).
⚡ What Makes This Version Stand Out
- Unrivaled Taste: The interplay of deep‑brown fudge, tangy cheesecake, and buttery caramel creates a flavor pyramid that climbs higher with each bite, delivering a taste that’s both familiar and wildly novel.
- Texture Symphony: You get the crisp edge of a baked brownie, the silky glide of a cheesecake, and the silky‑smooth drizzle of caramel, all topped with airy whipped cream and a hint of chocolate crunch.
Simple Yet Sophisticated: Despite using a boxed mix, the technique elevates it to a restaurant‑grade dessert without requiring a pastry‑chef’s degree.- Crowd‑Pleaser: This dish has earned a reputation for being the “first‑to‑be‑gone” item at any gathering, and it often sparks the “Who made this?” chorus.
- Ingredient Integrity: We only use high‑quality cream cheese, real‑deal heavy cream, and a luscious store‑bought caramel that behaves like liquid gold.
- One‑Pan Wonder: Everything is baked in a single 9‑inch spring‑form pan, minimizing mess and maximizing flavor inter‑mixing.
- Visual Drama: The glossy caramel river and the glossy top of the cheesecake create a visual that looks as good on Instagram as it does on the plate.
🍋 Inside the Ingredient List
The Flavor Base
The first hero in our cast is the box of Brownie Mix. It provides the foundational chocolate‑loving backbone, delivering that deep, earthy cocoa taste that will be the base for everything else. If you skip it, you lose the “fudge‑first” experience that makes this dish feel like a decadent treat rather than just a cheesecake. For a deeper flavor, opt for a double‑chocolate or a mix that includes espresso powder; the coffee will amplify the chocolate without being overtly “coffee‑y”.
The Texture Crew
The duo of 16 oz Cream She Date and 2 large eggs (for the cheesecake) creates the silky, tangy layer that sits atop the brownie base. The cream cheese is the star of the show, giving the dish its luxurious mouth‑feel, while the eggs act as the binder, ensuring the layer sets without being too firm. If you replace the cream cheese with a mix of mascarmas and ricotta, you’ll get a lighter, more airy top but lose some of the tang that balances the sweet. A tip: let the cream cheese sit at room temperature for 15 minutes before mixing; it will blend more smoothly and avoid lumps.
The Unexpected Star
One cup of Caramel Sauce is the golden river that runs through this dessert, and it does more than just add sweetness. It adds a buttery, slightly salty depth that ties the chocolate and cheese together, creating a harmonious “sweet‑salty” experience that many desserts chase but few achieve. If you’re a purist, use a homemade sauce made from brown sugar, butter, and a splash of sea‑salt for an even deeper flavor. A common mistake is to pour the sauce too early; let the cheesecake set a bit first, then drizzle the sauce for a glossy, pool‑like effect.
The Final Flourish
The final touches—1 cup Whipped Cream, ½ cup Chocolate Shavings, and a splash of Heavy Cream—add a lightness and a touch of decad‑tastic sparkle. The whipped cream sits on top like a soft cloud, while the chocolate shavings provide a gentle crunch and a visual contrast of dark against the light. If you want a different visual, replace the shavings with a drizzle of white chocolate or a sprinkle of sea‑salt flakes for a salty‑sweet finish. The heavy cream mixed into the cheesecake ensures a silky texture that doesn’t become too dense as it cools.
Everything's prepped? Good. Let’s get into the real action, where we’ll turn these humble pantry items into a masterpiece that will have you bragging to anyone within ear‑range.

🔥 The Method — Step by Step
First, pre‑heat your oven to 350 °F (175 °C) and grease a 9‑inch spring‑form pan with a thin layer of butter or spray. Line the bottom with parchment paper for an easy release. As the oven warms, the kitchen will fill with the faint, sweet aroma of the oil you’ll be adding to the mix—this is your first hint that something amazing is about to happen. This is the moment of truth for the base; if you skip the parchment, you might end up with a broken base that crumbles like a house of cards.
In a large mixing bowl, combine the box of Brownie Mix with 2 large eggs, ½ cup oil, and ¼ cup water. Stir until just combined; you’ll notice a glossy, thick batter that looks like a midnight‑black lava. Scrape the sides, and for an extra touch, fold in half of the boxed mix (about a quarter of the box) into the cream cheese later; this adds that hidden depth. Let the batter sit for 2‑3 minutes while you prepare the pan—this rest allows the flour to hydrate, ensuring a more tender crumb.
Pour the brownie batter into the prepared pan, spreading it evenly with a spatula. The surface should be flat but not overly smoothed; a gentle hand leaves a few “peaks” that will become the first wave of the “crack‑top” when baked. Place the pan on the middle rack of the oven and bake for 12‑15 minutes, just until the edges start pulling away and the top begins to set but is still slightly soft in the center. This “partial bake” is crucial: it creates a firm enough base to hold the cheesecake without becoming a soggy slab.
While the base is in the oven, start the cheesecake mixture. In a separate bowl, beat the 16 oz of room‑temp cream cheese until creamy, then add ¾ cup granulated sugar and 1 tbsp vanilla extract. Scrape in the 2 large eggs for the cheesecake, one at a “slow‑pour” while the mixer is on low to avoid incorporating too much air. Add 1 cup sour‑cream and ½ cup heavy cream, then gently fold in the remaining half of the boxed brownie mix we set aside earlier. This step is the “bridge” that ties the two layers together; the extra mix adds a subtle chocolate‑brown hue and prevents the cheesecake from sliding off.
When the base is partially baked, remove it from the oven and let it cool for about 5‑7 minutes. This pause prevents the middle from becoming too soft when the cheesecake is poured. Then, gently pour the cheesecake mixture over the warm base, smoothing the top with a spatula. The two layers will start to meld at the edges, creating a gentle “marbled” effect that is both beautiful and indicative of a well‑combined dessert.
Return the pan to the oven and bake for an additional 20‑25 minutes. You’re looking for a gentle wobble in the center when you gently shake the pan; the edges should be set and start to pull away, while the center should still have a slight jiggle. This is the “creamy‑just‑right” stage. As soon as it’s done, turn off the oven, crack the door open a few inches, and let the cheesecake cool inside for 10 minutes—this prevents a sudden temperature shock that could crack the top.
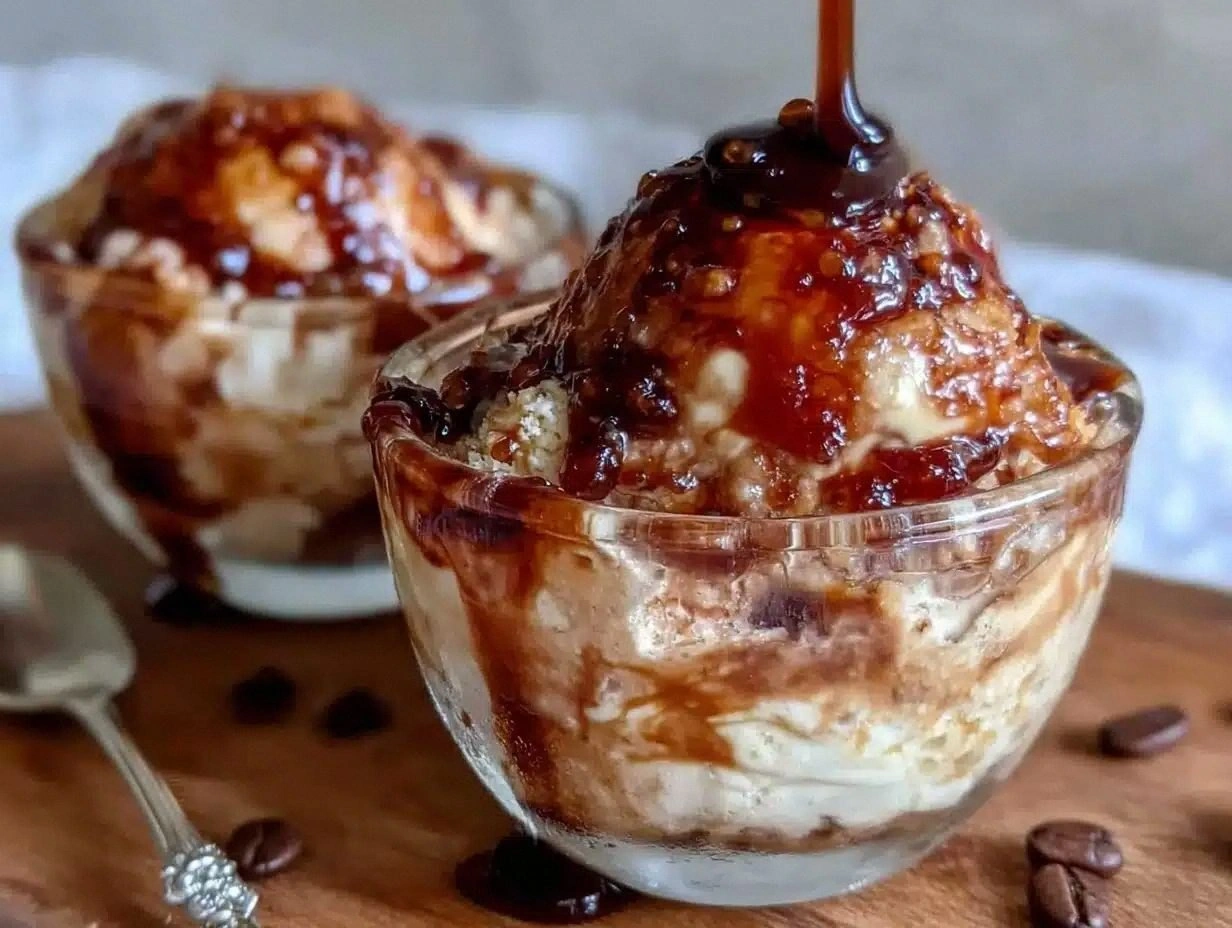
Now for the star‑the‑show: Drizzle the entire 1 cup of caramel sauce over the still‑warm top of the cheesecake. Let it pool into the gaps and roll down the sides, creating a glossy, liquid‑gold river. If you want a glossy top that doesn’t run too much, gently swirl a spoon through the sauce to create a marble‑like pattern. After the sauce settles, place the entire pan in the refrigerator for at least 2 hours, preferably overnight, to let everything set and the flavors meld.
When you’re ready to serve, remove the cheesecake from the spring‑form pan, lift the parchment paper, and place the whole thing on a serving platter. Top with a generous dollop of whipped cream, then sprinkle the ½ cup of chocolate shavings across the surface. For an extra touch of drama, lightly torch the top of the cream for a gentle “burnt‑cream” effect that adds a subtle, caramelized flavor. Slice with a warm knife (dip it in hot water and wipe dry) for clean slices that reveal the layered glory.
🏆 Insider Tricks for Flaw Loss Results
The Temperature Rule Nobody Follows
Never rush the cooling step. Let the base sit for at least five minutes after the first bake, and always cool the entire pan on a wire rack before refrigerating. This step prevents the middle from becoming a “syrup‑puddle” and ensures the layers lock together. I once tried to skip this step in a hurry for a surprise guests, and the whole thing fell apart like a house of sand—lesson learned.
Why Your Nose Knows Best
The moment you smell the edges start to turn a deep golden‑brown, you’re at the brink of perfection. Trust that scent more than the clock; ovens vary, and the nose is the original “timer”. If the top starts to smell like burnt toast, pull it in a minute; if it’s still milky, give it a minute longer.
The 5‑Minute Rest That Changes Everything
After the final bake, let the cheesecake sit in the turned‑off oven with the door slightly open for five minutes. This “stealth‑rest” allows the interior to settle, reducing the chance of a cracked top. It’s like letting a soufflé rest before serving; the difference is night‑and‑day.
The “Pat‑Pat” Technique for the Top
Gently tap the pan on the counter once the top is set; this releases any air pockets that might have formed during baking, ensuring a flat, glossy surface for the caramel. This is a trick I learned from a professional patisserie, and it’s worth its weight in gold.
The “Roll‑Roll” Method for Chocolate Shavings
Instead of just dumping the shavings, roll a piece of parchment into a tube and gently roll it over the top. This creates a “snow‑like” blanket that looks elegant and stays in place longer. My friend tried to sprinkle them directly and they fell into the middle, ruining the visual appeal.
🎨 Creative Tw Variations
This recipe is a playground. Here are some of my favorite ways to switch things up:
Salt‑Sprinkled Sea‑Salt & Sea‑Salted Caramel
Replace the regular caramel with a sea‑salted version and sprinkle a pinch of flaky sea‑salt on top of the whipped cream. The salty‑sweet contrast takes the dessert to a sophisticated, “dessert‑for‑dessert” level.
Mint‑Inf‑Midnight
Add a teaspoon of mint extract to the cheesecake mixture and top with a drizzle of white chocolate. The cool mint cuts through the rich chocolate, offering a fresh “after‑dinner” feel.
Peanut Butter Swirl
Swirl in a generous spoon of creamy peanut butter into the middle of the cheesecake before baking. The nutty swirl creates a “Peanut Butter Jewel” that will have peanut lovers swooping in.
Espresso Boost
Add a tablespoon of instant espresso powder to the brownie mix and a drizzle of mocha‑scented sauce on top of the caramel. This adds a subtle “coffee‑kiss” that deepens the chocolate flavor.
Berry Burst
Layer a layer of fresh raspberries or sliced strawberries between the base and the cheesecake. The tang of the berries cuts through the richness and adds a pop of color for the Instagram‑savvy.
❄️ Storing & Bringing It Back to Life
Fridge Storage
Cover the entire cheesecake with a tight‑fit plastic wrap or a silicone lid and store it in the refrigerator for up to 5 days. The cooler maintains the creamy texture and prevents the caramel from hardening too much.
Freezer Friendly
Wrap the whole cake in a double layer of parchment and then a layer of aluminum foil. It will keep for up‑to 2 months. When you’re ready to enjoy, thaw overnight in the refrigerator, then let it sit at room‑temperature for 15 minutes before serving.
Best Re‑Heating Method
For a warm slice, place a single slice on a plate, cover loosely with foil, and microwave for 20‑30 seconds. Add a tiny splash of milk or water before microw‑‑‑ing to steam the slice back to life; this prevents the cake from becoming rubbery.