I was in the middle of a Halloween party when my friend dared me to bake something that would make the kids scream “more!” and the adults whisper “that’s insane.” I stared at a bowl of plain chocolate chip dough and thought, “Nope, this is going to be a disaster.” Then the oven timer pinged, the sugar melted into a caramel river, and the smell of butter and vanilla swirled through the kitchen like a warm, spooky fog. I realized that the classic cookie had been robbed of its Halloween spirit, and I set out to rescue it with a few bold twists that would make even the grumpiest ghoul smile.
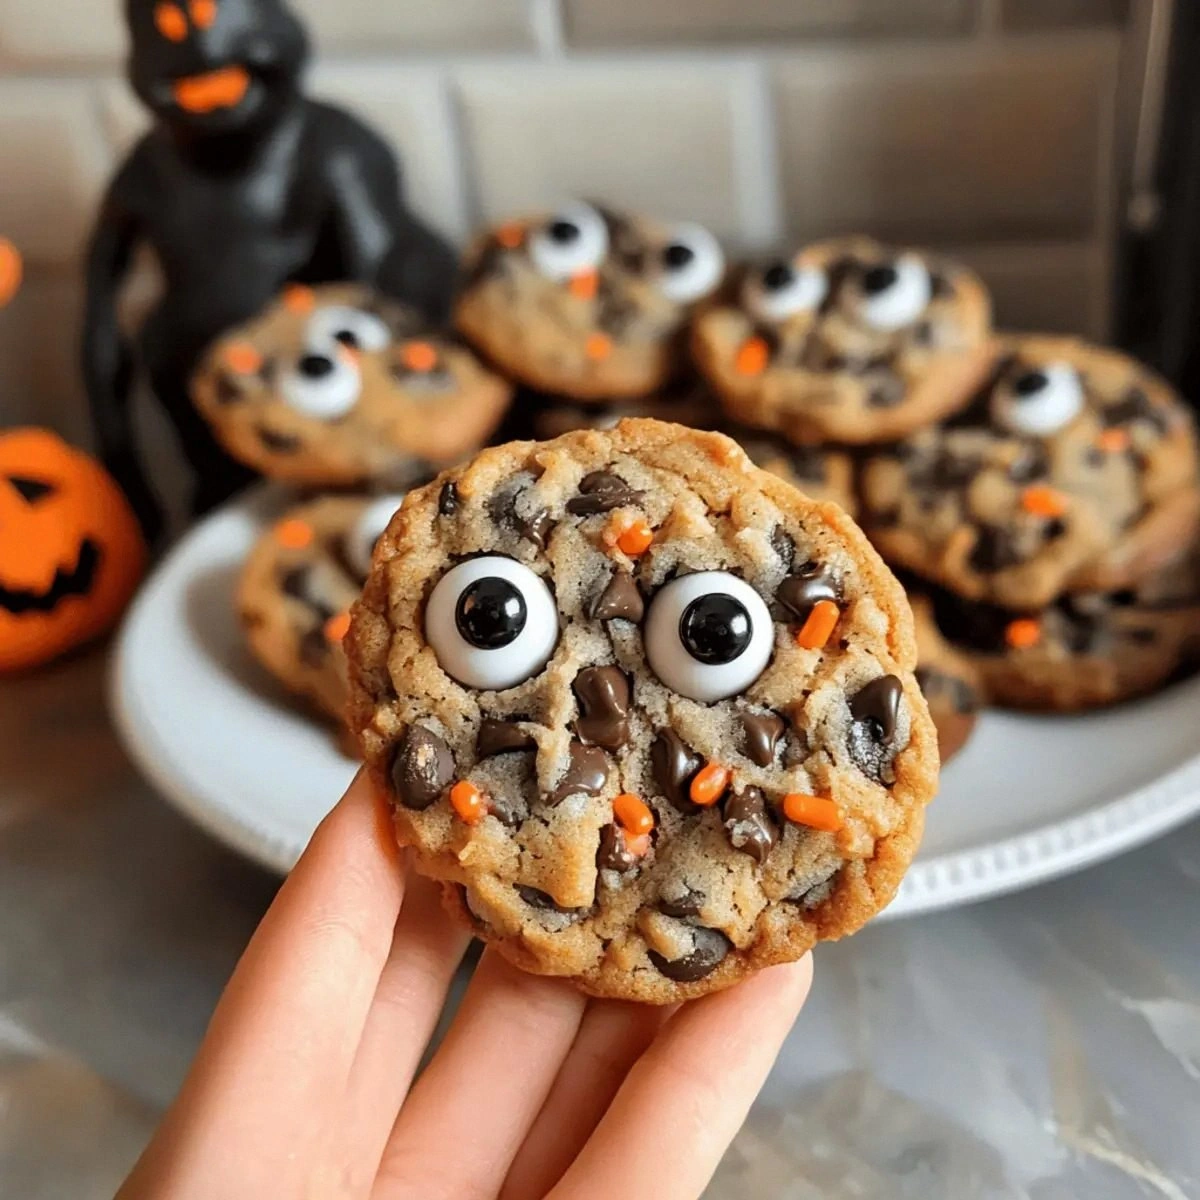
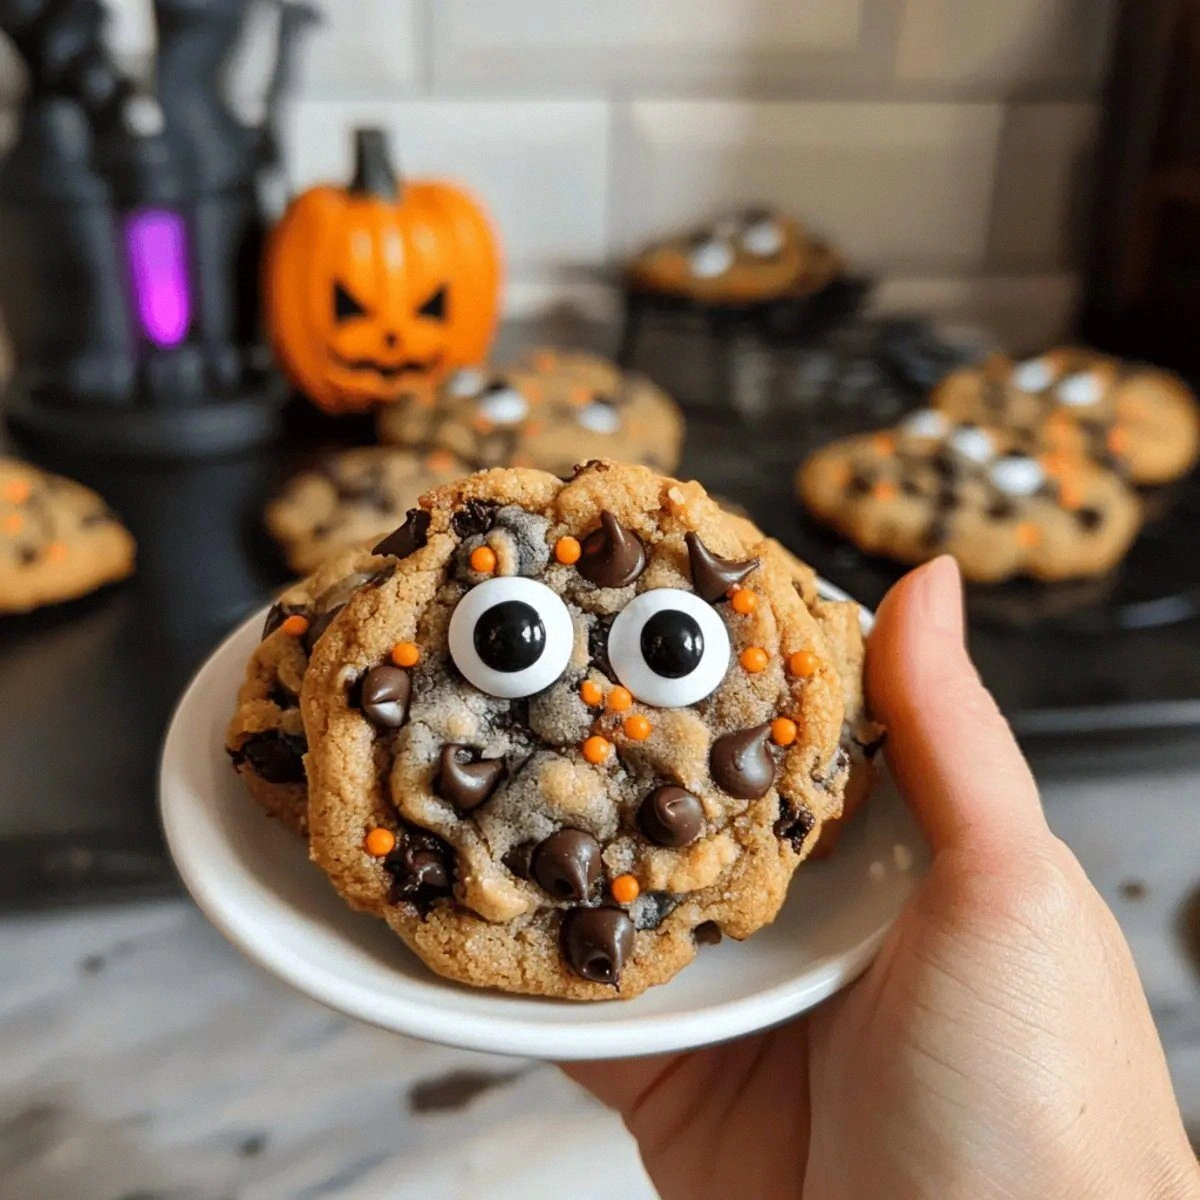
Picture this: a tray of golden‑brown cookies fresh out of the oven, the edges crisp enough to crack like autumn leaves underfoot, the centers soft and chewy, studded with melty chocolate chips and eerie orange sprinkles that sparkle like tiny lanterns. The scent is a mash‑up of sweet caramel, buttery richness, and a whisper of vanilla that wraps around you like a cozy blanket on a chilly October night. When you bite into one, the first thing you notice is the snap of the edge, then the gooey melt of chocolate, and finally the surprising crunch of candy eyes that pop out like little monsters. It’s a sensory roller coaster that makes you want to shout, “I dare you to taste this and not go back for seconds!”
Most chocolate chip cookie recipes get this completely wrong. They either over‑bake, leaving you with a brick, or they under‑mix, giving you a flat, flavorless disc. This version, however, uses a precise balance of butter and sugars, a dash of baking soda for lift, and a secret ingredient—Halloween sprinkles—that adds both color and a subtle citrus zing. I’ll be honest — I ate half the batch before anyone else got to try it, and that’s because the flavor is so addictive that you’ll be reaching for the next cookie before the first one even finishes melting on your tongue.
Okay, ready for the game‑changer? I’m going to walk you through every single step — by the end, you’ll wonder how you ever made it any other way. The technique that makes these cookies unforgettable is a quick chill of the dough, followed by a high‑heat blast that creates that perfect contrast between a crunchy exterior and a chewy heart. Stay with me here — this is worth it, and the payoff is a batch of cookies that will become the talk of every Halloween gathering for years to come.
What Makes This Version Stand Out
- Flavor Explosion: The combination of unsalted butter, brown sugar, and a splash of vanilla creates a caramel‑rich base that feels like a warm hug for your taste buds.
- Texture Symphony: Crispy edges give way to a soft, chewy center, a contrast that most store‑bought cookies simply can’t achieve.
- Simplicity: Only ten ingredients, all pantry staples, yet the result feels like it came from a professional bakery.
- Unique Visuals: Halloween sprinkles and candy eyes turn an ordinary cookie into a festive masterpiece that looks as good as it tastes.
- Crowd Reaction: Guests invariably ask for the recipe, and kids try to “steal” the candy eyes before the adults can stop them.
- Ingredient Quality: Using real butter (never margarine) and high‑quality chocolate chips ensures a deep, buttery flavor and melty pockets of chocolate.
- Cooking Method: The brief chill of the dough prevents spreading, while a hot oven gives a quick, caramelized exterior.
- Make‑Ahead Potential: You can freeze the dough balls for up to a month, then bake fresh cookies whenever the craving hits.
Inside the Ingredient List
The Flavor Base
Unsalted Butter (1 cup): Butter is the heart of any good cookie. It provides richness, flavor, and the structure that holds everything together. If you substitute with margarine, you’ll lose that buttery depth and end up with a greasy texture. For the best result, use a high‑fat European butter; it melts slower and gives a more pronounced flavor. Tip: Cut the butter into small cubes and let it soften at room temperature for a minute before creaming.
Granulated Sugar (¾ cup) & Light Brown Sugar (¾ cup): The duo creates a perfect balance of sweetness and chew. Granulated sugar encourages crisp edges, while brown sugar adds moisture and a subtle caramel note. Skipping the brown sugar will make the cookies too crunchy and less flavorful. If you’re out of light brown sugar, you can make your own by mixing ¾ cup white sugar with 1 ½ teaspoons molasses.
The Texture Crew
Egg (1 large): The egg acts as a binder, giving the dough elasticity and helping the cookies rise just enough to stay fluffy inside. Over‑beating the egg can incorporate too much air, leading to a cakey texture. If you’re vegan, a flax egg (1 tbsp ground flaxseed + 3 tbsp water) works as a solid substitute.
All‑Purpose Flour (2 ½ cups): Flour provides the structure. Too much flour makes the cookies dry; too little makes them spread excessively. Sift the flour with the baking soda to ensure even distribution of leavening. For a gluten‑free version, use a 1‑to‑1 gluten‑free flour blend, but add a teaspoon of xanthan gum to mimic the elasticity.
The Unexpected Star
Halloween Sprinkles (½ cup): These aren’t just for show. The orange and black sprinkles contain a tiny amount of citrus oil that brightens the flavor profile, cutting through the richness of butter and chocolate. If you don’t have Halloween sprinkles, use regular orange sprinkles or a mix of orange zest and black sanding sugar.
Candy Eyes: Pure visual fun. They add a playful, slightly crunchy surprise that makes each bite feel like a tiny trick‑or‑treat. If you’re allergic to gelatin, look for vegan candy eyes made from pectin.
The Final Flourish
Chocolate Chips (1 cup): The classic semi‑sweet chips melt just enough to create gooey pockets without overtaking the butter flavor. For a richer experience, use a mix of dark and milk chocolate chips. If you love a salty contrast, sprinkle a pinch of flaky sea salt on top before baking.
Vanilla Extract (1 tsp) & Baking Soda (1 tsp): Vanilla deepens the overall flavor, while baking soda reacts with the brown sugar’s acidity to give the cookies a slight rise and a tender crumb. Too much baking soda will give a metallic aftertaste; stick to the measured amount.
Salt (½ tsp): Salt is the unsung hero that amplifies every other flavor. Skipping it makes the cookies taste flat. If you love a briny pop, finish each cookie with a tiny grain of flaky sea salt just after they exit the oven.
Everything's prepped? Good. Let’s get into the real action…
The Method — Step by Step
Preheat your oven to 375°F (190°C) and line two baking sheets with parchment paper. While the oven heats, take a large mixing bowl and combine the softened butter, granulated sugar, and light brown sugar. Using a handheld mixer on medium speed, cream the mixture until it’s pale, fluffy, and smells like a bakery on a crisp autumn morning. This should take about 3‑4 minutes; the texture will be thick but smooth, a sign that the butter and sugars are fully emulsified.
Add the egg and vanilla extract to the creamed butter. Beat on low speed just until incorporated; you’ll hear a faint “whoosh” as the egg folds in. Over‑mixing at this stage can cause the dough to become too airy, leading to a cakey cookie later. Power transition: Okay, ready for the game‑changer? This is where the dry ingredients meet the wet.
In a separate bowl, whisk together the all‑purpose flour, baking soda, and salt. Whisking ensures the baking soda is evenly distributed, preventing any bitter pockets.
Kitchen Hack: Sift the flour mixture directly over the butter mixture; the gentle “puff” of flour helps keep the dough light.Gradually add the flour mixture to the wet ingredients, stirring with a spatula or wooden spoon. Scrape the sides of the bowl to ensure everything is incorporated. The dough will look thick and slightly sticky—this is exactly what you want. If it feels too dry, add a teaspoon of milk; if it’s too wet, sprinkle in an extra tablespoon of flour.
Fold in the chocolate chips, Halloween sprinkles, and candy eyes. Distribute them evenly so each bite gets a surprise. The orange sprinkles will create little bursts of citrusy brightness, while the candy eyes add a playful crunch.
Watch Out: This is the trickiest step. If you over‑mix after adding the chips, the dough can become overly soft and the cookies will spread too much. Stop stirring the moment the last chip disappears into the dough.
Cover the bowl with plastic wrap and refrigerate for exactly 30 minutes. This chill solidifies the butter, preventing the cookies from flattening too much during baking.
Watch Out: Skipping the chill will give you a thin, overly crisp cookie that lacks the coveted chewy center.While the dough chills, scoop out a tablespoon of dough and roll it into a ball. Place the balls on the prepared baking sheets, spacing them about 2 inches apart. For uniform size, use a cookie scoop (size #30 works perfectly). This ensures even baking and consistent texture across the batch.
Bake for 10‑12 minutes, or until the edges are a deep golden brown and the centers still look slightly soft. The cookies will continue to set as they cool on the sheet—trust the visual cue, not the timer alone. When you pull them out, you’ll notice a faint caramel aroma and the chocolate chips glistening like tiny night‑time lanterns.
Allow the cookies to cool on the sheet for 5 minutes before transferring them to a wire rack. This short rest lets the cookies firm up without losing their chewy interior. As they cool, the sprinkles set, and the candy eyes become perfectly crisp. Serve warm, or store in an airtight container for later terror‑inducing snacking.
That's it — you did it. But hold on, I've got a few more tricks that'll take this to another level…
Insider Tricks for Flawless Results
The Temperature Rule Nobody Follows
Most home bakers keep the oven at a constant 350°F, but raising the temperature to 375°F gives you that coveted caramelized edge while keeping the center chewy. The higher heat creates a rapid Maillard reaction, which is why you’ll hear a faint “crackle” as the cookies bake. I once tried 400°F and the cookies burnt; 375°F is the sweet spot. Remember, every oven is different—use an oven thermometer for precision.
Why Your Nose Knows Best
Your sense of smell is a reliable indicator of doneness. When the cookies start to emit a toasty, buttery aroma, you’re within seconds of perfection. If you rely solely on the timer, you risk over‑baking. Trust that nose‑signal; it’s the same instinct professional pastry chefs use.
The 5‑Minute Rest That Changes Everything
After baking, let the cookies rest on the sheet for exactly five minutes before moving them. This short pause allows the residual heat to finish setting the interior, ensuring a chewy center. Skipping this step makes the cookies crack when you try to lift them, ruining the delicate texture. I’ve seen novices transfer cookies too early, and the result is a sad, crumbly mess.
The Butter Softening Shortcut
The Sprinkles Timing Trick
Add the Halloween sprinkles just before the final bake, not during mixing. This prevents the sprinkles from turning soggy and losing their crunch. A quick toss of the sprinkles onto the dough balls right before they go into the oven preserves their bright color and texture, making each bite visually striking.
Creative Twists and Variations
This recipe is a playground. Here are some of my favorite ways to switch things up:
Spooky Double‑Chocolate
Swap half of the all‑purpose flour for cocoa powder and add ½ cup of white chocolate chips. The result is a darker, richer cookie that feels like a midnight treat. Perfect for chocolate addicts who want an extra layer of decadence.
Pumpkin Spice Surprise
Add ¼ cup of canned pumpkin puree and a pinch of pumpkin pie spice. The pumpkin adds moisture and a subtle earthiness, while the spice blend (cinnamon, nutmeg, ginger) brings a warm autumnal note. Use this version for a truly seasonal twist.
Nutty Nightmare
Fold in ½ cup of chopped toasted pecans or walnuts. The nuts give an extra crunch that contrasts with the soft interior, and the buttery nut flavor pairs beautifully with chocolate. Just be mindful of nut allergies when serving to a crowd.
Vegan Vampires
Replace butter with coconut oil, use a flax egg, and swap chocolate chips for dairy‑free dark chocolate. The texture stays delightfully chewy, and the coconut oil adds a faint tropical hint that surprises the palate.
Gluten‑Free Goblins
Use a 1‑to‑1 gluten‑free flour blend and add ½ teaspoon xanthan gum. The cookies will retain their structure and chew without the gluten network. This version is perfect for friends with celiac disease who still want to join the Halloween cookie frenzy.
Storing and Bringing It Back to Life
Fridge Storage
Place the cooled cookies in an airtight container with a slice of bread on top. The bread releases moisture, keeping the cookies soft for up to five days. If you notice the cookies drying out, replace the bread slice.
Freezer Friendly
Layer cookies between parchment sheets and freeze in a zip‑top bag for up to three months. When you’re ready to eat, let them thaw at room temperature for 10 minutes, then pop them in a 300°F oven for 5 minutes. This revives the crisp edge and melty center as if they were fresh‑baked.
Best Reheating Method
To bring a refrigerated cookie back to life, place it on a microwave‑safe plate, add a tiny splash (about a teaspoon) of water beside it, and microwave for 8‑10 seconds. The water creates steam that re‑hydrates the interior without making the cookie soggy. The result is a cookie that feels warm, chewy, and just‑out‑of‑the‑oven.