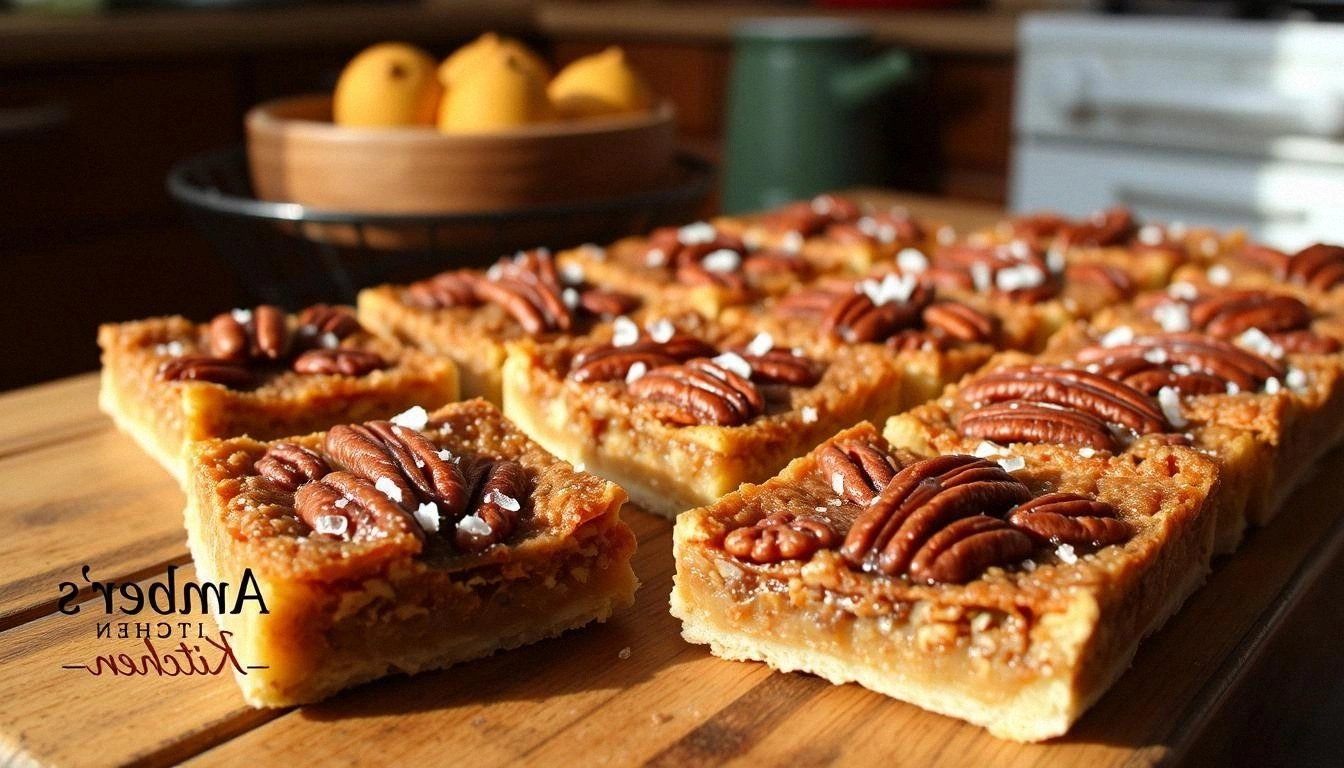
Picture this: you’re in the middle of a bustling family dinner, the air thick with laughter, the table crowded with plates, and suddenly the dessert clock starts ticking. Your mind flashes to a sweet, nutty treat that could tie the whole evening together. I’m talking about the kind of dessert that turns heads, raises eyebrows, and, honestly, makes people drop their forks in awe. That’s the moment when I discovered the Perfect Pecan Pie Bars, a recipe that didn’t just satisfy a craving—it rewrote the entire narrative of what a pecan pie can be.
I was on a mission to salvage a disastrous batch of pecan pies that had turned out as hard as a rock and as bland as cardboard. The kitchen smelled of burnt sugar, the texture was as flat as a pancake, and the taste? Nothing. I vowed to create a version that would make even the most skeptical palates swoon. Fast forward to today, and I’m here to walk you through the exact steps that transform ordinary ingredients into a slice of heaven that will have your guests begging for seconds.
This isn’t just another pie bar recipe. It’s a carefully balanced symphony of flavors and textures—crisp, buttery crust, silky, caramelized filling, and a generous crunch of toasted pecans that pop like tiny fireworks. Each element is engineered to complement the others, creating a harmony that feels both comforting and sophisticated. And the best part? The method is so straightforward that even novice bakers can master it, while seasoned chefs will appreciate the subtle nuances that elevate this dish above the rest.
Hold onto your aprons because there’s a twist you won’t expect: a small, seemingly insignificant ingredient that turns a good filling into a showstopper. I’ll reveal that secret in the “Inside the Ingredient List” section, but trust me—once you taste the bars, you’ll wonder why anyone ever settled for anything else. So, let’s dive in. By the end of this guide, you’ll not only have a flawless batch of bars, but you’ll also know the insider tricks that will make every bite an experience.
What Makes This Version Stand Out
- Flavor: The combination of light corn syrup and dark brown sugar creates a deep caramel base that’s both sweet and slightly smoky, a balance that’s rarely achieved in traditional pies.
- Texture: The crust is buttery and flaky, yet firm enough to hold the luscious filling without becoming soggy, giving each bar a satisfying bite.
- Convenience: The recipe is a one-pan wonder—no separate crust or filling pans needed, which means less cleanup and a faster turnaround.
- Versatility: The bars can be served warm, at room temperature, or chilled, making them ideal for potlucks, holiday gatherings, or a quick snack.
- Make-ahead Potential: These bars hold up beautifully in the fridge for up to five days and freeze well, so you can prep them ahead of a big event.
- Ingredient Quality: By using high-quality pecans, lightly toasted, you unlock a nutty aroma that permeates the entire dish.
- Presentation: The bars cut into perfect squares, each with a glossy, caramelized top that looks as good as it tastes.
- Audience Appeal: Whether you’re serving a crowd of families or a group of foodie friends, these bars are guaranteed to be a crowd-pleaser.
Alright, let’s break down exactly what goes into this masterpiece…
Inside the Ingredient List
The Flavor Base
The foundation of any great dessert is its flavor base, and in these bars, that role is played by a blend of corn syrup and brown sugar. The corn syrup prevents crystallization, giving the filling a silky smoothness, while the brown sugar adds depth and a hint of molasses. Together, they create a caramelized sweetness that sings with every bite. If you skip either, you’ll notice a noticeable drop in both texture and flavor complexity.
The Texture Crew
Texture is everything in baking, and this recipe pulls the rug out from under the competition. The crust is a marriage of all-purpose flour, granulated sugar, and cold butter, pressed into a pan until it’s just the right level of crumbly. The filling’s richness is amplified by melted butter, which coats the pecans and creates a glossy sheen. The result? A buttery base that supports a silky filling, punctuated by the satisfying crunch of pecans.
The Unexpected Star
You might think pecans are the obvious star, but there’s a hidden gem that elevates the entire dish: lightly toasted pecans. Toasting them at 350°F for 8 minutes brings out their natural oils and adds a subtle nutty bitterness that balances the sweetness. If you use raw pecans, the bars will taste too mild and the nuts may not hold their shape. Toasting is the secret to that perfect snap.
The Final Flourish
The final flourish is the vanilla extract. It may seem like a small detail, but vanilla adds a fragrant warmth that ties all the flavors together. Without it, the bars would feel flat and unremarkable. A teaspoon is all you need; too much can overwhelm the pecan’s nutty profile. This tiny addition is the difference between good and unforgettable.
Everything’s prepped? Good. Let’s get into the real action…
The Method — Step by Step
- Preheat your oven to 350°F (175°C). Line an 8‑inch square baking pan with parchment paper, leaving an inch of overhang on each side for easy removal. This step might seem mundane, but a properly lined pan guarantees a clean lift and prevents the bars from sticking. If you’re in a hurry, you can also lightly grease the pan with butter or oil, but parchment is the gold standard.
- In a large mixing bowl, whisk together 1½ cups all‑purpose flour, ¼ cup granulated sugar, and ¼ tsp salt. Add ½ cup cold, cubed unsalted butter and use a pastry cutter or your fingertips to blend until the mixture resembles coarse crumbs. This is the moment where the butter’s temperature is crucial—if it’s too warm, the crust will become greasy; if too cold, it won’t bind properly. The result should be a crumbly, sandy texture that’s ready to press into the pan.
- Press the crust mixture firmly into the bottom of the prepared pan, using the back of a spoon or your palm to smooth it out evenly. The crust should be about ¼ inch thick. Once pressed, bake for 12 minutes until it turns a light golden brown. Keep a close eye on the edges—they’re the first to show signs of browning, and you want a subtle color, not a burnt one. Removing the crust early ensures it stays crisp when the filling is added.
- While the crust is baking, whisk together 1 cup light corn syrup, ½ cup packed brown sugar, ¼ cup melted butter, 2 large eggs, 1 tsp vanilla extract, and ¼ tsp salt in a separate bowl. The corn syrup and brown sugar should dissolve completely, creating a glossy, amber liquid. Beat the mixture until it’s smooth—no lumps. This filling base is the heart of the bars, and a smooth texture will prevent any gritty surprises.
- Toast 1½ cups chopped pecans in a dry skillet over medium heat for about 8 minutes, stirring frequently. The pecans should emit a nutty aroma and darken slightly. Once toasted, let them cool for a minute, then fold them into the filling mixture. The toasted pecans add a crunchy texture that contrasts beautifully with the silky filling.
- Pour the filling over the partially baked crust, spreading it evenly with a spatula. Return the pan to the oven and bake for 25 minutes. The filling should set at the edges while the center remains slightly jiggle—this is the sweet spot. Don’t overbake; a hard center will ruin the bars’ signature creaminess. If you’re unsure, insert a toothpick—it should come out with a few moist crumbs.
- Watch Out: The most common mistake is letting the bars cool in the pan on a hot rack. The residual heat can continue cooking the filling, causing it to become overly firm or even crack. Cool the pan on a wire rack for 10 minutes, then lift the bars using the parchment overhang. This ensures the bars set properly without sticking or cracking.
- Once the bars have cooled to room temperature, cut them into squares using a sharp knife. A hot knife can tear the filling, so let the bars sit for a few minutes after cutting to firm up. Serve immediately for the best texture, or wrap them in parchment and store for later enjoyment. The bars are best when they’re fresh, but they hold up wonderfully when refrigerated.
That’s it—you did it. But hold on, I’ve got a few more tricks that will take this to another level.
Insider Tricks for Flawless Results
The Temperature Rule Nobody Follows
Many bakers believe that the oven temperature can be adjusted by a few degrees without consequence, but that’s not the case with pecan pie bars. The crust needs a steady 350°F to develop a golden brown without burning, while the filling requires a slightly lower temperature to set evenly. Using a calibrated oven thermometer ensures you’re not inadvertently baking at 375°F, which would scorch the edges and create a dry center. I’ve spent countless hours tweaking my oven, and the difference is as obvious as a light vs. dark chocolate.
Why Your Nose Knows Best
When baking, the aroma is your most reliable indicator of progress. A warm, caramel scent that’s not too sweet signals that the filling is cooking correctly. If the smell is too syrupy, it means the sugar is overcooking. Conversely, a faint scent might mean the oven temperature is too low. Trust your nose; it’s more accurate than the clock, especially when you’re juggling multiple dishes.
The 5-Minute Rest That Changes Everything
After the bars have cooled to room temperature, let them rest for at least 5 minutes before cutting. This brief pause allows the filling to set fully, preventing it from sliding off the parchment when you lift the pan. It also gives the pecans a chance to settle, ensuring each bite has a consistent crunch. I’ve seen bars that are cut too early and end up with a gooey mess—resting eliminates that risk.
The Secret to Even Crust
The key to a uniform crust is consistent pressure when pressing the dough into the pan. Use the back of a measuring cup or a flat-bottomed glass to apply even weight across the surface. If you press too hard, the crust will be too thick and may not bake evenly. If you press too lightly, the crust will be thin and may tear when you lift the bars. Find that sweet spot—about ¼ inch thick—and you’ll have a crust that’s both beautiful and functional.
How to Keep Pecans Crunchy
To maintain the pecans’ crunch, avoid overmixing the filling after adding the nuts. Stir them in gently, just enough to coat. Overmixing can break down the nut’s structure, turning it into a paste. If you’re using raw pecans, toast them first; raw nuts tend to become soggy when baked in a sugary filling. Toasting also amplifies their natural oils, adding a richer flavor profile.
Creative Twists and Variations
This recipe is a playground. Here are some of my favorite ways to switch things up:
Maple Pecan Bars
Swap the corn syrup for pure maple syrup and add a pinch of ground cinnamon. The maple introduces a subtle earthiness that pairs beautifully with the pecans. Serve with a drizzle of caramel for an extra indulgent touch.
Dark Chocolate Pecan Bars
Add ½ cup melted dark chocolate to the filling before pouring it over the crust. The chocolate’s bittersweetness contrasts the sweetness of the corn syrup, creating a complex flavor profile. Top with a sprinkle of sea salt to enhance the chocolate’s depth.
Salted Caramel Pecan Bars
Replace the vanilla with a splash of caramel sauce and finish the top with a dusting of flaky sea salt. The caramel’s buttery sweetness balances the pecan’s nuttiness, while the sea salt provides a savory counterpoint. This version is perfect for a holiday gathering.
Vegan Pecan Bars
Use coconut oil instead of butter and replace the eggs with flaxseed meal mixed with water. The coconut oil adds a subtle tropical flavor that complements the nuts. Flaxseed provides the binding needed to hold the bars together, making them fully plant‑based.
Mini Pecan Pie Squares
Use a 6‑inch square pan and reduce the ingredient quantities by 50%. These bite‑size treats are perfect for parties or as a dessert for kids. They bake slightly faster—about 20 minutes—so keep an eye on the edges.
Storing and Bringing It Back to Life
Fridge Storage
Wrap the bars tightly in plastic wrap or store them in an airtight container. They’ll stay fresh for up to five days, maintaining their crisp crust and chewy filling. When you’re ready to serve, let them sit at room temperature for 10 minutes to soften the crust slightly.
Freezer Friendly
For longer storage, wrap each bar individually in parchment paper and then place them in a freezer bag. They’ll keep for up to three months. Thaw overnight in the refrigerator and let them reach room temperature before cutting. This method preserves the bars’ texture and flavor perfectly.
Best Reheating Method
If the bars have been refrigerated, reheat them in a 350°F oven for 5 minutes. Add a tiny splash of water to the bottom of the pan before reheating—this steams the filling, preventing it from drying out. After reheating, let them cool for a couple of minutes before serving; the crust will regain its crispness.