Picture this: I’m standing in a cramped kitchen, a bag of white chocolate chips trembling in my hand, and the smell of peppermint lacing the air from a candy cane that’s been stuck in the freezer since last Christmas. I had just finished a chaotic dinner prep, the table crowded with dishes that looked like a culinary warzone, and my heart was racing for a sweet, comforting finish. The moment I cracked open the white chocolate, it seemed to whisper, “You’re about to make the most indulgent, melt‑in‑your-mouth treat you’ll ever taste.” I had no idea that this simple combination would become the crown jewel of my holiday dessert repertoire. That’s when the idea sparked: a peppermint bark that’s not just a bark, but a silky, frosted, festive masterpiece.
I dared myself to create something that would outshine the ordinary peppermint bark you find at the grocery store. The white chocolate should feel like a cloud of vanilla‑sweet velvet, the peppermint candy canes should snap like brittle ice, and the sprinkles should sparkle like holiday lights. Every bite should melt into a harmony of sweetness and minty freshness, leaving a lingering aftertaste that makes you reach for more. I was determined to keep the recipe simple enough for a novice, yet sophisticated enough to wow the guests at your next gathering. By the end of this post, you’ll discover a version so flawless that you’ll wonder why you ever settled for anything less.
I’ll walk you through each step, from selecting the perfect white chocolate chips to the final garnish that turns this into a showstopper. You’ll learn the subtle techniques that keep the chocolate from seizing, how to layer candy canes for maximum crunch, and the exact timing that ensures the bark stays firm but not brittle. I’ll also reveal a secret ingredient that adds a depth of flavor you’ll never expect in a peppermint bark. This isn’t just a recipe; it’s a full‑spectrum sensory experience that will elevate your holiday desserts to a new level. So, grab your apron, and let’s dive into the ultimate peppermint bark adventure.
I’ve always been skeptical of recipes that promise “easy” and “delicious” in the same breath. The truth is, most people end up with a mess that looks more like a chocolate disaster than a festive treat. That’s why I’m taking a stand with this version: it’s straightforward, foolproof, and the final product is a piece of art you can proudly serve. If you’ve ever struggled with melting chocolate or wanted a bark that doesn’t taste like it was rushed, this is the recipe for you. I’ll share every trick, hack, and tip that turns a simple set of ingredients into a holiday masterpiece. Trust me, by the time you finish reading, you’ll have all the confidence to whip up this bark with ease.
Now let’s talk about what makes this version stand out from the crowd. It’s not just about the ingredients; it’s about the technique, the balance, and the sheer wow factor. Below, I’ve broken down the key elements that set this recipe apart. I’ve also included a handy kitchen hack that will save you time and keep the chocolate perfectly smooth.
- Flavor: The white chocolate’s silky sweetness is amplified by a hint of vanilla extract, creating a depth that balances the sharp peppermint. The result is a bark that’s both sweet and refreshing, with a lingering mint finish that isn’t overpowering.
- Texture: The candy canes are carefully chopped and layered so that each bite delivers a satisfying crunch that contrasts the creamy chocolate. This texture play makes the bark feel luxurious rather than heavy.
- Simplicity: With only six ingredients, the recipe is quick to assemble, making it ideal for last‑minute dessert prep or when you’re juggling multiple dishes.
- Uniqueness: The addition of a pinch of sea salt subtly enhances the sweetness and brings out the chocolate’s richness, a technique often overlooked in traditional peppermint bark.
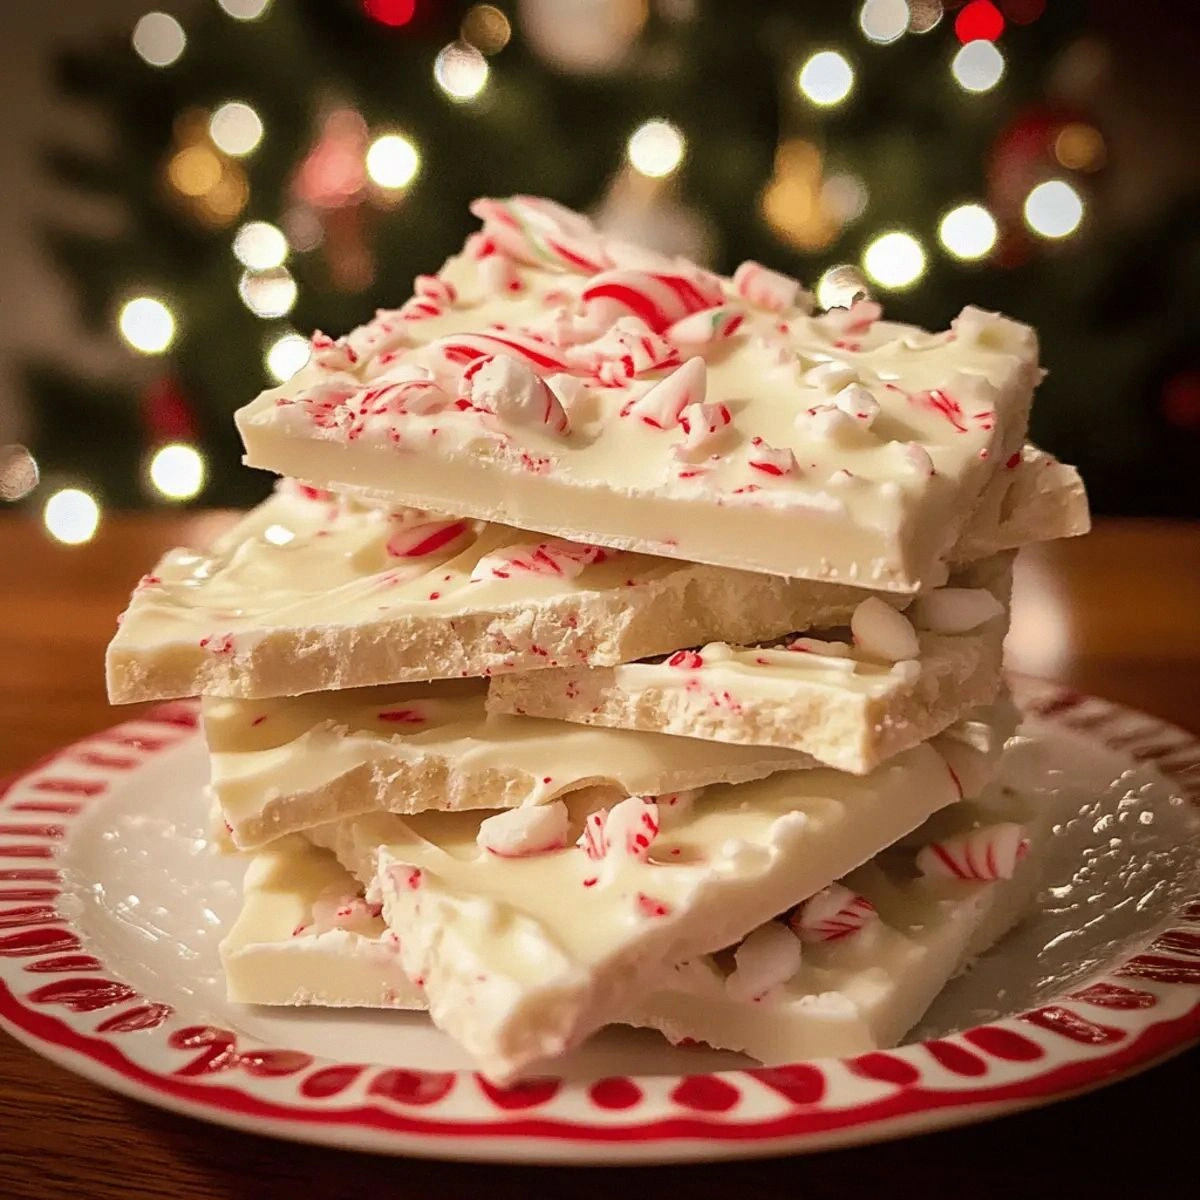
- Crowd Reaction: Guests will be amazed by the glossy finish and the way the bark cracks with a satisfying snap. It’s a conversation starter that brings the holiday spirit to the table.
- Ingredient Quality: Using premium white chocolate chips and fresh candy canes ensures the bark’s flavor is authentic and not diluted by cheap substitutes.
- Cooking Method: The double‑boiler method keeps the chocolate from scorching, while the quick chill in the fridge sets the bark perfectly.
- Make‑ahead Potential: Once set, the bark can be stored for up to two weeks, making it a great pre‑made dessert that saves time on the day of the party.
The Flavor Base
White chocolate chips are the heart of this bark. They provide a sweet, creamy foundation that carries the peppermint flavor without overpowering it. When selecting chips, look for a high cocoa butter content; this ensures the chocolate melts smoothly and sets with a brilliant shine. If you’re short on time, you can use a high‑quality white chocolate bar, but make sure to cut it into small chunks to melt evenly.
Coconut oil is a game‑changer in this recipe. It lowers the melting point of the chocolate, giving the bark a silky texture and a quick set time. Coconut oil also adds a subtle tropical undertone that complements the peppermint. If you prefer a dairy‑free version, coconut oil is the perfect substitute for butter or butter‑based sauces.
Candy canes are the crunchy, minty star of the show. They should be chopped into small pieces so they’re easy to spread and melt into the chocolate. The sharp snap of a candy cane bite is the contrast that makes each mouthful exciting. If you can’t find candy canes, a peppermint candy bar works, but the texture will differ slightly.
Peppermint extract is the secret to a deep, aromatic mint flavor. A teaspoon is enough to infuse the bark with a robust, yet balanced, mintiness that lingers without becoming cloying. If you’re sensitive to peppermint, start with half a teaspoon and adjust to taste. The extract also helps the chocolate set with a smooth finish.
Red and green sprinkles add a festive pop of color and a subtle crunch. They’re sprinkled on top after the chocolate has set partially, giving the bark a sparkling finish that’s perfect for holiday photos. If you’re vegan or prefer a more natural look, you can use edible glitter or crushed holiday candies instead.
Sea salt flakes are the final touch that brings everything together. A pinch of sea salt enhances the sweetness and brings out the chocolate’s richness. Salt also balances the intense mint flavor, creating a harmonious taste profile. If you’re watching sodium intake, a tiny pinch is still enough to make a difference.
Everything’s prepped? Good. Let’s get into the real action.
The Method — Step by Step
- Begin by placing a heat‑proof bowl over a pot of simmering water, ensuring the bottom of the bowl doesn’t touch the water. Add the white chocolate chips and stir constantly until they’re completely melted and glossy. The key here is patience; rushing can cause the chocolate to seize and become grainy.
- Once the chocolate is smooth, stir in the coconut oil until it’s fully incorporated. This step reduces the melting point and gives the bark a silky finish. If you notice any lumps, give it another minute of gentle stirring.
- Add the peppermint extract to the mixture and stir until the aroma fills the kitchen. The scent should be sweet and minty, like a fresh snowfall. This is the moment you’ll know you’re on the right track.
- Pour the melted mixture onto a parchment‑lined baking sheet, spreading it evenly to a thickness of about 1/4 inch. Use a spatula to smooth the surface; a flat, even layer ensures a consistent texture in every bite.
- Let the chocolate sit for 5 minutes so it starts to set but remains pliable. At this point, sprinkle the chopped candy canes evenly over the surface, pressing them gently into the chocolate. The candy will melt slightly, creating a marbled effect.
- Sprinkle the red and green sprinkles over the chocolate while it’s still soft. The colors will melt into the chocolate, giving it a festive sparkle. Don’t overdo it; a light dusting looks more elegant.
- Add a pinch of sea salt flakes, letting them settle on top. The salt will create a subtle contrast that enhances the overall flavor profile. This step is crucial for achieving the perfect balance.
- Place the baking sheet in the refrigerator for 20 minutes, or until the bark is firm but not brittle. The quick chill ensures the chocolate sets with a glossy sheen. Check the bark; the edges should pull away slightly from the parchment.
- Once set, remove the bark from the refrigerator and cut it into bite‑size pieces using a sharp knife or a pizza cutter. The pieces should snap cleanly, giving you that satisfying crackle with each bite.
- Serve immediately, or store the pieces in an airtight container at room temperature for up to a week. If you need to keep them longer, refrigerate them for up to two weeks; just let them come to room temperature before serving for the best texture.
That’s it — you did it. But hold on, I've got a few more tricks that'll take this to another level. These insider tips will help you avoid common pitfalls and ensure your bark is flawless every time.
Insider Tricks for Flawless Results
The Temperature Rule Nobody Follows
Chocolate is a temperamental lover; it loves the right temperature but hates anything else. The ideal temperature for white chocolate is between 86°F and 88°F. Using a thermometer can seem overkill, but it guarantees that the bark will set with a shiny, crack‑free surface. If you’re using a double‑boiler, keep the water at a gentle simmer to avoid overheating.
Why Your Nose Knows Best
The aroma of melting chocolate is a reliable indicator of doneness. When you smell a sweet, buttery scent that’s not too hot, the chocolate is ready. If it smells burnt or metallic, it’s time to lower the heat. Your nose is the unsung hero of chocolate making.
The 5‑Minute Rest That Changes Everything
Letting the chocolate rest for five minutes after it’s melted allows the bubbles to settle. This pause prevents the chocolate from forming a skin, resulting in a smoother finish. It also gives the peppermint extract time to distribute evenly, ensuring each bite has a balanced flavor.
The Perfect Chill
Refrigerating the bark for exactly 20 minutes is crucial. Too short, and the bark will be soft; too long, and it will become brittle. The 20‑minute window gives the chocolate enough time to set without losing its glossy sheen. Check the edges; they should pull away from the parchment with a gentle tug.
The Secret to a Snap
A small pinch of sea salt is the secret to the crack‑like snap you love. The salt draws out moisture from the chocolate, creating a micro‑crack that gives the bark its signature bite. Don’t skip this step; it’s what separates a good bark from a great one.
The Final Touch
If you’re presenting the bark at a holiday party, arrange the pieces on a festive platter with a touch of fresh mint leaves. The visual appeal will be as important as the flavor. A simple garnish can elevate the entire presentation.
Creative Twists and Variations
This recipe is a playground. Here are some of my favorite ways to switch things up:
Nutty Delight
Add chopped toasted almonds or pecans between the chocolate and candy cane layers. The nuts provide a crunchy texture that contrasts with the smooth chocolate, creating a new dimension of flavor. This version is perfect for guests who love a nutty twist.
Citrus Burst
Replace half of the peppermint extract with a splash of orange zest or a few drops of orange essential oil. The citrus adds brightness, cutting through the sweetness and making the bark feel fresh. It’s a surprisingly delightful change.
Chocolate Swirl
Before chilling, swirl in a ribbon of dark chocolate or milk chocolate. The swirl creates a marbled effect that’s visually stunning and adds a richer chocolate flavor. The contrast between dark and white chocolate is a classic holiday treat.
Spiced Edition
Add a pinch of ground cinnamon or nutmeg to the chocolate mixture. The spices add warmth and depth, making the bark feel cozy and comforting. This variation is ideal for those who love a spiced holiday dessert.
Vegan Version
Use dairy‑free white chocolate chips and coconut oil, and replace the candy canes with vegan peppermint candies. The result is a completely plant‑based bark that still delivers on flavor and texture. It’s a must‑try for vegan holiday celebrations.
Garnish Galore
After the bark has set, drizzle a thin layer of melted white chocolate over the top and sprinkle with edible gold dust. The gold dust adds a touch of elegance, making the bark feel like a luxurious treat. This is perfect for special occasions or when you want to impress.
Mini Bites
Instead of cutting the bark into large pieces, use a cookie cutter to create fun shapes like stars or snowflakes. The shapes make the bark feel festive and playful, especially for kids. It’s a simple way to add a holiday flair.
Storing and Bringing It Back to Life
Fridge Storage
Store the bark in an airtight container at room temperature for up to one week. Keep it away from strong odors, as chocolate can absorb them quickly. The bark will stay firm and flavorful if stored properly.
Freezer Friendly
For longer storage, place the bark in a freezer‑safe container and freeze for up to two months. When you’re ready to serve, let it thaw at room temperature for 30 minutes. The texture will remain crisp and the flavor intact.
Best Reheating Method
If the bark has become too hard, gently warm it in a microwave on low power for 10‑15 seconds. Add a splash of water before reheating to create steam, which helps restore the chocolate’s smoothness. Be careful not to overheat; you want a soft, melt‑in‑your‑mouth texture.