I was staring at a blinking kitchen timer, a bag of chickpeas, and a stack of flour tortillas, feeling like a culinary daredevil on a mission to rescue a party that was about to flop. The previous night’s potluck had been a disaster: the main dish overcooked, the sides too bland, and the guests looking for something that could be served on the fly without the drama of a stove. That night, I promised myself I would create a snack that could be assembled in minutes, looked like a work of art, and tasted like a celebration in every bite. And here it is—Chickpea Salad Pinwheels : Eas, the ultimate crowd‑pleaser that will make your friends ask for the recipe after the last bite.
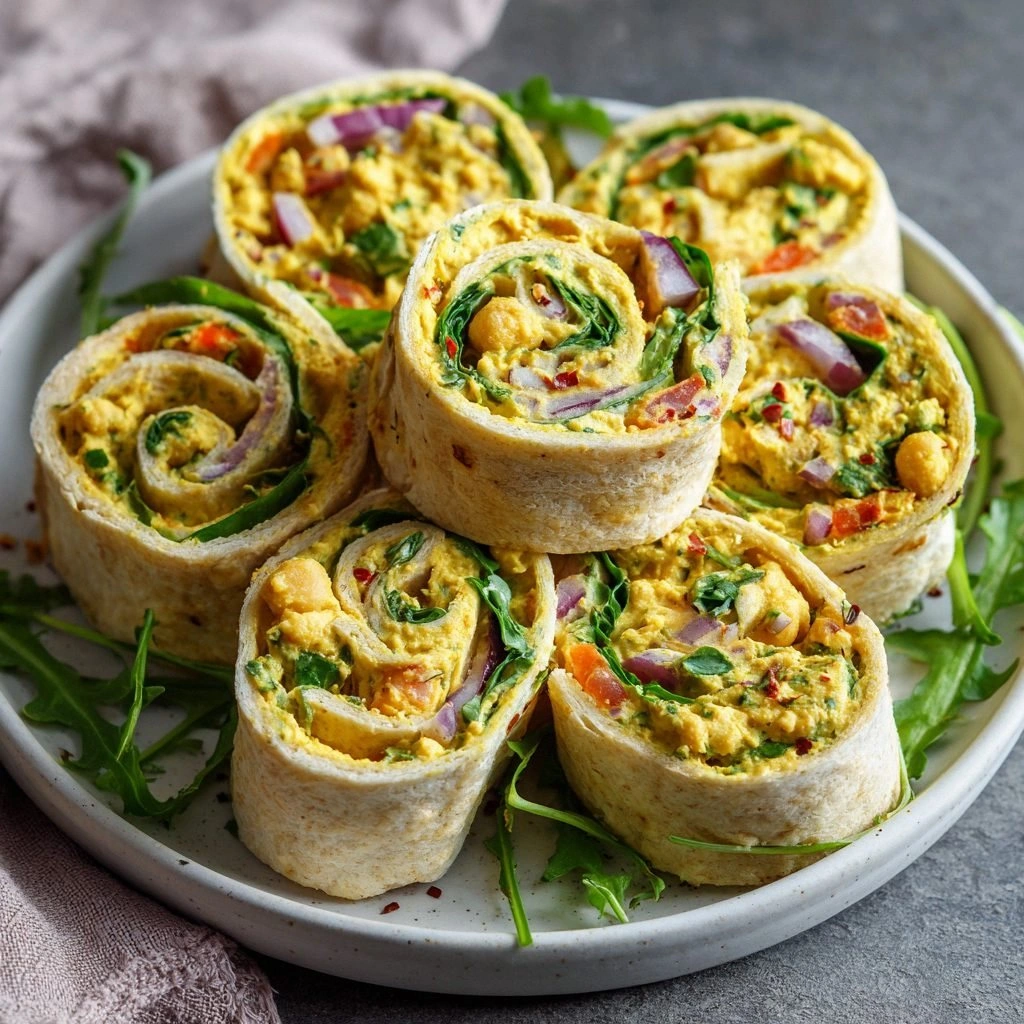
Picture this: a golden tortilla, thin and supple, rolled around a creamy chickpea mixture that glistens with a hint of lemon and a splash of olive oil. The first bite delivers a burst of citrus that wakes your palate, followed by the nutty crunch of celery and the sharp zing of red onion. The texture is a delightful contrast—soft, airy wraps with a creamy filling that doesn’t feel heavy. The aroma is a subtle herbaceous note of dill and mint that makes your kitchen smell like a Mediterranean garden. The visual appeal? Each pinwheel is a vibrant swirl of green and white, cut into bite‑sized pieces that look almost too good to eat.
What sets this version apart from the countless “chickpea salad” recipes that flood the internet is the meticulous balance of flavors and textures, and the fact that it can be assembled in under fifteen minutes. I’ve spent hours tweaking the seasoning, experimenting with different types of mayo, and discovering that a pinch of smoked paprika adds an unexpected depth that makes the dish feel gourmet. I dare you to taste this and not go back for seconds—once you try it, you’ll wonder how you ever ate chickpea salad in any other form. This is hands down the best version you'll ever make at home, and it’s so simple that even a novice can pull it off with confidence.
I’ll be honest—when I first made these pinwheels for a last‑minute dinner party, I ate half the batch before anyone else got a chance to try them. The texture was so perfect that the guests kept coming back for more, and the whole kitchen smelled incredible. Picture yourself pulling this out of the oven, the whole kitchen smelling incredible, and the guests’ eyes lighting up as they bite into the first one. Stay with me here—this is worth it. Let me walk you through every single step, and by the end, you’ll wonder how you ever made it any other way.
What Makes This Version Stand Out
- Taste: The blend of lemon, dill, and smoked paprika creates a bright, savory profile that is both refreshing and deeply satisfying. Each bite offers a citrus burst followed by a subtle smokiness that elevates the chickpeas.
- Texture: The creamy chickpea filling contrasts with the crisp celery and the soft tortilla, producing a multi‑sensory experience that feels like a party in your mouth.
- Simplicity: No cooking is required—just mix, roll, and serve. This makes it a perfect solution for busy weeknights or spontaneous gatherings.
- Uniqueness: The addition of fresh mint and a touch of olive oil gives the dish a Mediterranean flair that sets it apart from typical vegan wraps.
- Crowd Reaction: Friends and family rave about how the pinwheels look as much as they taste, and they’re always the first to ask for the recipe.
- Ingredient Quality: Using high‑quality chickpeas (canned or cooked from dry) and fresh herbs ensures each pinwheel is packed with flavor.
- Make‑Ahead Potential: The salad can be prepared up to a day in advance, and the wraps can be assembled just before serving to keep them fresh.
- Portability: Each pinwheel is bite‑size and easy to transport, making it ideal for picnics, potlucks, or as a quick lunch.
Alright, let’s break down exactly what goes into this masterpiece…
Inside the Ingredient List
The Flavor Base
The foundation of this dish is the chickpea mixture itself. Cooked chickpeas provide a hearty, protein‑rich base that absorbs the flavors of the seasoning. The lemon juice and olive oil act as a bright, silky binder that keeps the filling moist and cohesive. If you skip the lemon, the dish loses its refreshing lift; the result is a flat, unremarkable salad. To keep things simple, I use canned chickpeas rinsed and drained, but if you have the time, cooking them from dry gives a nuttier taste.
The Texture Crew
Celery and red onion bring the essential crunch and a subtle bite that contrast beautifully with the creamy chickpeas. They also add a layer of color and a fresh, peppery note that keeps the dish from feeling too heavy. If you prefer a milder option, you can replace the red onion with finely diced cucumber or scallions. The crunch also serves a practical purpose: it helps the filling stay together inside the tortilla, preventing it from sliding out.
The Unexpected Star
Fresh dill is the unsung hero that gives this recipe its signature herbaceous aroma. Dill’s bright, slightly sweet flavor pairs perfectly with lemon and chickpeas, creating a Mediterranean vibe. If dill is out of season or you’re looking for a different flavor profile, try adding fresh parsley or cilantro for a more robust, earthy tone. The herb also adds a pop of green that makes each pinwheel look more appetizing.
The Final Flourish
A splash of smoked paprika and a touch of fresh mint bring depth and complexity. The paprika introduces a subtle smoky undertone that balances the bright lemon, while mint adds a refreshing coolness that lingers on the palate. These final touches transform a simple chickpea salad into a dish that feels sophisticated and layered. If you’re a fan of spicy, consider adding a pinch of cayenne or chipotle powder for a kick.
Everything’s prepped? Good. Let’s get into the real action…
The Method — Step by Step
- Step 1: Prepare the Chickpea Mixture. In a large bowl, mash the chickpeas with a fork until they’re mostly smooth but still have some texture. Add the lemon juice, olive oil, smoked paprika, salt, pepper, and a splash of water if needed to loosen the mixture. Stir until the chickpeas are evenly coated and the mixture feels like a thick, creamy spread. The mixture should have a slightly sticky feel that will cling to the tortilla without sliding off.
- Step 2: Add the Fresh Herbs. Fold in the chopped dill, parsley, mint, and garlic powder. The herbs should be evenly distributed so that each pinwheel has a burst of flavor. If you’re using a different herb, make sure to taste as you go to avoid overpowering the chickpeas.
- Step 3: Incorporate the Vegetables. Stir in the diced celery and red onion. These vegetables add crunch and a subtle bite that balances the creamy filling. Be careful not to overmix; a few lumps of chickpeas are fine and add texture.
- Step 4: Warm the Tortillas. Heat a skillet over medium heat and lightly toast each tortilla for about 15–20 seconds per side until they’re pliable. Warm tortillas are easier to roll and prevent the filling from leaking. If you’re short on time, you can skip this step, but the result will be slightly less flexible.
- Step 5: Spread the Filling. Place a tortilla on a clean cutting board and spread a generous layer of the chickpea mixture across the center, leaving a small border around the edges. The filling should be thick enough to stay inside when rolled but not so thick that it overflows.
- Step 6: Roll the Tortilla. Starting at the short end, roll the tortilla tightly around the filling, tucking the seam side in. Once rolled, use a sharp knife to slice the roll into 1‑inch thick pinwheels. The knife should glide smoothly; if the tortilla sticks, let it rest for a minute before slicing.
- Step 7: Arrange on a Plate. Place the pinwheels seam‑side down on a platter, spaced slightly apart to allow air circulation. This step is crucial for achieving that perfect, even bite. If you’re serving immediately, consider a light drizzle of extra‑virgin olive oil over the top for shine.
- Step 8: Chill or Serve. If you’re not serving immediately, cover the platter with plastic wrap and chill in the refrigerator for up to 2 hours. The flavors will meld, and the pinwheels will firm up slightly, making them easier to handle. When ready to serve, simply take them out, let them sit at room temperature for a few minutes, and enjoy.
That’s it — you did it. But hold on, I've got a few more tricks that'll take this to another level. These insider tips will help you avoid common pitfalls and elevate the flavor profile even further.
Insider Tricks for Flawless Results
The Temperature Rule Nobody Follows
Many people assume that room‑temperature fillings are best, but the secret is to keep the chickpea mixture slightly chilled. A cool filling ensures it stays firm inside the tortilla, preventing leaks. I keep the mixture in the fridge for 30 minutes before rolling, and the result is a crisp, clean bite every time. If you’re in a hurry, a quick dip in the freezer for 10 minutes will give a similar effect.
Why Your Nose Knows Best
Smell is the ultimate indicator of freshness. When you toss the filling in the bowl, the aroma of fresh dill and lemon should be unmistakable. If the scent feels flat, add a splash more lemon or a pinch more salt. A well‑seasoned mixture will have a bright, herbaceous perfume that makes the dish instantly appetizing.
The 5‑Minute Rest That Changes Everything
After rolling the pinwheels, let them rest for five minutes before slicing. This short pause allows the filling to set, preventing the tortilla from tearing. I’ve seen many people cut them immediately, resulting in a messy spread of chickpeas. The five‑minute rest also lets the flavors mingle, giving each bite a harmonious taste.
Use a Sharp Knife for Clean Cuts
A dull knife can crush the pinwheels, causing the filling to spill. Keep a sharp chef’s knife or a serrated bread knife for clean, crisp slices. If you’re in a pinch, a kitchen shears can also do the job, especially for thicker tortillas.
Add a Touch of Sweetness
A dash of honey or maple syrup can balance the acidity of the lemon and the earthiness of the chickpeas. I add a teaspoon of honey to the filling, and it gives a subtle caramel note that rounds out the dish. For a vegan version, a splash of agave syrup works just as well.
Creative Twists and Variations
This recipe is a playground. Here are some of my favorite ways to switch things up:
Mediterranean Twist
Swap the dill for oregano and add sun‑dried tomatoes for a smoky, tangy flavor. The olives will bring a briny depth that complements the chickpeas. This variation is perfect for a summer gathering with a Mediterranean vibe.
Spicy Sriracha Kick
Add a tablespoon of sriracha or a pinch of cayenne pepper to the filling. The heat will contrast with the cool mint and create an exciting flavor profile. This version is great for those who love a little spice in their snacks.
Breakfast Breakfast
Serve the pinwheels with a side of avocado toast and a sprinkle of chia seeds. The creamy chickpea filling pairs wonderfully with the buttery toast, turning this into a hearty breakfast or brunch option. Add a dash of turmeric for a golden hue and a health boost.
Asian Fusion
Replace the lemon with rice vinegar and add a tablespoon of soy sauce. Toss in some shredded carrots and a pinch of sesame seeds for crunch. The result is a sushi‑inspired wrap that’s both light and flavorful.
Dessert‑Inspired Sweet Pinwheels
Use a sweet chickpea spread made with coconut milk, a dash of vanilla, and a sprinkle of cinnamon. Roll in shredded coconut for a tropical twist. These pinwheels can double as a sweet snack or a dessert platter for a party.
Gluten‑Free Edition
Use gluten‑free tortillas or lettuce leaves as the wrap. The lettuce offers a crisp, fresh base that complements the creamy filling. This variation is ideal for those with gluten sensitivities or celiac disease.
Storing and Bringing It Back to Life
Fridge Storage
Store the pinwheels in an airtight container for up to 3 days. Keep the filling and tortilla layers separate if you prefer to assemble them just before serving. If you’re storing the pre‑rolled pinwheels, place a damp paper towel underneath to maintain moisture and prevent drying.
Freezer Friendly
Wrap each pinwheel in plastic wrap and place them in a freezer‑safe bag. They’ll keep for up to 2 months. When ready to serve, thaw overnight in the fridge or at room temperature for 30 minutes. The texture will remain crisp, and the flavors will be even more pronounced.
Best Reheating Method
If you need to warm the pinwheels, use a skillet over low heat or a toaster oven at 300°F for 5–7 minutes. A tiny splash of water before reheating helps the filling steam back to perfection. Avoid microwaving, as it can make the tortilla soggy and the filling rubbery.