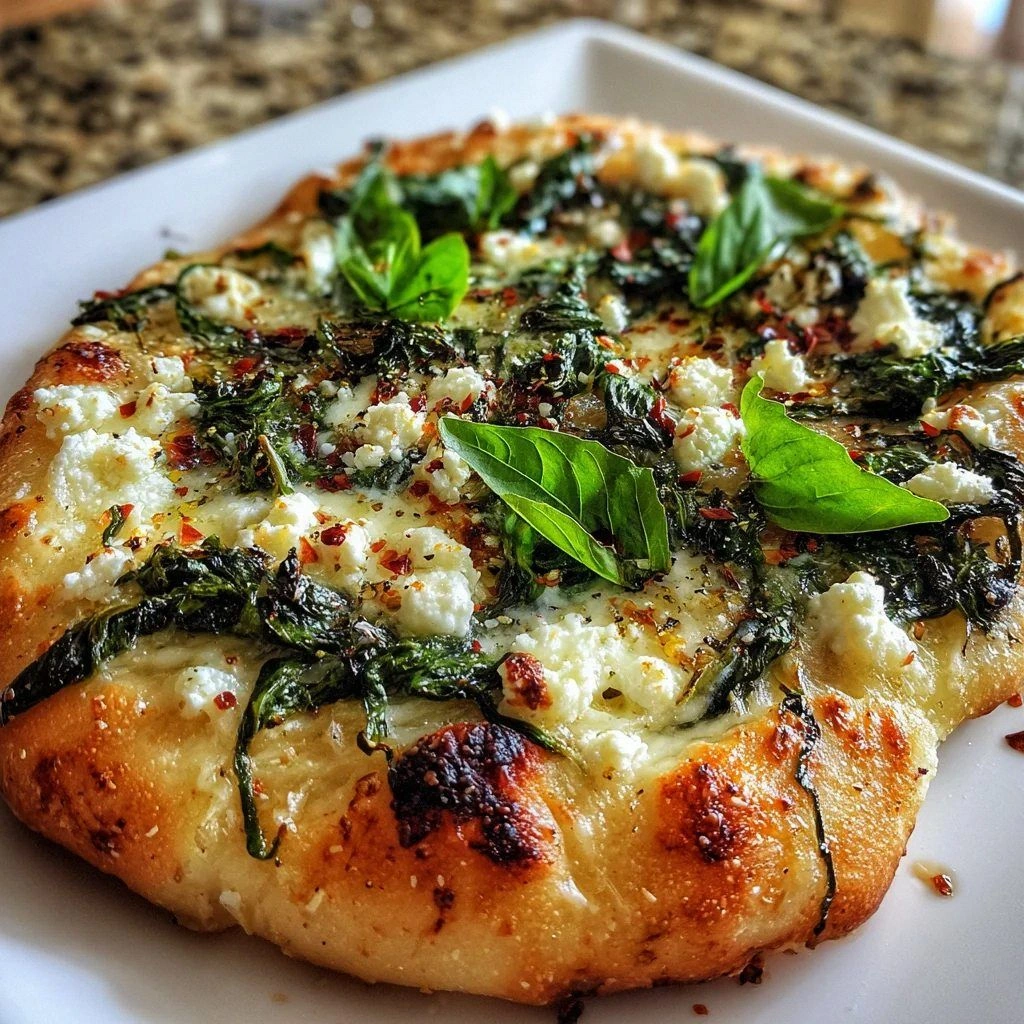
I was standing in my kitchen at 6 AM on a Sunday, still in my pajamas, staring at a pile of ingredients that seemed to be mocking me. The plan was simple: make breakfast for my family who would be arriving in an hour. But here's the thing — I wanted to impress them. I wanted to create something that would make them forget every mediocre brunch they'd ever had. The hashbrowns were thawing on the counter, the bell peppers were staring at me with their vibrant colors, and I had this wild idea to combine everything I loved about a Denver omelette with the comfort-food magic of a hashbrown casserole.
Twenty minutes later, I was covered in flour, my hair was a mess, and I was pretty sure I'd just created the most incredible breakfast mashup of my life. The smell wafting from my oven was absolutely intoxicating — that perfect marriage of crispy potatoes, caramelized onions, and smoky ham that makes your stomach growl even when you're not hungry. My neighbor actually knocked on my door to ask what I was making, claiming the aroma had drifted all the way to her house. That's when I knew I was onto something special.
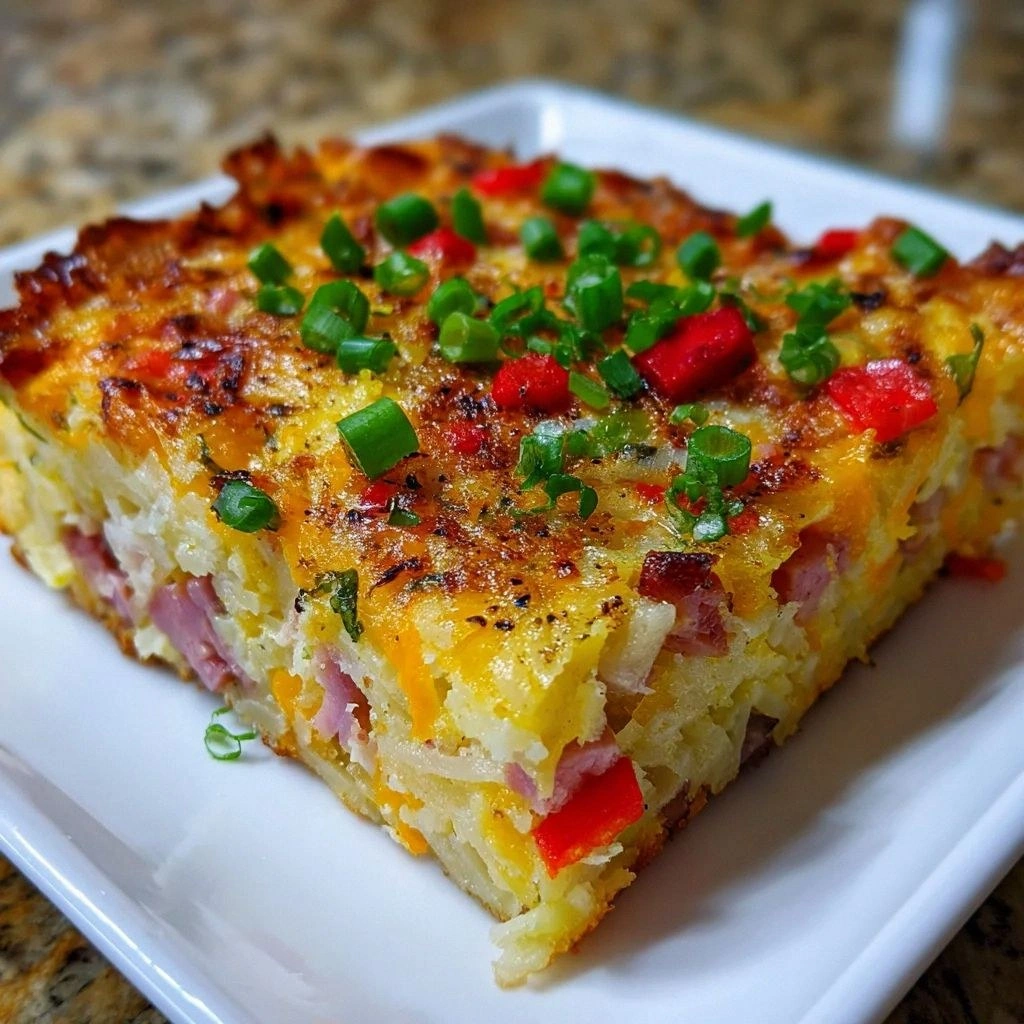
Picture this: golden hashbrowns forming the perfect crispy base, layered with the classic Denver omelette fillings of ham, bell peppers, and onions, all bound together with eggs and cheese that creates these incredible pockets of melty goodness throughout. Each bite delivers that satisfying crunch from the edges, followed by the creamy, savory interior that basically hugs your taste buds. This isn't just another breakfast casserole — this is the breakfast casserole that will ruin all other breakfast casseroles for you forever.
I've made this dish at least fifty times since that fateful morning, tweaking and perfecting it until it reached what I consider absolute breakfast nirvana. Friends have begged for the recipe, family members have requested it for every holiday gathering, and I've even had people offer to pay me to make it for their events. The secret isn't just in the ingredients — it's in the technique, the timing, and a few game-changing tricks that I'm about to share with you. Let me walk you through every single step — by the end, you'll wonder how you ever made it any other way.
What Makes This Version Stand Out
Most breakfast casseroles are just sad, soggy messes of bread and eggs that taste more like a science experiment than actual food. This version? It's completely different. Here are the specific reasons why this Denver Omelette Hashbrown Casserole will become your new breakfast obsession:
- Texture Magic: Instead of mushy bread cubes, we're building this on a foundation of crispy hashbrowns that maintain their integrity. The edges get golden and crunchy while the inside stays tender, creating a textural contrast that makes each bite interesting rather than monotonous.
- Flavor Explosion: Traditional recipes dump everything together and hope for the best. We're layering flavors strategically — the vegetables get sautéed first to develop deep, caramelized sweetness, the ham gets a quick sear to intensify its smoky notes, and the cheese is added in stages for maximum melt factor.
- Make-Ahead Champion: This casserole actually gets better when assembled the night before. The flavors meld together in the refrigerator, and in the morning you just pop it in the oven. Perfect for holidays, brunch parties, or those mornings when you want to sleep in but still serve something incredible.
- Customizable Canvas: While I love the classic Denver omelette combination, this recipe is endlessly adaptable. Swap the ham for sausage or bacon, add different vegetables, use different cheese blends — once you master the technique, you can create dozens of variations that all work perfectly.
- Feed a Crowd: One 9x13 pan serves eight generously, and it slices beautifully. No more standing over a hot stove making individual omelettes while your guests get hangry. Everything bakes together, stays hot, and you get to actually enjoy your own party.
- Freezer Friendly: Make two, eat one, freeze one for later. It reheats like a dream, making Monday morning breakfast as easy as pressing a button on your microwave. Future you will thank present you for this level of breakfast preparedness.
- Restaurant Quality: The combination technique — starting on the stovetop and finishing in the oven — creates layers of flavor and texture that taste like something you'd pay twenty dollars for at a fancy brunch spot. Your guests will think you secretly took culinary classes.
Alright, let's break down exactly what goes into this masterpiece...
Inside the Ingredient List
The Flavor Base
The foundation of any great dish starts with building layers of flavor, and this casserole is no exception. The humble onion becomes something extraordinary when given time to slowly caramelize, releasing its natural sugars and developing that deep, complex sweetness that makes everything taste better. Don't rush this step — those ten minutes of patient stirring while the onions turn golden brown are what separate a good casserole from a legendary one.
Garlic might seem like an afterthought in a Denver omelette, but here it plays a crucial supporting role. Just two cloves, minced so fine it practically dissolves, adds that background note of savory depth that makes people ask "what's in this that tastes so good?" When you add it to the sautéed vegetables, let it cook for only thirty seconds — any longer and it turns bitter, any shorter and you lose that mellow sweetness we're after.
The Texture Crew
Hashbrowns are the star of this show, but not all frozen hashbrowns are created equal. Look for the shredded variety rather than the diced ones — they create better layers and crisp up more evenly. Thaw them completely and squeeze out as much moisture as humanly possible. I've seen people skip this step and end up with a soggy mess that tastes like wet cardboard. Don't be that person. Your casserole deserves better.
Bell peppers bring more than just color to this party. The red ones add sweetness, the green ones bring a slightly bitter edge that balances all the richness, and if you throw in some yellow or orange ones, you get a fruity note that makes the whole dish more complex. Dice them small enough that they distribute evenly but not so small that they disappear into the background.
The Unexpected Star
Here's where I deviate from traditional Denver omelette territory: cream cheese. Yes, you heard that right. Little cubes of cream cheese scattered throughout the casserole melt into these pockets of creamy luxury that take this from good to absolutely unforgettable. It sounds weird, but trust me on this one. The cream cheese doesn't make it taste like cheesecake — it just adds richness and moisture that regular shredded cheese can't achieve alone.
Mustard powder is my secret weapon in egg dishes. Just a teaspoon whisked into the eggs before pouring them over everything adds a subtle tang that brightens all the other flavors. It's like adding a squeeze of lemon, but better. People won't be able to identify it, but they'll know something makes this taste more sophisticated than your average breakfast casserole.
The Final Flourish
Cheese selection matters more than you think. Sharp cheddar brings that classic breakfast flavor, but mixing it with some Monterey Jack adds excellent melting properties and a mild creaminess that balances the cheddar's bite. I use a 70/30 ratio, but feel free to adjust based on how intense you want the cheese flavor to be. And please, for the love of all that is holy, buy blocks and shred it yourself. Pre-shredded cheese is coated with cellulose that prevents it from melting smoothly.
Fresh herbs at the end aren't just for garnish — they add a pop of freshness that cuts through all the richness. Chives are traditional and perfect, but flat-leaf parsley works beautifully too. Add them after baking so they stay bright and vibrant rather than turning into sad, wilted flecks that look like they gave up on life.
Everything's prepped? Good. Let's get into the real action...
The Method — Step by Step
- Start with your largest non-stick skillet over medium-high heat. Add two tablespoons of butter and let it foam — this is your visual cue that the pan is properly heated and ready for action. Toss in your diced onions with a pinch of salt, stirring to coat them in the butter. Here's the key: don't touch them for the first two minutes. Let them develop some color and caramelization on the bottom before you start stirring. This initial sear is where the flavor magic begins.
- While your onions are working their magic, place your thawed hashbrowns in the center of a clean kitchen towel. Gather up the corners and twist, creating a makeshift tourniquet for your potatoes. Wring with all your might — I'm talking Popeye-level strength here. Keep twisting until no more water drips out. You should end up with what looks like compressed potato hockey pucks. Break these apart with your fingers; they're now ready to achieve maximum crispiness.
- After about five minutes, your onions should be starting to turn translucent and pick up some golden color. Add your diced bell peppers — I like a mix of colors for both flavor and visual appeal. Stir everything together and let it cook for another five minutes. You want the peppers to soften but still maintain some bite. They'll continue cooking in the oven, so don't worry if they're not completely tender yet.
- Clear a space in the center of your pan and add your diced ham. Let it sit undisturbed for two minutes so it can develop some caramelization. This step is crucial — it intensifies the smoky flavor and adds little crispy bits that provide textural contrast throughout the casserole. Stir everything together and cook for another three minutes until the ham is heated through and starting to brown at the edges.
- Transfer your vegetable and ham mixture to a bowl and set aside. Don't wipe out the pan — those browned bits at the bottom are liquid gold. Add another tablespoon of butter and crank the heat up to high. When the butter is melted and just starting to brown, spread your wrung-out hashbrowns in an even layer across the bottom of the pan. Press down firmly with a spatula to create a compact layer. Let them cook undisturbed for five minutes. This is the foundation of your casserole, and those crispy edges will provide incredible texture contrast.
- While your hashbrowns are developing that beautiful golden crust, crack your eggs into a large bowl. Add the milk, mustard powder, salt, pepper, and a healthy pinch of cayenne if you like a little heat. Whisk vigorously for a full minute — you want to incorporate air so the eggs bake up light and fluffy rather than dense and rubbery. The mixture should be pale yellow and slightly frothy on top.
- After five minutes, check your hashbrowns by lifting up a corner with a spatula. They should be golden brown and crisp. Flip them in sections — they don't need to be perfect, just get them turned over so the other side can crisp up too. Cook for another three minutes, then remove from heat. They won't be fully cooked through, but they'll finish in the oven.
- Preheat your oven to 375°F. Grease a 9x13 baking dish with butter — don't use cooking spray here, you want the flavor that real butter provides. Spread half of your hashbrowns in the bottom of the dish, pressing down to create an even layer. Sprinkle with half of your shredded cheese, then top with your vegetable and ham mixture. Dot with cream cheese cubes — try to distribute them evenly so every bite gets some creamy goodness.
- Pour your egg mixture evenly over everything, making sure to get it into all the nooks and crannies. Give the pan a gentle shake to help distribute the eggs, then top with the remaining hashbrowns and cheese. Press down lightly to compress everything — this helps it hold together when you slice it. At this point, you can cover it with plastic wrap and refrigerate overnight, or bake immediately.
- Bake for 25-30 minutes until the eggs are just set and the top is golden brown. The center should still have a slight jiggle when you shake the pan — that's your cue that it's perfectly cooked. Let it rest for five minutes before slicing; this allows everything to set up properly and makes serving much cleaner. Garnish with your fresh herbs and watch as everyone dives in with abandon.
That's it — you did it. But hold on, I've got a few more tricks that'll take this to another level...
Insider Tricks for Flawless Results
The Temperature Rule Nobody Follows
Here's the thing about eggs — they're incredibly sensitive to temperature changes, and most people sabotage their casseroles by using cold ingredients straight from the refrigerator. Let your eggs and milk come to room temperature before mixing them. This simple step ensures they cook evenly and prevents that dreaded rubbery texture around the edges while the center is still liquid. I usually set mine out 30 minutes before I start cooking, and the difference is remarkable.
The same rule applies to your cheese. Cold cheese doesn't melt smoothly — it can seize up and become greasy. Room temperature cheese melts into creamy perfection, creating those Instagram-worthy cheese pulls that make everyone reach for their phones before their forks.
Why Your Nose Knows Best
Don't underestimate the power of aroma in cooking. When your casserole is almost done, your kitchen should smell like the best diner breakfast you've ever had, but amplified. If you're not getting those savory, slightly sweet, totally intoxicating aromas wafting through your house, your oven temperature might be off. Ovens can vary by up to 25 degrees from what the dial says, so if your casserole is taking forever to set up or browning too quickly, trust your nose and adjust accordingly.
I keep an inexpensive oven thermometer on my middle rack and check it periodically. It's saved me from countless cooking disasters and ensures that my casseroles bake consistently every single time.
The 5-Minute Rest That Changes Everything
I know it's tempting to dig right in when you pull this bubbling beauty from the oven, but patience is your friend here. Those five minutes of resting time allow the eggs to finish setting, the cheese to settle into its final melty state, and the flavors to distribute evenly throughout the casserole. Cut into it too soon and you'll have a runny mess that falls apart when you try to serve it. Wait just five minutes, and you'll get clean, beautiful slices that hold their shape and look as good as they taste.
Use this time to set the table, pour some coffee, or just bask in the admiring glances from your family as they gather around the kitchen island, drawn by the incredible aroma. Trust me, they'll wait — and they'll thank you for it.
Creative Twists and Variations
This recipe is a playground. Here are some of my favorite ways to switch things up:
The Southwestern Adventure
Swap the ham for chorizo and add a can of drained diced green chiles to the vegetable mix. Replace half the cheddar with pepper jack, and add a teaspoon of cumin to your egg mixture. Top with fresh cilantro and serve with salsa on the side. The smoky heat from the chorizo pairs perfectly with the creamy eggs, and the green chiles add a tangy brightness that cuts through all the richness.
The Vegetarian Dream
Replace the ham with sautéed mushrooms and spinach. Use a mix of cremini and shiitake for maximum umami flavor, and make sure to squeeze the spinach dry after wilting to prevent excess moisture. Add some crumbled goat cheese along with the cheddar for tang, and throw in some sun-dried tomatoes for concentrated flavor bursts throughout.
The Mediterranean Escape
Use Italian sausage instead of ham, add some chopped artichoke hearts and sun-dried tomatoes to the vegetable mix, and season with oregano and basil. Replace the cheddar with a mix of mozzarella and provolone for that perfect Italian-style cheese pull. Top with fresh basil and a drizzle of good olive oil right before serving.
The Everything Bagel Remix
Everything bagel seasoning isn't just for bagels anymore. Mix two tablespoons into your egg mixture, and sprinkle more on top before baking. Replace the ham with smoked salmon, add some capers to the vegetable mix, and use cream cheese as your primary cheese instead of just the cubes. It's like your favorite bagel breakfast exploded into casserole form.
The Breakfast Burrito Bowl
Add a can of drained black beans and some corn kernels to the vegetable mix. Season with chili powder and a touch of chipotle powder for smokiness. Use Monterey jack as your primary cheese, and serve topped with fresh pico de gallo and avocado slices. It's all the flavors of a breakfast burrito without the mess of wrapping.
The French Onion Soup
Caramelize your onions until they're deep golden brown and almost jam-like. Replace the ham with gruyere cheese, and add a splash of white wine to the egg mixture. Top with crispy fried onions before serving. The result is a breakfast casserole that tastes like your favorite French onion soup had a baby with a Denver omelette.
Storing and Bringing It Back to Life
Fridge Storage
Let your casserole cool completely before storing — putting hot food in the fridge creates condensation that leads to soggy leftovers. Cut it into individual portions and store them in airtight containers. It'll keep for up to four days in the refrigerator, though honestly, it never lasts that long in my house. The flavors actually intensify overnight, making day-two leftovers something to look forward to rather than endure.
When storing, place a paper towel under the lid of your container to absorb any excess moisture. This simple trick keeps your leftovers from getting that sad, wet texture that makes even good food taste terrible. Change the paper towel daily if you're storing for multiple days.
Freezer Friendly
This casserole freezes beautifully, either as a whole pan or in individual portions. Wrap tightly in plastic wrap, then in aluminum foil, and label with the date. It'll keep for up to three months in the freezer. Pro tip: freeze individual portions on a baking sheet first, then transfer to freezer bags. This way, you can grab exactly how much you need without thawing the whole batch.
Thaw overnight in the refrigerator for best results, though you can microwave from frozen in a pinch. Just add a splash of water before reheating to restore moisture and prevent the edges from drying out.
Best Reheating Method
The oven is your friend here — 350°F for about 15 minutes if refrigerated, 25 minutes if frozen. Cover with foil for the first two-thirds of reheating, then remove the foil to let the top crisp up again. If you're in a hurry, the microwave works, but add a tablespoon of water and cover loosely to create steam that prevents rubbery eggs.
For individual portions, I actually love using my air fryer. Five minutes at 350°F restores that crispy top while keeping the inside moist and tender. It's almost like having fresh-baked casserole all over again, and it's faster than waiting for the oven to heat up.