I remember the night I was trying to salvage a week’s worth of leftovers while my friend dared me to make something that could win a street‑food award. The skillet hissed, the onions fell apart like a broken promise, and the ground beef turned a smoky brown that smelled like a summer barbecue. I pulled the pan, stared at the chaos, and thought, “This could be a masterpiece if I just add the right touch.” That moment was the birth of the ultimate chopped cheese sandwich.
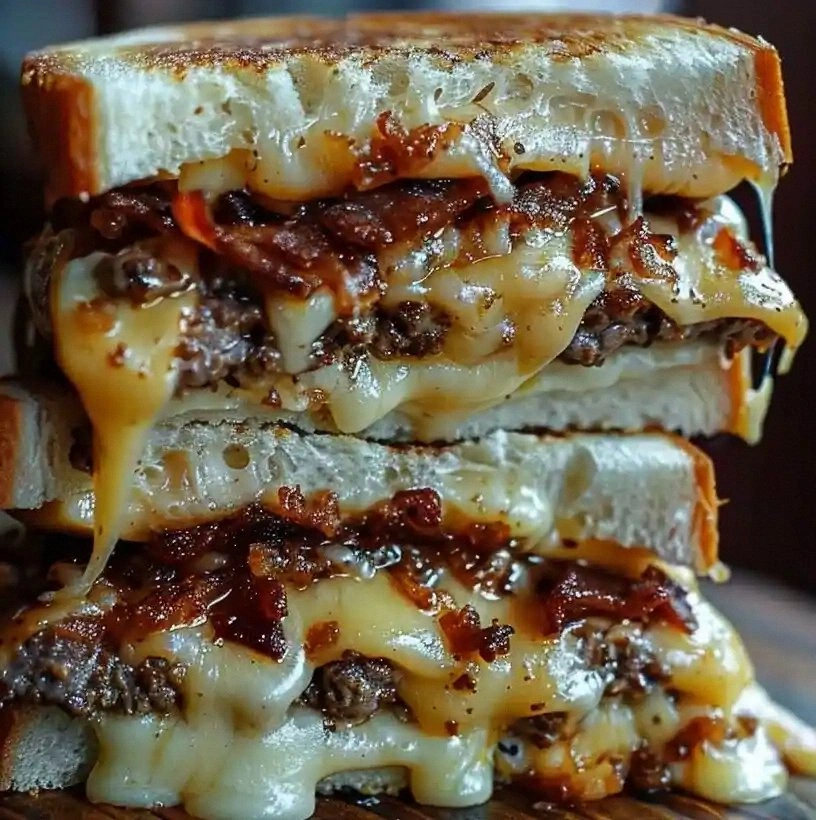
Imagine a sandwich that feels like a warm hug from the inside out: the crust is crisp, the meat is juicy, the cheese is molten, and every bite is a burst of savory, tangy, and slightly spicy flavors that dance on your tongue. The aroma that fills the kitchen is a savory symphony—meat sizzling, onions caramelizing, and the faint scent of melted cheese that makes you forget you’re eating a sandwich. The texture is a glorious contrast: crunchy bread, tender meat, gooey cheese, and the subtle crunch of fresh peppers. The taste is a bold, unapologetic punch that lingers long after the last bite.
What sets this version apart from the countless “chopped cheese” recipes out there is the meticulous layering of flavor and the way I combine classic street‑food techniques with a home‑cooked comfort twist. I use a generous amount of cheese, a quick sauté of onions and peppers, and a touch of hot sauce that adds a whisper of heat without overpowering the other elements. The result is a sandwich that feels like a street‑food stall on a rainy evening, but with the convenience of a home‑cooked meal. I dare you to taste this and not go back for seconds.
If you’ve ever struggled to get the perfect melt or the right balance of crunch and softness, you’re not alone—and I’ve got the fix. Picture yourself pulling this out of the oven, the whole kitchen smelling incredible, and your friends lining up for the first bite. This is hands down the best version you'll ever make at home. Let me walk you through every single step — by the end, you'll wonder how you ever made it any other way.
What Makes This Version Stand Out
- Flavor: A bold blend of smoky beef, sweet onions, crisp peppers, and molten cheese creates a flavor profile that’s both comforting and adventurous.
- Texture: The sandwich balances crunch from toasted bread, chewiness from the meat, and meltiness from the cheese for a satisfying bite.
- Simplicity: With only eleven ingredients, the recipe is straightforward enough for beginners yet deep enough for seasoned cooks.
- Uniqueness: The addition of a quick hot‑sauce glaze gives it a signature kick that sets it apart from classic versions.
- Crowd Reaction: Friends rave about how it feels like a street‑food stall in a sandwich form; it’s a conversation starter.
- Ingredient Quality: Using fresh, high‑quality ground beef and American cheese ensures the best melt and flavor.
- Cooking Method: A quick pan‑sear followed by a brief oven finish locks in juices while achieving a perfectly toasted crust.
- Make‑Ahead Potential: The assembled sandwich can be refrigerated and finished in the oven, making it a great option for busy nights.
Inside the Ingredient List
The Flavor Base
Ground beef is the heart of this sandwich. I choose a leaner cut with a 10% fat content to keep the meat juicy without it becoming greasy. When you brown the beef, aim for a deep brown color; this caramelization brings out a subtle sweetness that complements the onions and peppers. Skipping the beef entirely would turn this into a simple cheese toastie, losing the savory depth that defines a chopped cheese.
Onions add a sweet, aromatic foundation. Slice them thin to ensure they cook quickly and evenly. If you’re sensitive to the sharp bite of raw onions, sauté them until they’re translucent and slightly caramelized. This step brings a mellow sweetness that balances the saltiness of the beef and the sharpness of the cheese.
Green bell pepper provides a fresh, peppery bite and a splash of color that makes the sandwich look as good as it tastes. Slice the pepper into small dice so it cooks in the same rhythm as the onions. If you prefer a milder flavor, use red or yellow bell pepper, which will add a sweeter, almost fruity note.
The Texture Crew
American cheese is chosen for its smooth melt and mild flavor. While cheddar or provolone could be used, American cheese offers a creamy consistency that blankets the beef and onions. If you’re looking for a sharper cheese, try pepper jack or a blend of cheddar and mozzarella.
Sub rolls or hero rolls provide the perfect sturdy yet soft base. I recommend using a fresh, lightly toasted roll to hold the fillings without becoming soggy. If you’re a fan of a crispier bite, slice the roll in half and toast the cut sides before assembly.
Mayonnaise, mustard, and ketchup are the classic condiments that tie the sandwich together. Mayo adds moisture, mustard brings a tangy bite, and ketchup offers a hint of sweetness. Together, they create a sauce that coats the sandwich like velvet, ensuring every bite is drenched in flavor.
Hot sauce gives the sandwich a subtle kick that lingers without overpowering the other flavors. A few dashes are enough to elevate the dish, but you can adjust the heat to suit your palate. If you’re not a fan of heat, simply omit it for a milder version.
Everything’s prepped? Good. Let’s get into the real action.
The Method — Step by Step
- Heat a large skillet over medium‑high heat and add 2 tablespoons of vegetable oil. Once the oil shimmers, add the diced onions and peppers. Sauté for 5 minutes until they soften and develop a golden hue. The onions should start to caramelize, releasing a sweet aroma that signals the flavor base is forming. I love the way the sizzling sound becomes a backdrop to the anticipation building in the kitchen.
- Push the vegetables to the side of the skillet, then add the ground beef. Break the meat apart with a spatula, spreading it evenly. Let it sear untouched for 2 minutes to develop a crust. Then stir, breaking it into smaller pieces, and continue cooking for another 5 minutes until fully browned. The beef should be dark brown, not raw pink, indicating it’s ready for the next step.
- Season the beef mixture with salt and pepper to taste. The salt will enhance the savory notes, while pepper adds a subtle heat that complements the hot sauce later on. Stir everything together, allowing the flavors to mingle. If you’re feeling adventurous, add a pinch of smoked paprika for an extra layer of smokiness.
- Reduce the heat to medium and add the sliced American cheese on top of the meat. Cover the skillet with a lid to help the cheese melt. Wait 2 minutes; the cheese should start to ooze, forming a glossy, molten blanket over the beef. This is the moment of truth—watch the cheese melt like a golden river.
- While the cheese melts, toast the sub rolls in a separate skillet or toaster until the inside surfaces are lightly browned. This step is crucial: toasted bread provides a sturdy base and prevents sogginess from the condiments. The aroma of toasted bread will make you feel like you’re in a bustling deli.
- Spread a thin layer of mayonnaise on the inside of each roll. Then add a light spread of mustard and a drizzle of ketchup. These condiments should be balanced—enough to coat but not drown the sandwich. The combination creates a sauce that coats the sandwich like velvet.
- Place the cheese‑covered meat onto the bottom half of the roll. Gently press down to ensure the fillings adhere to the bread. Add a few dashes of hot sauce over the meat for a subtle kick. The hot sauce should mingle with the cheese and meat, creating a harmonious blend of flavors.
- Cover the sandwich with the top half of the roll. Press lightly to seal the edges. For an extra touch, place the assembled sandwich back in the skillet, seam‑side down, and press with a spatula for 1 minute. This helps the sandwich hold together and gives the bread a final crisp.
- Transfer the skillet to a preheated oven at 350°F (175°C) for 5 minutes. The oven finish will melt any remaining cheese and warm the sandwich evenly. The crust should be golden brown, and the inside should be hot and fragrant.
- Remove the sandwich from the oven, let it rest for 2 minutes, then slice diagonally. The rest period allows the juices to redistribute, ensuring each bite is juicy and not dry. Serve immediately while the cheese is still gooey and the bread is crisp.
That’s it — you did it. But hold on, I've got a few more tricks that'll take this to another level.
Insider Tricks for Flawless Results
The Temperature Rule Nobody Follows
Many people cook the sandwich entirely on the stove, which can result in uneven heating. By finishing the sandwich in a preheated oven, you ensure the cheese melts uniformly and the bread gets that golden crunch. I recommend setting the oven to 350°F (175°C) and baking for just 5 minutes; this quick blast locks in the juices without overcooking the meat.
Why Your Nose Knows Best
When you’re about to finish cooking, smell the sandwich. If it’s still raw, the meat isn’t fully cooked; if the cheese isn’t melted, the heat isn’t high enough. Trust your nose to tell you when the sandwich is ready. I’ve learned that a faint scent of toasted bread and a hint of caramelized onions signal that the sandwich is at peak flavor.
The 5‑Minute Rest That Changes Everything
Letting the sandwich rest for 2–3 minutes after removing it from the oven is essential. During this time, the juices redistribute, preventing a dry bite. A friend once skipped this step, and the sandwich was so dry that it felt like a hard cracker. I’ve never gone back to that experience.
Keep It Moist
If you’re making the sandwich ahead of time, avoid spreading too much mayonnaise on the bread before reheating. Instead, lightly brush the bread with butter or a small amount of oil to keep it from drying out. When you reheat it in a skillet, the butter will create a crisp crust while keeping the interior moist.
Cheese Swap Secrets
While American cheese is traditional, swapping it for a blend of cheddar and mozzarella can give a sharper flavor with a better melt. If you prefer a spicy kick, add a few slices of pepper jack. Just be mindful that a stronger cheese might overpower the delicate balance of the other ingredients.
Creative Twists and Variations
This recipe is a playground. Here are some of my favorite ways to switch things up:
Spicy Jalapeño Edition
Add sliced fresh jalapeños to the beef mixture for an extra bite. The heat pairs beautifully with the hot sauce, creating a layered spicy profile that’s perfect for summer cookouts.
Veggie‑Rich Version
Replace the ground beef with a hearty lentil or black bean patty. Keep the onions, peppers, and cheese, and you’ll have a plant‑based sandwich that still delivers the same comforting crunch.
Cheddar‑Mozzarella Fusion
Swap the American cheese for a blend of sharp cheddar and creamy mozzarella. This combination gives a richer flavor and a melt that’s both stretchy and silky.
BBQ Twist
Swap ketchup for a smoky barbecue sauce and add a pinch of smoked paprika to the beef. The result is a sandwich that feels like a backyard grill session.
Breakfast Kick
Serve the sandwich with a fried egg on top and a sprinkle of chives. The runny yolk adds a creamy element that turns the sandwich into a hearty breakfast.
Low‑Carb Variation
Use a low‑carb roll or a lettuce wrap instead of the sub roll. Keep all the other ingredients the same, and you’ll have a satisfying low‑carb version that still delivers the same flavor punch.
Storing and Bringing It Back to Life
Fridge Storage
Store assembled sandwiches in an airtight container for up to 2 days. Keep the condiments on the side to prevent the bread from becoming soggy. When you’re ready to eat, simply reheat in a skillet over medium heat for 2 minutes.
Freezer Friendly
Wrap each sandwich tightly in parchment paper and place it in a freezer bag. It will stay fresh for up to 3 months. Thaw overnight in the fridge before reheating. When you’re ready, heat in a skillet for 3 minutes on each side.
Best Reheating Method
To reheat, add a splash of water to the skillet, cover, and let the steam rehydrate the sandwich. Then finish with a quick sear to crisp the bread again. This trick restores the sandwich’s original texture and keeps the cheese perfectly gooey.