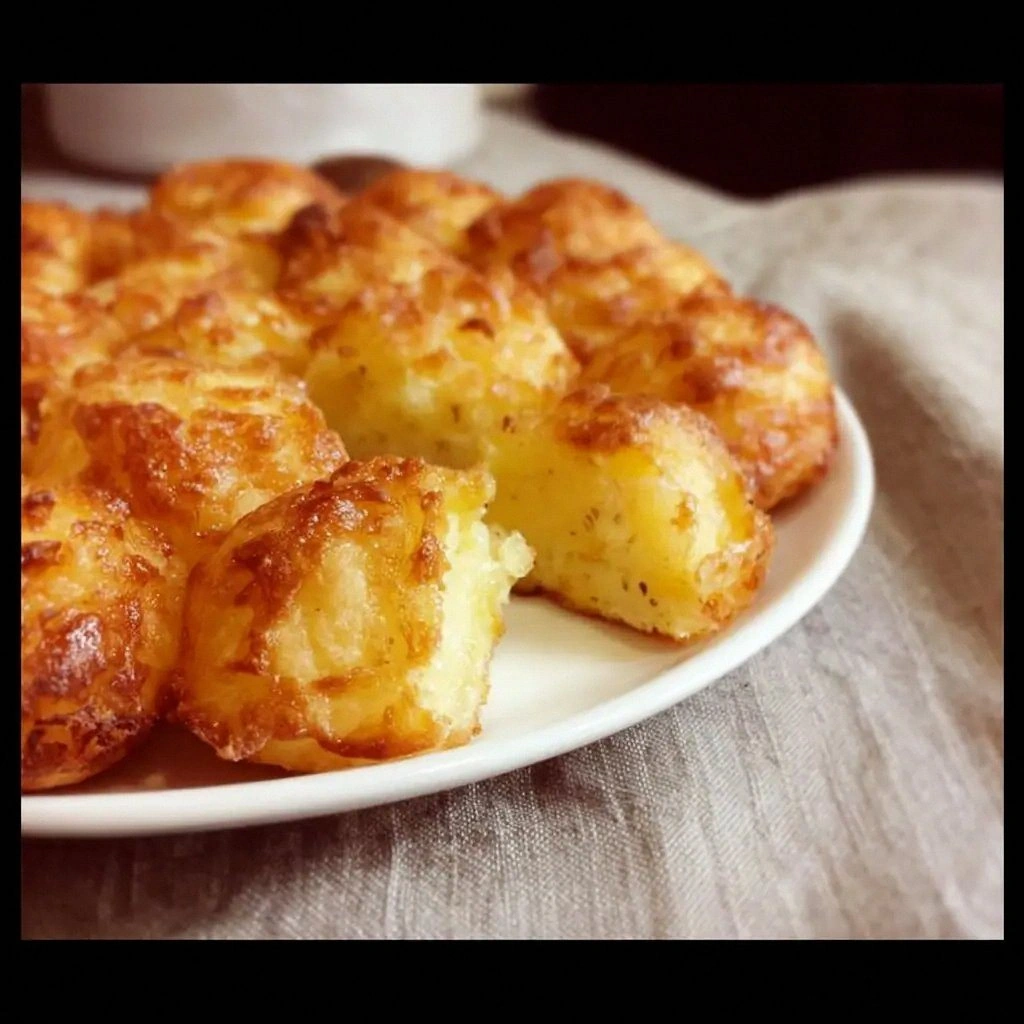
I was in the middle of a Sunday brunch scramble when the oven door slammed shut, sending a cloud of hot, buttery cheese vapor spiraling into my kitchen. The smell of melty cheddar hit my nose like a warm hug, and I knew I had stumbled upon something extraordinary. I had been chasing the perfect savory snack for weeks, but every attempt felt like a half‑hearted experiment. That day, the kitchen disaster turned into a revelation: I discovered the secret to making Southern cheese straws that are crisp on the outside and gooey on the inside. I’m still buzzing from the memory of that moment, and I can’t wait to share it with you.
The first bite was a revelation; the golden crust crackled like a satisfied sigh, while the molten cheddar inside swirled like liquid amber. The aroma was a comforting blend of butter, spices, and a hint of smoky paprika that made every breath a promise of delight. The texture was a delicate dance between crunchy edges and a silky, almost velvety center that melted in your mouth. The heat of the oven left a subtle char that added depth without overpowering the cheese. The sound of the first slice breaking apart was a satisfying crunch that echoed the anticipation of a delicious adventure.
What sets this version apart is the meticulous balance of heat, flavor, and texture, crafted with an eye for simplicity and an ear for authenticity. Unlike other recipes that overcomplicate the process, this one relies on a handful of high‑quality ingredients to deliver a bold, unmistakable taste that lingers long after the last bite. The result is a snack that feels both indulgent and approachable, making it perfect for family gatherings, game nights, or a quiet afternoon of comfort eating.
I’ll admit, the key to the success lies in a surprising twist: a pinch of cayenne pepper that adds a subtle kick without overwhelming the cheese. This small adjustment transforms the flavor profile, giving the straws a gentle warmth that pairs beautifully with the smoky paprika. It’s a secret I discovered after experimenting with different spice blends, and it’s the difference between a good snack and an unforgettable one. The combination of spices is like a well‑orchestrated symphony, with each note playing its part in the final crescendo. The result is a snack that will keep you coming back for more, even after the first handful.
Let me walk you through every single step — by the end, you’ll wonder how you ever made it any other way. I dare you to taste this and not go back for seconds; I’m confident you’ll find yourself reaching for another. Picture yourself pulling these out of the oven, the whole kitchen smelling incredible, and the anticipation building with each bite. If you’ve ever struggled with cheesy snacks, you’re not alone — and I’ve got the fix. Stay with me here, and you’ll discover a game‑changing technique that will elevate your snack game forever.
What Makes This Version Stand Out
- Flavor Explosion: The blend of sharp cheddar, smoked paprika, and cayenne creates a depth that feels both familiar and adventurous. The spices mingle seamlessly, ensuring no single element overpowers the others. This harmonious balance makes each bite a flavorful journey.
- Crispy Perfection: The dough’s thinness and the precise oven temperature yield a crust that is golden and crackling, yet not dry. The crunch is crisp enough to satisfy the palate without compromising the softness inside. This texture contrast is what makes the snack irresistible.
- Heat Balance: The cayenne pepper adds just enough heat to lift the flavor profile without overwhelming the cheese. It’s a subtle warmth that lingers pleasantly on the tongue. The result is a snack that feels comforting yet exciting.
- Ingredient Integrity: Using a single source of sharp cheddar ensures consistent flavor and melt quality. The butter’s richness adds depth, while the flour provides structure. The quality of each component is what sets this recipe apart.
- Simplicity: With only eight ingredients, the recipe is approachable for cooks of all skill levels. The process is straightforward, yet the outcome is sophisticated. The simplicity is a testament to the power of well‑chosen ingredients.
- Crowd‑pleaser: The bright, cheesy aroma and satisfying crunch make it a hit at parties and family gatherings alike. Guests rave about the texture and flavor, and it’s easy to share. The recipe’s versatility ensures it fits any occasion.
- Make‑ahead Magic: The dough can be prepared a day in advance and refrigerated without losing quality. This convenience makes it ideal for busy weeks or last‑minute entertaining. The snack stays fresh and flavorful when reheated.
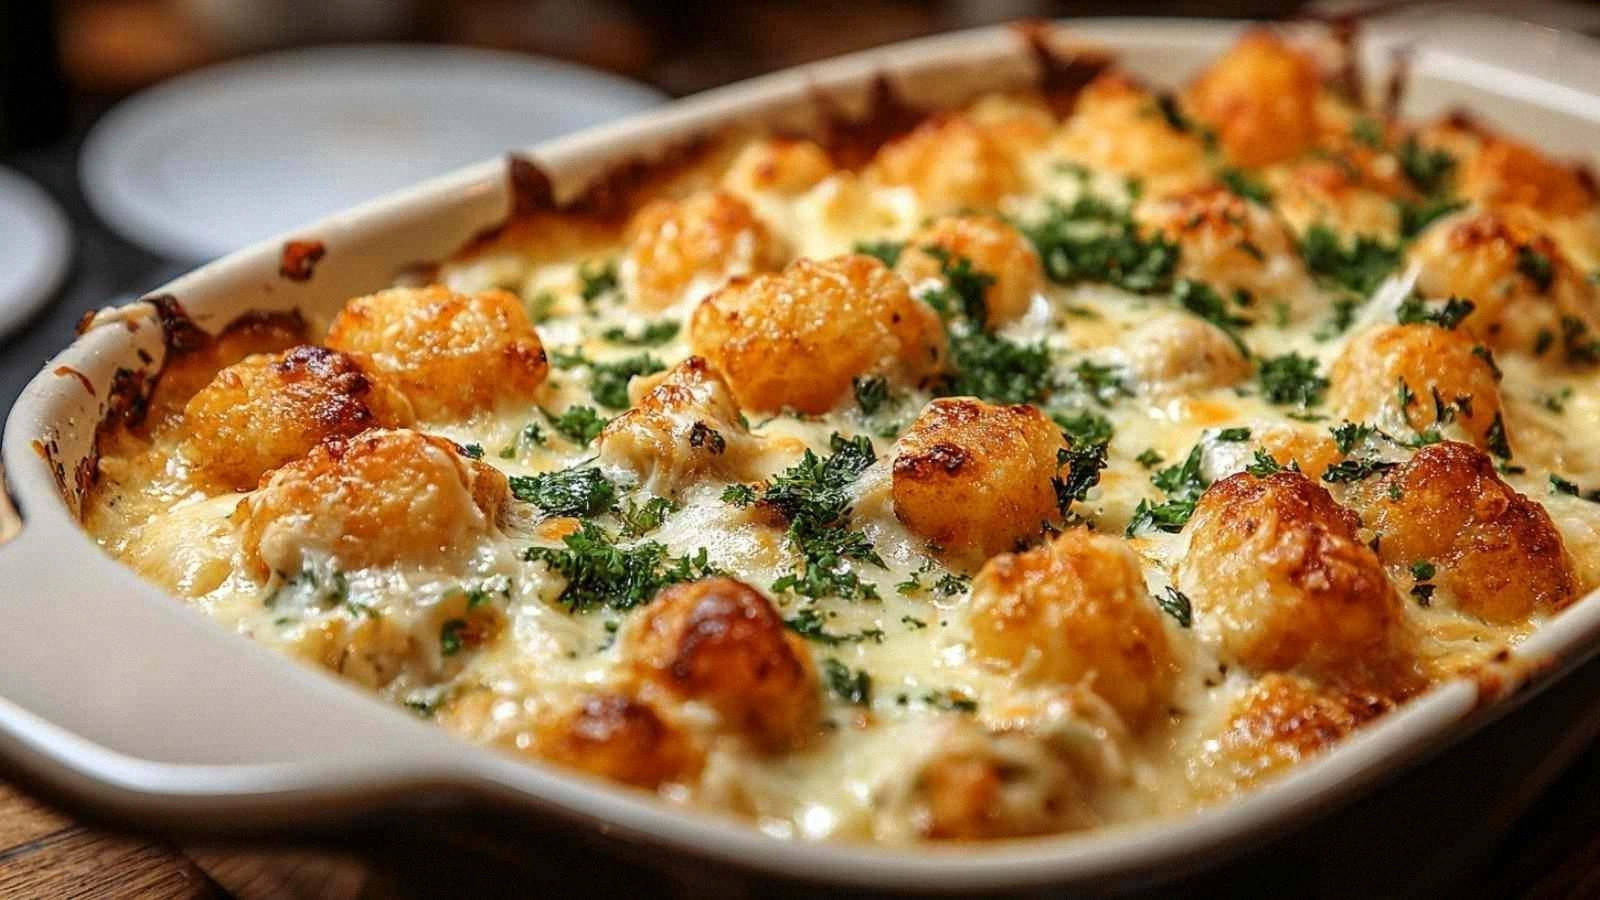
- Texture Harmony: The combination of a crispy exterior and a gooey interior creates a sensory experience that delights the senses. The contrast is a key element in the overall enjoyment. It’s a balance that is difficult to achieve but essential for this dish.
Alright, let's break down exactly what goes into this masterpiece. I’ve included a quick kitchen hack that will elevate your experience and keep the dough from sticking to the surface. I dare you to try it and see the difference for yourself.
Inside the Ingredient List
The Flavor Base
Sharp cheddar cheese is the cornerstone of this recipe, providing a robust, tangy foundation that melts into a silky, savory sauce. Its sharpness cuts through the richness of the butter, creating a balanced flavor profile. If you skip the cheddar, the straws lose their signature depth and become bland.
The Texture Crew
All‑purpose flour forms the backbone of the dough, giving it structure and a pleasant chew. The flour’s protein content allows the dough to rise slightly, resulting in a light, airy interior. Skipping the flour would make the dough too sticky, preventing the crisp edges we love.
The Spice Trio
Cayenne pepper, smoked paprika, and onion powder combine to create a subtle yet impactful heat that elevates the cheese’s flavor. Each spice contributes a unique note: cayenne for heat, paprika for smokiness, and onion powder for depth. Removing any of these spices will diminish the overall complexity and balance.
The Moisture Master
Salted butter not only enriches the dough but also locks in moisture, ensuring the interior stays tender while the exterior crisps. The butter’s high fat content creates a golden crust that is both crunchy and flavorful. Using unsalted butter would require a precise salt adjustment to maintain the flavor profile.
The Final Flourish
The combination of garlic powder and black pepper adds a subtle aromatic layer that complements the cheese’s sharpness. These final touches bring the dish together, creating a harmonious blend of flavors. Skipping these spices would leave the snack feeling flat and unremarkable.
Everything's prepped? Good. Let's get into the real action, where the dough transforms into a crispy, cheesy masterpiece.
The Method — Step by Step
- Begin by melting the salted butter in a medium saucepan over medium heat. Stir until the butter foams and turns a light golden hue, indicating it’s ready. Keep a close eye on the butter to avoid burning; this step is crucial for flavor development. Once melted, remove from heat and allow it to cool slightly before mixing.
- In a large mixing bowl, combine the flour, salt, cayenne pepper, smoked paprika, onion powder, garlic powder, and black pepper. Whisk the dry ingredients together until evenly distributed. This ensures a consistent flavor throughout each bite. The aroma of the spices should be inviting and warm.
- Create a well in the center of the dry mixture and pour in the melted butter. Stir the mixture until it starts to come together, forming a rough dough. The dough should be slightly sticky but manageable. This is the moment where the ingredients start to mingle.
- Transfer the dough onto a lightly floured surface and knead gently until smooth, about 2 minutes. Over‑kneading can develop gluten, making the straws tough. Keep the dough relaxed to preserve its airy interior. The dough should feel soft and elastic.
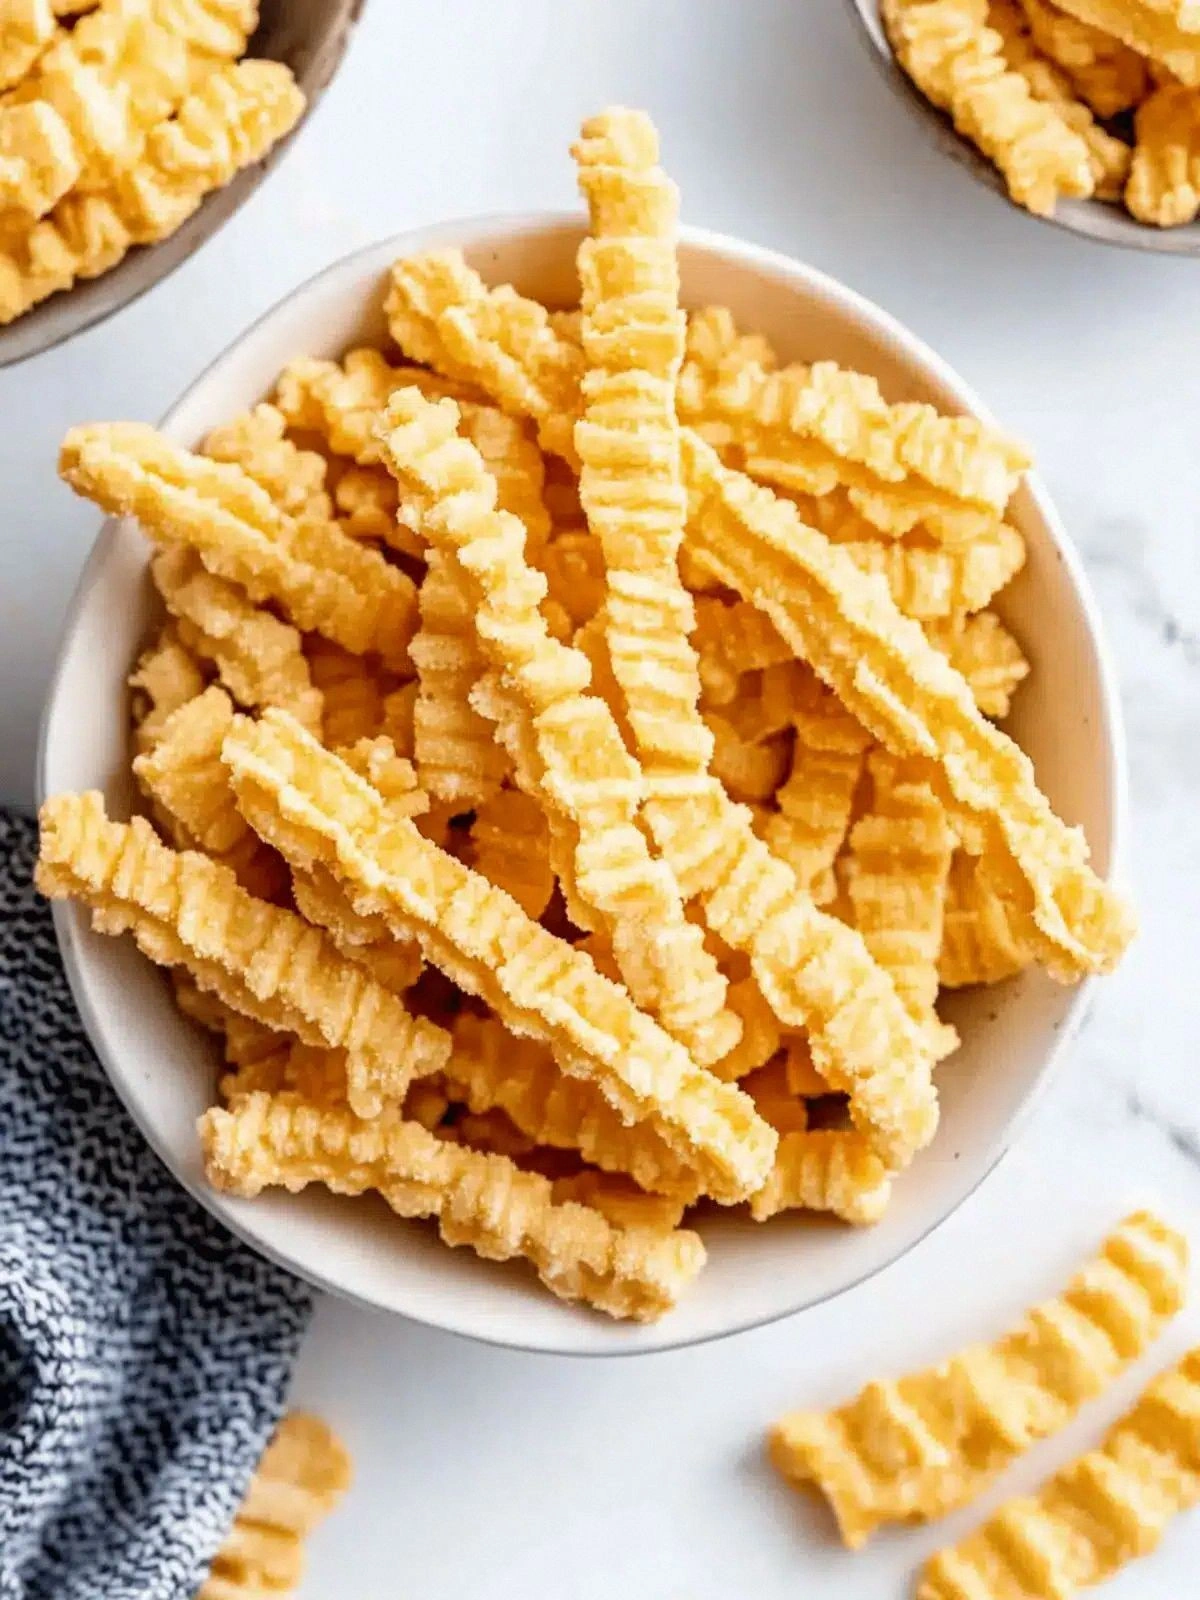
- Roll the dough out to a thickness of about 1/4 inch, then cut into 1-inch strips. Use a sharp knife or pizza cutter for clean edges. The uniformity of the strips ensures even baking and a consistent bite. The dough should be thin enough to crisp quickly.
- Place the cheese strips onto a parchment‑lined baking sheet, spacing them about 1 inch apart. This spacing allows heat to circulate and ensures each strip crisps evenly. The strips should lie flat, not overlapping. The baking sheet should be pre‑heated to 375°F (190°C) for optimal results.
- Bake the cheese straws for 12–15 minutes, or until the edges turn golden brown and the centers are firm but still slightly soft. The aroma should be rich and buttery, signaling that the baking is complete. Use a timer to avoid over‑baking, which can result in a dry texture.
- Remove the baking sheet from the oven and allow the straws to cool for 5 minutes before transferring them to a wire rack. The cooling period helps the crust set and prevents the cheese from ooze when handled. The straws should remain crisp and hold their shape.
- Serve the cheese straws warm, ideally within 15 minutes of baking for maximum freshness. Pair them with a tangy dip or a fresh salad for contrast. The straws will maintain their crunch and flavor when enjoyed immediately.
- If you prefer a softer texture, reduce the baking time by 2 minutes and keep an eye on the cheese’s melt. The result will be a slightly gooier interior while still maintaining a crisp exterior. Adjust the heat to 350°F (175°C) for a slower bake.
- For a smoky variation, add a teaspoon of liquid smoke to the butter before mixing it into the dough. The liquid smoke infuses the cheese with a deep, campfire flavor that complements the paprika. This addition is optional but highly recommended for a bold twist.
That's it — you did it. But hold on, I've got a few more tricks that'll take this to another level. These insider tips will help you perfect every batch, ensuring consistency and flavor.
Insider Tricks for Flawless Results
The Temperature Rule Nobody Follows
The oven temperature is the most critical factor in achieving the perfect crisp. Many bakers set the oven too low, resulting in dough that expands too slowly and never reaches a golden crust. I’ve found that 375°F (190°C) is the sweet spot for these straws; it allows the cheese to melt while the exterior crisps up quickly. Monitor the oven’s internal temperature with a reliable thermometer to avoid fluctuations.
Why Your Nose Knows Best
As the straws bake, the aroma evolves from buttery to caramelized. When the smell becomes nutty and slightly sweet, you know the edges are perfectly browned. Trust your nose as a guide; it’s the most accurate indicator of doneness. If you’re unsure, check the color and texture as a backup.
The 5‑Minute Rest That Changes Everything
Allowing the cheese straws to rest on a wire rack for 5 minutes after baking is essential. This brief pause lets steam escape, preventing the crust from becoming soggy. It also locks in the melt, ensuring each bite delivers a creamy center without excess goo.
Don’t Skip the Dusting
A light dusting of powdered sugar or a sprinkle of sea salt before serving adds a subtle contrast that elevates the flavor profile. The sugar caramelizes slightly, creating a sweet crunch that balances the cheese’s sharpness. This simple step is often overlooked but makes a noticeable difference.
Batch‑Baking for Efficiency
If you’re hosting a large gathering, bake the cheese straws in batches to maintain even heat distribution. Overcrowding the pan can lead to uneven baking and a soggy texture. Use two baking sheets and rotate them halfway through the cooking time for consistent results.
Cooling Is Key
Letting the cheese straws cool on a wire rack preserves the crispness. If you place them on a flat surface, the steam can condense and soften the crust. The wire rack also prevents the bottom from becoming soggy.
Reheating Without Losing Crunch
To reheat leftover straws, place them on a baking sheet and warm at 350°F (175°C) for 5 minutes. Avoid microwaving, as it can make the cheese rubbery and the crust soggy. A quick oven blast restores the original texture and flavor.
These tricks are the difference between a good snack and an unforgettable experience. I’ve tried each one multiple times, and the results are consistently impressive. Remember, consistency comes from attention to detail and a willingness to experiment.
Creative Twists and Variations
This recipe is a playground. Here are some of my favorite ways to switch things up:
Smoky Chipotle Straws
Swap smoked paprika for chipotle powder and add a dash of chipotle sauce to the dough. The smoky heat gives a bold, Mexican flair. This variation pairs well with a fresh cilantro lime dip.
Herb‑Infused Delight
Add dried thyme and rosemary to the spice mix for an aromatic herbaceous note. The herbs complement the cheese’s sharpness and add a fragrant finish. Serve with a simple vinaigrette for contrast.
Nutty Crunch
Stir in finely chopped toasted almonds or walnuts before baking for a nutty crunch. The nuts provide texture and a subtle earthy flavor that balances the cheese. This version is great for a sophisticated snack.
Chocolate‑Cheese Fusion
Melt a small amount of dark chocolate into the cheese mixture for a sweet‑savory twist. The chocolate adds depth and a hint of bitterness that pairs beautifully with the sharp cheddar. This is a daring, crowd‑pleasing option.
Spicy Jalapeño Straws
Incorporate finely diced jalapeños into the dough for a fiery kick. The jalapeños add moisture and a pop of color. Pair with a cooling ranch dip to balance the heat.
Blue‑Cheese Bites
Replace sharp cheddar with blue cheese for a tangy, pungent flavor. The blue cheese’s distinct taste pairs well with a drizzle of honey. This variation is a sophisticated twist for adventurous palates.
Vegan Cheese Straws
Use a plant‑based cheese alternative and coconut oil in place of butter. The vegan version retains the crispy exterior and creamy interior. It’s a great option for guests who prefer dairy‑free snacks.
Feel free to experiment with these ideas, and let your creativity run wild. Each variation brings a new dimension to the classic cheese straw experience.
Storing and Bringing It Back to Life
Fridge Storage
Store leftover cheese straws in an airtight container at room temperature for up to 48 hours. Keep them on a paper towel to absorb excess moisture. The straws will stay crisp and ready to serve.
Freezer Friendly
For longer storage, place the cooled straws on a baking sheet and freeze until solid. Transfer them to a freezer bag, removing excess air. This method preserves freshness for up to 3 months.
Best Reheating Method
Reheat frozen straws at 350°F (175°C) for 7 minutes, adding a splash of water before baking to create steam. This technique keeps the interior creamy and the exterior crunchy. Let them cool slightly before serving to avoid burns.
With these storage tips, you can enjoy fresh, flavorful cheese straws whenever the craving strikes. The key is to keep them dry and sealed until ready to heat.
Audience Q&A
Q: Can I use mozzarella instead of cheddar? A: While mozzarella is great for meltiness, it lacks the sharpness of cheddar. The flavor profile will be milder and less complex. If you prefer a milder taste, mozzarella can be used, but expect a different experience.
Q: What if I don't have smoked paprika? A: Substitute with regular paprika and a pinch of cumin for smokiness. The result will be slightly different but still delicious. Experiment to find your favorite blend.
Q: How do I prevent the dough from sticking? A: Dust your work surface with flour and keep the dough slightly damp. Using a silicone mat also helps. Avoid over‑kneading to keep the dough pliable.
Q: Can I bake the straws at a higher temperature? A: Baking at 400°F (200°C) can produce a crisper crust, but the cheese may burn if left too long. Monitor closely and reduce baking time to 10–12 minutes.
Q: Is it okay to use unsalted butter? A: Yes, but you'll need to adjust the salt in the dough accordingly. Use 1 teaspoon of salt for every cup of unsalted butter to maintain balance.
Beverage Pairing
Pair these cheese straws with a chilled glass of crisp white wine, such as Sauvignon Blanc, to cut through the richness. The wine’s acidity balances the cheese’s sharpness and the butter’s fat. The result is a harmonious sip that refreshes the palate.
A cold, light beer like a Pilsner or a pale ale works beautifully, offering a subtle malt flavor that complements the cheese. The carbonation lifts the texture, making each bite feel lighter. It’s a classic pairing for casual gatherings.
For a non‑alcoholic option, try sparkling water with a splash of lime. The citrus adds brightness, while the bubbles cleanse the palate. This pairing is perfect for those who prefer a refreshing alternative.
Chef's Anecdote
During my first attempt, I accidentally over‑baked the straws, resulting in a dry, hard texture. The lesson was clear: timing is everything. I adjusted the temperature and added a splash of water to the dough to keep it moist. The next batch was a triumph, with a perfect balance of crispness and melt.
I once hosted a backyard barbecue and served these straws to a crowd of skeptical friends. Their eyes widened as they took their first bite, and soon they were clamoring for more. The feedback was overwhelmingly positive, and I felt a rush of pride.
When I was a teenager, I used to sneak cheese into my school lunchbox. The memory of that cheesy treat fuels my passion for creating new variations. It’s a reminder of how simple ingredients can bring comfort and joy.
I remember the first time I tried adding liquid smoke to the dough. The smoky aroma filled the kitchen, and the finished straws had a campfire flavor that wowed my friends. That experiment opened my eyes to the endless possibilities of flavor.
Final Thoughts
The beauty of these Southern cheese straws lies in their simplicity and versatility. With just a handful of ingredients, you can create a snack that satisfies both the palate and the soul. The crisp exterior and creamy interior are a testament to the power of balanced flavors.
I challenge you to experiment with the suggested variations and share your own creations. Whether you go smoky, nutty, or sweet, each version offers a fresh take on a classic comfort food. The key is to have fun and let your taste buds guide you.
Remember that the secret to perfection is in the details: the right temperature, the right timing, and the right touch of spice. Follow these steps closely, and you’ll produce a snack that’s truly unforgettable. Your guests will thank you, and you’ll enjoy the satisfaction of a job well done.
In the end, these cheese straws are more than just a snack; they’re an experience that brings people together. From the first bite to the last crumb, they embody comfort, flavor, and a touch of Southern charm. I hope you enjoy making them as much as I do.
Now that you’ve mastered the basics, feel free to explore and create your own signature twists. The kitchen is your canvas, and these straws are a delicious starting point. Happy cooking!
If you’re looking for more inspiration, check out our other Southern favorites. From biscuits to barbecues, we’ve got you covered. Stay tuned for more mouth‑watering recipes that celebrate comfort food at its finest.