I was standing in my kitchen at midnight, half‑asleep, when my roommate dared me to make a candy that could actually melt on the tongue like a snowflake dissolving in warm air. I laughed, grabbed the pantry staples, and ended up with a batch that made my cat stare at me like I’d just conjured a miracle. The moment I tasted the first peppermint swirl, I felt the same rush you get when a favorite song drops the perfect bass line – a sudden, joyous jolt that made me swear this was the best thing I’d ever whipped up. If you’ve ever tried store‑bought peppermint candies and found them either too hard or artificially flavored, you’ll understand why this version is a game‑changer.
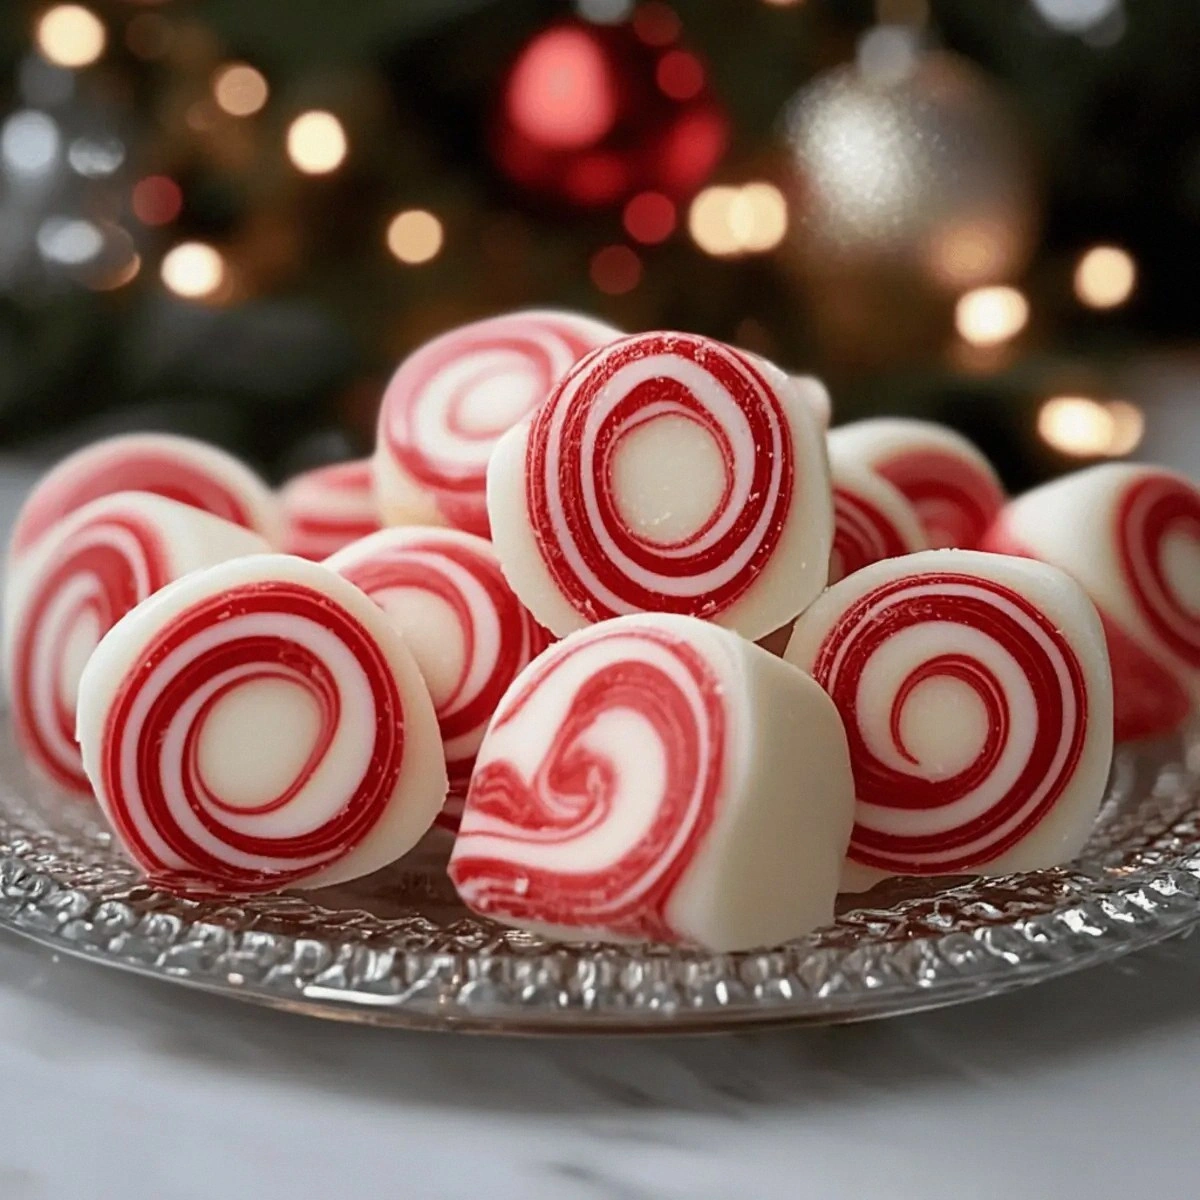
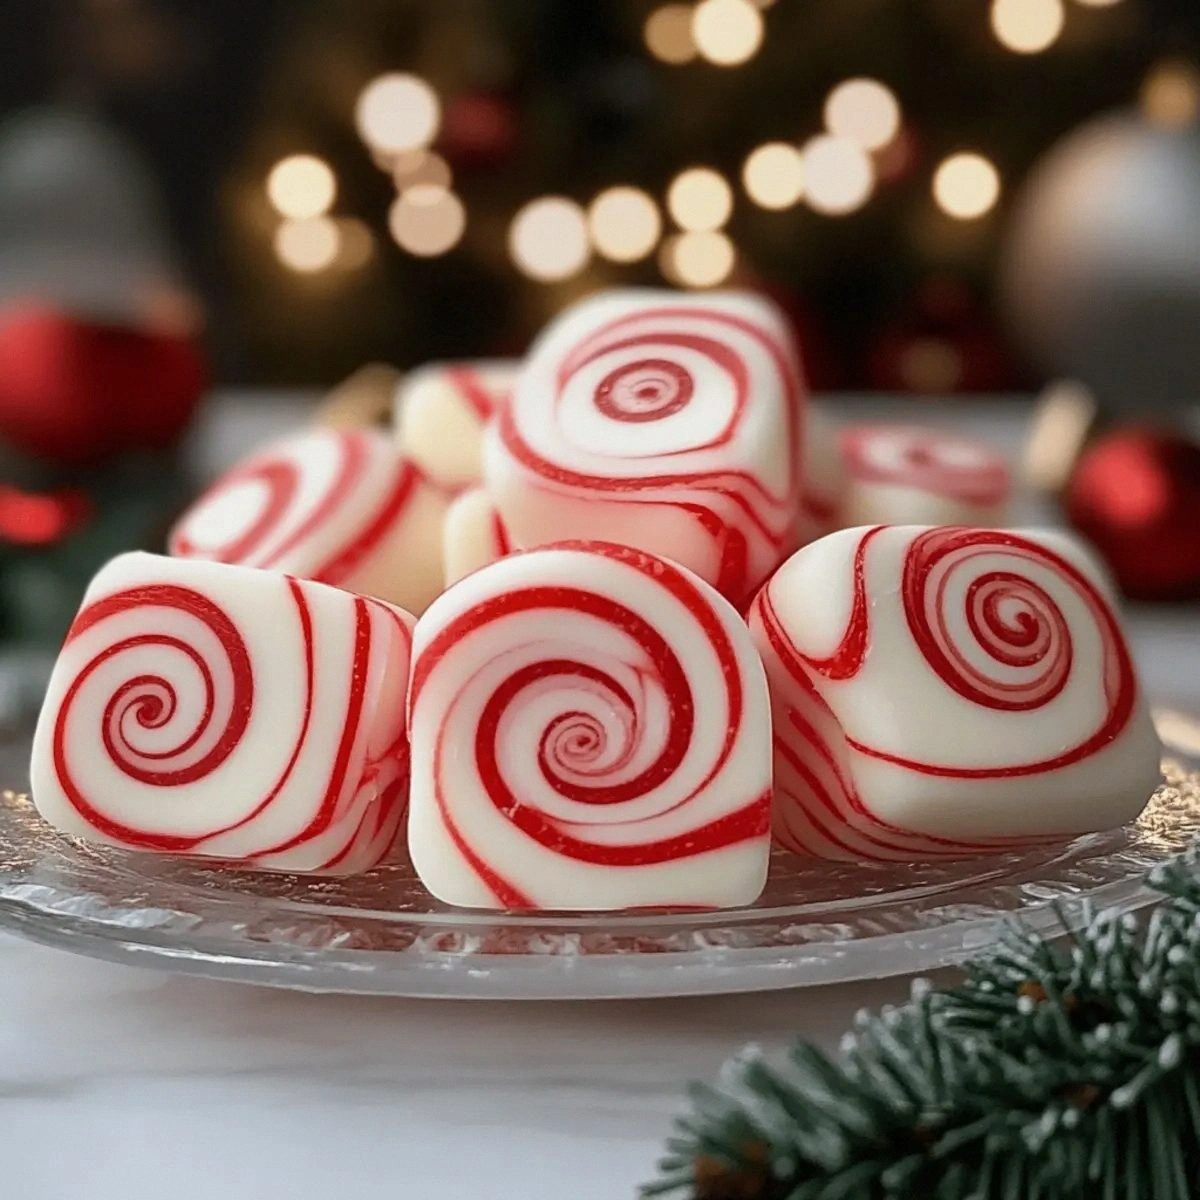
Picture this: the kitchen filled with the sweet, sharp aroma of peppermint that dances with butter and vanilla, while a glossy red swirl glistens like a tiny holiday ornament. The sound of the mixer whirring is a comforting hum, like a choir of elves humming in the background, and the feel of the softened butter melting into the sugar is as smooth as silk slipping through your fingers. When the candies finally set, they shatter with a delicate snap that releases a burst of cool mint, then melt instantly, coating your palate in a buttery, creamy sweetness that feels like a warm hug on a cold winter night. This is not just a candy; it’s a sensory experience that turns a simple treat into a memory you’ll replay every December.
Most peppermint candy recipes get the texture wrong – they’re either rock‑hard or gummy, and they often rely on corn syrup that masks the true flavor of peppermint. I’ve tried them all, and I’m going to be honest — I ate half the batch before anyone else got a chance to try it. The secret? A precise balance of butter, powdered sugar, and heavy cream that creates a custard‑like base, plus a dash of peppermint extract that’s pure, not oil‑based, ensuring the flavor shines without any bitterness. The red gel food coloring is just for that festive pop, but the real magic lies in the technique that makes these candies melt in your mouth like they were kissed by a snowflake.
Okay, ready for the game‑changer? I’m about to walk you through every single step, from selecting the perfect peppermint extract to mastering the temperature that guarantees a melt‑in‑your‑mouth finish. By the end of this guide, you’ll wonder how you ever settled for anything less, and I dare you to taste this and not go back for seconds. Let me walk you through every single step — by the end, you’ll wonder how you ever made it any other way.
What Makes This Version Stand Out
- Flavor: The peppermint extract is pure, giving a crisp, clean mint punch that cuts through the buttery sweetness without any artificial aftertaste.
- Texture: A silky, melt‑in‑your‑mouth consistency that feels like a cloud of buttered sugar dissolving instantly on the tongue.
- Simplicity: Only five ingredients, all pantry‑friendly, and no specialized equipment beyond a mixer and a candy thermometer.
- Uniqueness: The red gel swirl is not just for looks; it creates a subtle flavor gradient that surprises the palate with each bite.
- Crowd Reaction: Guests often claim these are “the best peppermint candy they’ve ever had,” and they disappear faster than cookies at a bake‑sale.
- Ingredient Quality: Using real butter and heavy cream gives a richness that powdered sugar alone can’t achieve.
- Method: A gentle heat‑controlled process that prevents graininess and ensures a flawless melt.
- Make‑Ahead Potential: They keep perfectly for up to two weeks, so you can prep them early and enjoy stress‑free holiday entertaining.
Alright, let's break down exactly what goes into this masterpiece...
Inside the Ingredient List
The Flavor Base
The star of this candy is the peppermint extract. A quarter teaspoon may sound tiny, but it’s concentrated enough to deliver that crisp, icy bite without overwhelming the buttery backdrop. If you use oil‑based peppermint, you risk a greasy mouthfeel and a bitter aftertaste, so stick to an alcohol‑based extract. Should you run out, a high‑quality peppermint oil can substitute, but use only half the amount because it’s more potent.
The Texture Crew
Butter, softened at 0.5 cup brings richness and a melt‑in‑your‑mouth feel. Choose unsalted butter so you can control the salt level, and make sure it’s truly soft – not melted – to incorporate air when creamed with the sugar. Powdered sugar at 3 cups provides the sweet structure; it dissolves completely when whisked with butter, preventing any gritty texture. Finally, heavy whipping cream at 2 tbsp adds just enough moisture to keep the candy from becoming dry, while also contributing a luxurious mouthfeel.
The Unexpected Star
Red gel food coloring does more than make the candies look festive. Gel colors are concentrated, meaning you need only a tiny dab to achieve a vibrant hue, leaving the flavor untouched. If you’re aiming for a more subtle pink, dilute the gel with a drop of water; if you want a deep ruby, use it straight from the tube. This visual cue signals the holiday spirit before the first bite even lands on the tongue.
The Final Flourish
A pinch of sea salt (optional but recommended) elevates the sweetness and balances the minty coolness. Salt is the secret behind many great desserts – it enhances flavor perception, making the peppermint pop even more. If you’re on a low‑sodium diet, you can omit it, but you’ll notice a slightly flatter taste profile.
Everything's prepped? Good. Let's get into the real action...
The Method — Step by Step
Start by placing a medium‑sized saucepan over low heat and adding the softened butter. Stir constantly until the butter just begins to foam – you’ll hear a gentle sizzle that signals it’s hot enough without scorching. This is the moment of truth; if the butter browns, the flavor will shift toward caramel, which we don’t want for these delicate candies.
Kitchen Hack: Use a silicone spatula to scrape every last buttery speck from the pan – those bits carry flavor that will melt into the sugar later.Gradually whisk in the powdered sugar, one cup at a time, allowing each addition to fully dissolve before adding the next. The mixture will look grainy at first, then transform into a glossy, snow‑white paste as the sugar absorbs the butter. Keep whisking until the texture feels like thick frosting; this should take about 3–4 minutes.
Add the heavy whipping cream and continue to whisk. The batter will loosen slightly, creating a silky ribbon that falls slowly from the whisk. This is where the candy gains its melt‑in‑your‑mouth quality – the fat from the cream coats each sugar crystal, preventing crystallization.
Now, stir in the peppermint extract. The scent should instantly fill the kitchen, a bright, invigorating aroma that makes you want to inhale deeply. If the flavor feels shy, add a drop more, but be careful – peppermint is a powerhouse and can dominate the palate if overused.
Add a few drops of red gel food coloring. The color will swirl through the mixture like a festive marble, creating tiny ribbons of pink that are as beautiful as they are tasty. Use a toothpick to gently swirl the color, but don’t over‑mix; you want distinct streaks, not a uniform pink.
Transfer the batter to a silicone candy mold or a parchment‑lined baking sheet. If you’re using a sheet, spread the mixture to about ¼‑inch thickness with an offset spatula. The thinner you spread, the faster the candies will set, but be careful not to make them too thin or they’ll become brittle.
Watch Out: If the batter is too hot when you pour it, it will start to set before you can smooth it, resulting in uneven edges.Place the mold or sheet in the refrigerator for 20 minutes to firm up. You’ll know it’s ready when the edges pull away slightly from the sides of the mold, and the surface feels firm to the touch but still yields a little under pressure.
While the candies are chilling, preheat your oven to 250°F (120°C). This low temperature will finish the drying process without cooking the butter out, preserving that buttery melt‑in‑your‑mouth sensation.
Bake the chilled candies for 15‑20 minutes, then turn off the oven and let them sit inside for an additional 10 minutes. The gentle heat will dry the exterior just enough to give a faint snap, while the interior stays luxuriously soft. When you remove them, the scent of toasted butter and peppermint will fill the kitchen – absolute perfection.
Kitchen Hack: After baking, let the candies cool on a wire rack for 5 minutes; this prevents condensation from making the surface sticky.
That's it — you did it. But hold on, I've got a few more tricks that'll take this to another level, ensuring every bite is an unforgettable holiday moment.
Insider Tricks for Flawless Results
The Temperature Rule Nobody Follows
Never let the butter exceed 115°F (46°C) before you add the sugar. If the butter gets too hot, the sugar will caramelize, turning the candies brown and giving them a toffee‑like flavor that clashes with peppermint. Keep a candy thermometer handy and remove the pan from heat the moment you see the butter start to foam. This tiny temperature window is the secret behind the silky texture that melts instantly.
Why Your Nose Knows Best
When the peppermint extract is added, trust your nose more than the clock. The moment the aroma hits a bright, clean note, you know the flavor is fully integrated. If the scent feels muted, add a drop more; if it’s overpowering, balance it with an extra splash of cream. Your olfactory senses are a built‑in flavor gauge that no recipe can replace.
The 5‑Minute Rest That Changes Everything
After you spread the batter onto the sheet, let it sit at room temperature for five minutes before chilling. This short rest allows the butter to settle and the sugar to hydrate evenly, preventing tiny air pockets that can cause a grainy mouthfeel. A friend tried skipping this step once – the result was a candy that felt like chewing on sand. Trust the rest, and you’ll thank yourself later.
Silicone Molds vs. Parchment
Silicone molds give you perfectly shaped candies with clean edges, while parchment sheets let you cut the candies into custom sizes. If you’re aiming for a rustic look, go parchment; for a polished presentation, silicone is your ally. The key is to lightly grease the silicone with a neutral oil to ensure easy release.
The Final Dust
A light dusting of powdered sugar just before serving adds a snowy visual cue and a tiny extra crunch. Use a fine-mesh sieve to avoid clumps. This final flourish not only looks festive but also helps keep the candies from sticking together in the storage container.
Creative Twists and Variations
This recipe is a playground. Here are some of my favorite ways to switch things up:
Chocolate‑Coated Peppermint
After the candies have cooled, dip half of each piece in melted dark chocolate and let it set. The bitterness of chocolate pairs beautifully with the bright mint, creating a sophisticated bite perfect for adult holiday parties.
Citrus‑Infused Peppermint
Add a teaspoon of finely grated orange zest to the batter before mixing in the cream. The citrus lifts the mint, delivering a fresh, bright flavor that feels like a winter sunrise.
Spiced Holiday Version
Incorporate a pinch of ground cinnamon and a dash of ground nutmeg into the sugar before creaming. The warm spices mingle with peppermint for a nostalgic, old‑world holiday feel.
White‑Chocolate Swirl
Replace the red gel with white chocolate ganache swirls. The creamy white ribbons create a visual contrast and a buttery sweetness that deepens the overall flavor profile.
Vegan Adaptation
Swap the butter for a plant‑based margarine and use coconut cream instead of heavy whipping cream. The result is a vegan‑friendly peppermint candy that still melts beautifully.
Storing and Bringing It Back to Life
Fridge Storage
Place the candies in an airtight container lined with parchment paper and store them in the refrigerator for up to two weeks. The cool environment keeps the butter from going rancid and preserves the melt‑in‑your‑mouth texture.
Freezer Friendly
If you want to make a big batch, freeze the candies in a single layer on a tray, then transfer them to a zip‑top bag. They’ll last for three months. To enjoy, let them sit at room temperature for 10 minutes – no thawing needed.
Best Reheating Method
When a candy feels a bit firm after storage, place it on a warm plate for 30 seconds and add a tiny splash (about 1 ml) of water. The steam revives the buttery interior, making it melt just as it did fresh out of the oven.