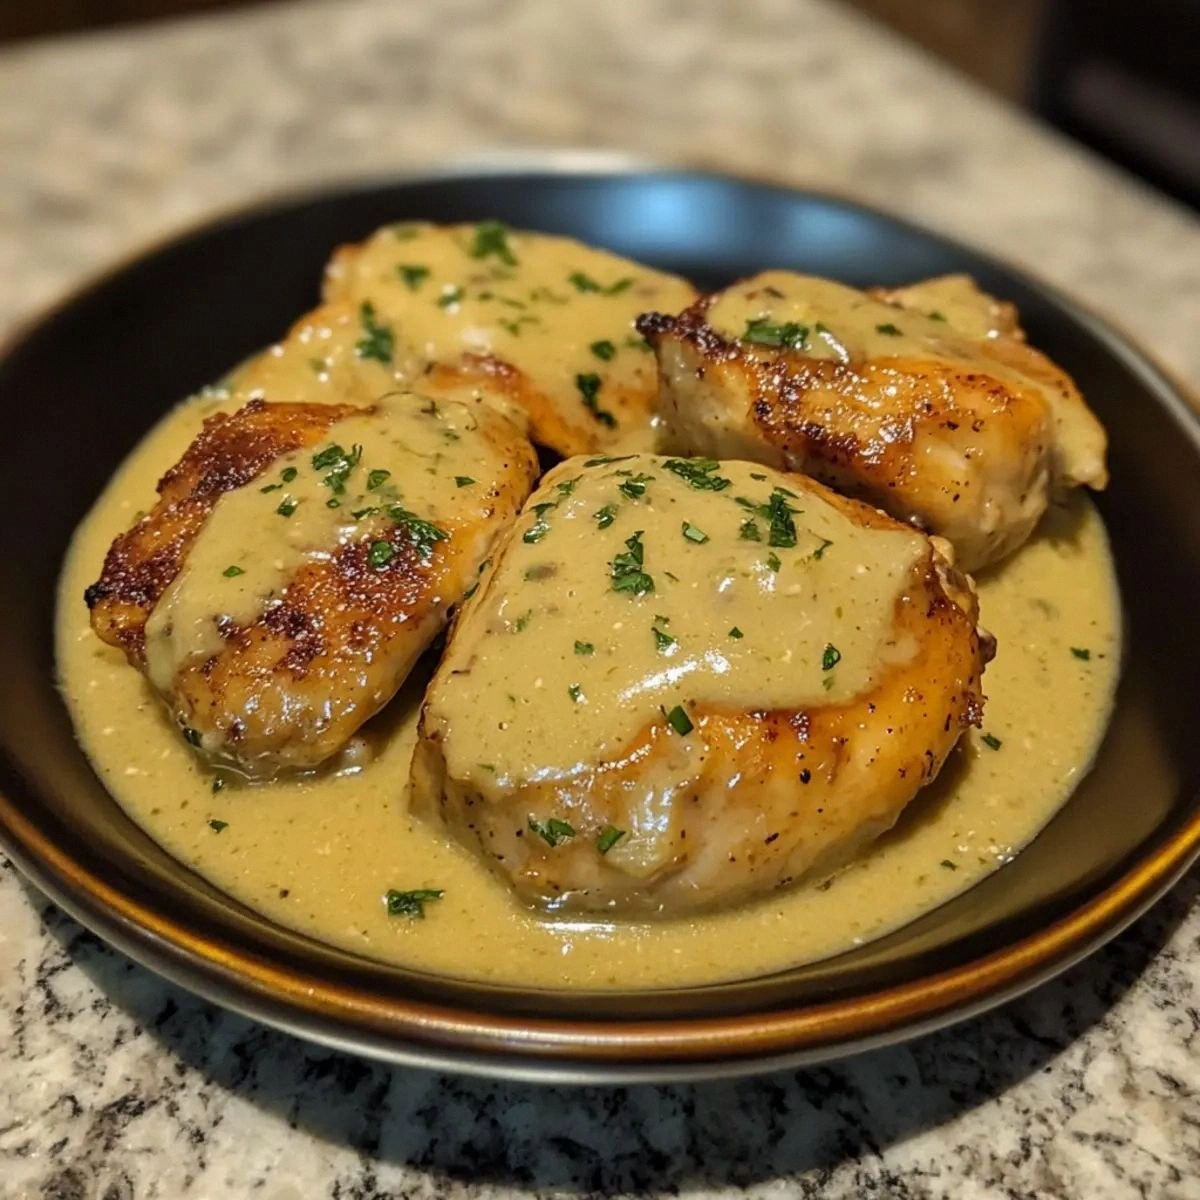
I remember the night I burned a pot of rice and thought, “I could do better.” The kitchen was a mess, the aroma of scorched grains clung to the walls, and my friends were laughing at my culinary misstep. I stared at the ruined pot, and a spark of determination ignited: I would create a dish that turns a kitchen disaster into a triumph. That spark led me to this Instant Pot chicken, a recipe that takes the humble chicken thigh, a splash of broth, and a secret egg‑sauce to create a silky, savory masterpiece.
Picture the scene: a bright, sunny kitchen, the hum of the Instant Pot, and the gentle clink of a wooden spoon against the pot’s interior. The scent of garlic and ginger rises like a fragrant cloud, mingling with the savory whisper of soy sauce. The sound of the steam valve releasing a quiet hiss is music to a home cook’s ears. When you take the first bite, the sauce coats the chicken like velvet, and the subtle crunch of green onions adds a satisfying contrast.
What makes this version stand out? It’s the combination of simplicity and depth. The Instant Pot does all the heavy lifting, while the gentle egg sauce adds a silky texture that feels like a luxury dinner. The dish is so easy that even the most novice cook can master it, yet it’s so flavorful that even seasoned chefs will be impressed. I dare you to taste this and not go back for seconds.
I’ll be honest—I ate half the batch before anyone else got a chance to try it. Most recipes get this completely wrong, missing that silky sheen and the perfect balance of umami. Here’s what actually works: a touch of cornstarch to thicken, a dash of sesame oil to finish, and a carefully timed egg fold that turns the sauce into a silky custard. Picture yourself pulling this out of the Instant Pot, the whole kitchen smelling incredible, and serving it over steaming rice. Stay with me here—this is worth it.
What Makes This Version Stand Out
- Flavor: The combination of soy sauce, ginger, and garlic creates a savory backbone that is both simple and complex.
- Texture: The gentle egg sauce turns the chicken into a silky, custard‑like coating that clings to every bite.
- Speed: The Instant Pot cooks everything in under 30 minutes, making it a perfect weeknight dinner.
- Ease: No sautéing, no separate sauce pans—just add, press, and wait.
- Versatility: Swap the rice for quinoa, cauliflower rice, or even noodles to fit any dietary preference.
- Make‑Ahead: The dish keeps well in the fridge for up to three days, so you can prep ahead of time.
- Crowd‑Pleaser: The sauce’s glossy sheen and the tender chicken make this dish a hit at dinner parties.
- Ingredient Quality: Using fresh ginger and high‑quality soy sauce elevates the flavor profile beyond the ordinary.
Inside the Ingredient List
The Flavor Base
The chicken broth is the soul of the sauce, providing a savory depth that the soy sauce alone cannot achieve. It also hydrates the chicken, keeping it moist and tender. If you use low‑sodium broth, you’ll need to adjust the soy sauce to avoid an overly salty finish. A good rule of thumb is to use a broth that tastes like a light stock—neither too bland nor too overpowering. When you pour it into the pot, the aroma immediately signals that the dish is about to become unforgettable.
The Texture Crew
Cornstarch is the secret to that silky, glossy coat. When whisked with a little water, it forms a slurry that thickens the sauce without adding heaviness. If you’re watching your carbs, a tablespoon of arrowroot powder works just as well. The eggs are the star of this texture crew; they’re whisked until frothy and folded in at the very end to create a custard‑like consistency. The result is a sauce that clings to the chicken like a velvet blanket.
The Unexpected Star
Sesame oil may seem like a minor detail, but it delivers a nutty aroma that elevates the entire dish. A teaspoon is enough to add a subtle depth without overpowering the other flavors. If you’re allergic or simply don’t have it on hand, a dash of toasted sesame seeds can mimic the nutty note. The oil also helps the sauce glide smoothly over the chicken, preventing it from sticking to the pot.
The Final Flourish
Green onions add a bright, fresh crunch that balances the richness of the sauce. They’re best added at the very end, just before serving, so they retain their color and crunch. The chopped scallions also provide a mild onion flavor that complements the garlic. If you prefer a milder taste, substitute with chives or a sprinkle of parsley. This final flourish turns a simple dish into a plated masterpiece.
Everything’s prepped? Good. Let’s get into the real action.
The Method — Step by Step
- Set your Instant Pot to the “Sauté” setting. Add a splash of sesame oil and let it shimmer. This pre‑heat step ensures the pot’s surface is warm enough to brown the chicken, creating a caramelized crust that locks in flavor. Watch for the oil to start smoking lightly—this means it’s hot enough. Don’t rush; a good sear is the foundation of this dish.
- Pat the chicken thighs dry with a paper towel. This step is crucial; moisture on the surface prevents browning. Season both sides with a pinch of salt and pepper. Place the thighs skin‑side down in the pot. Let them cook undisturbed for 3–4 minutes until a golden crust forms. Flip and sear the other side for another 2 minutes. The result should look like a caramelized loaf of bread.
- Remove the chicken and set it aside on a plate. In the same pot, add minced garlic and ginger. Sauté for 30 seconds until fragrant, being careful not to let them burn. The aroma will be intoxicating and will carry through the rest of the dish. This step builds the flavor base before you add the liquid.
- Pour in the chicken broth and stir, scraping any browned bits from the bottom of the pot. These bits are full of flavor, so make sure they’re incorporated. Add the soy sauce and stir again. The liquid should be a light, savory mixture that smells like a broth you’d find in a Japanese bento box. This is the heart of the sauce.
- Return the chicken thighs to the pot, nestling them into the liquid. Close the lid, set the valve to “Sealing,” and select “Pressure Cook” on high for 10 minutes. The pressure will tenderize the meat while infusing it with the sauce’s flavors. Trust the timer; the Instant Pot will handle the rest.
- Once the cooking cycle finishes, allow the pressure to release naturally for 5 minutes, then quick‑release the remaining pressure. This gentle release helps keep the chicken juicy. Open the lid carefully and check that the internal temperature is at least 165°F (74°C). The chicken should feel firm yet tender, like a well‑cooked steak.
- While the chicken rests, whisk the eggs with the cornstarch slurry until smooth. Heat a small non‑stick pan over medium heat and pour in the egg mixture. Stir constantly until it begins to thicken, forming a silky custard. This is the “gentle egg sauce” that will coat the chicken in the next step. The sauce should be glossy, not runny.
- Add the egg sauce to the pot, swirling gently to coat each piece of chicken. Let the mixture simmer for 2 minutes so the flavors meld. The sauce will thicken further, forming a velvety glaze that clings to the meat. The aroma will be intoxicating, signaling that you’re almost ready to serve.
- Transfer the chicken to a serving platter, drizzle with the remaining sauce, and sprinkle chopped green onions over the top. Serve hot over steamed white rice. The contrast between the creamy sauce, tender chicken, and fluffy rice creates a symphony of textures and flavors that will have everyone asking for seconds.
That’s it—you did it. But hold on, I’ve got a few more tricks that will take this to another level.
Insider Tricks for Flawless Results
The Temperature Rule Nobody Follows
Many cooks think a quick sauté is enough, but the key to a caramelized crust is actually a high‑heat sear. Use a thermometer to ensure the oil reaches 375°F before adding the chicken. This tiny detail can turn a good dish into a great one. I once tried searing at a lower temperature and ended up with a soggy exterior that swallowed the sauce.
Why Your Nose Knows Best
The aroma of garlic and ginger is a reliable indicator of freshness. If the smell feels flat or metallic, you’re likely using stale aromatics. Fresh garlic should smell sharp and sweet, while ginger should have a bright, citrusy undertone. Trust your nose; it’s the best quality control you’ll ever have.
The 5‑Minute Rest That Changes Everything
Letting the chicken rest after pressure cooking is essential for juicy meat. A five‑minute rest allows the juices to redistribute, preventing them from spilling out when you cut into the thighs. During this time, the sauce also thickens slightly, making the glaze richer.
The Egg‑Fold Technique
Whisk the eggs until they’re light and airy before adding them to the pot. Then, fold them in slowly, swirling the pot to create a uniform sauce. This technique ensures the eggs coat the chicken evenly, avoiding clumps. I used to add the eggs all at once, and the sauce always looked uneven.
The Final Sesame Touch
A drizzle of sesame oil at the very end adds a nutty finish that elevates the dish. If you’re watching your sodium intake, replace the oil with a splash of toasted sesame seeds for a similar flavor profile. The oil also gives the sauce a glossy sheen that makes the dish Instagram‑ready.
The Restless Rice Trick
When steaming rice, add a pinch of salt and a teaspoon of oil to keep the grains from sticking together. If you prefer, use a rice cooker for consistent results. The fluffy rice provides a neutral canvas that lets the sauce shine.
Creative Twists and Variations
This recipe is a playground. Here are some of my favorite ways to switch things up:
Coconut‑Creamed Version
Swap half the chicken broth for coconut milk and add a pinch of curry powder. The result is a tropical, creamy sauce that pairs beautifully with jasmine rice. The coconut’s natural sweetness balances the savory soy notes. It’s perfect for a summer dinner with a hint of adventure.
Spicy Sriracha Twist
Add a tablespoon of sriracha to the sauce for a kick that lingers. The heat complements the umami flavors and adds a pop of color. Use a mild version if you’re not a fan of intense spice. This version is ideal for those who love a little fire in their meals.
Pineapple & Ginger Fusion
Stir in diced fresh pineapple and a splash of rice vinegar. The pineapple’s acidity brightens the dish and the vinegar adds a subtle tang. The sweet‑savory balance is reminiscent of a Hawaiian plate lunch. It’s a refreshing change for hot summer evenings.
Miso‑Glazed Variation
Replace soy sauce with white miso paste and add a teaspoon of mirin. The miso brings depth and a slightly sweet undertone. The glaze becomes thicker and more complex, making the dish feel like a refined Japanese dinner. Great for a special occasion.
Herbed Mediterranean Spin
Incorporate chopped rosemary, thyme, and a squeeze of lemon juice into the sauce. The herbs bring earthiness while the lemon adds brightness. The result is a Mediterranean‑inspired dish that’s surprisingly fresh. It’s a fun way to bring a new flavor profile to a classic recipe.
Almond‑Crunch Finish
Top the dish with toasted sliced almonds for a nutty crunch that contrasts the silky sauce. The almonds also add protein and a subtle buttery flavor. Sprinkle them just before serving so they stay crisp. This variation is a crowd‑pleaser at dinner parties.
Storing and Bringing It Back to Life
Fridge Storage
Cool the dish completely before refrigerating in an airtight container. It will stay fresh for up to three days. The sauce may thicken slightly, but it will still taste delicious. Reheat gently on the stovetop with a splash of water to re‑soften the glaze.
Freezer Friendly
Freeze portions in freezer‑safe containers for up to two months. Thaw overnight in the refrigerator before reheating. The texture remains consistent, and the sauce still coats the chicken beautifully. Freezing is a lifesaver for busy weeknights.
Best Reheating Method
Reheat the dish in a low‑heat saucepan, adding a tiny splash of water or broth to loosen the sauce. Stir until the sauce is glossy again. Keep the heat low to avoid over‑cooking the chicken. This method preserves the silky texture and keeps the flavors vibrant.