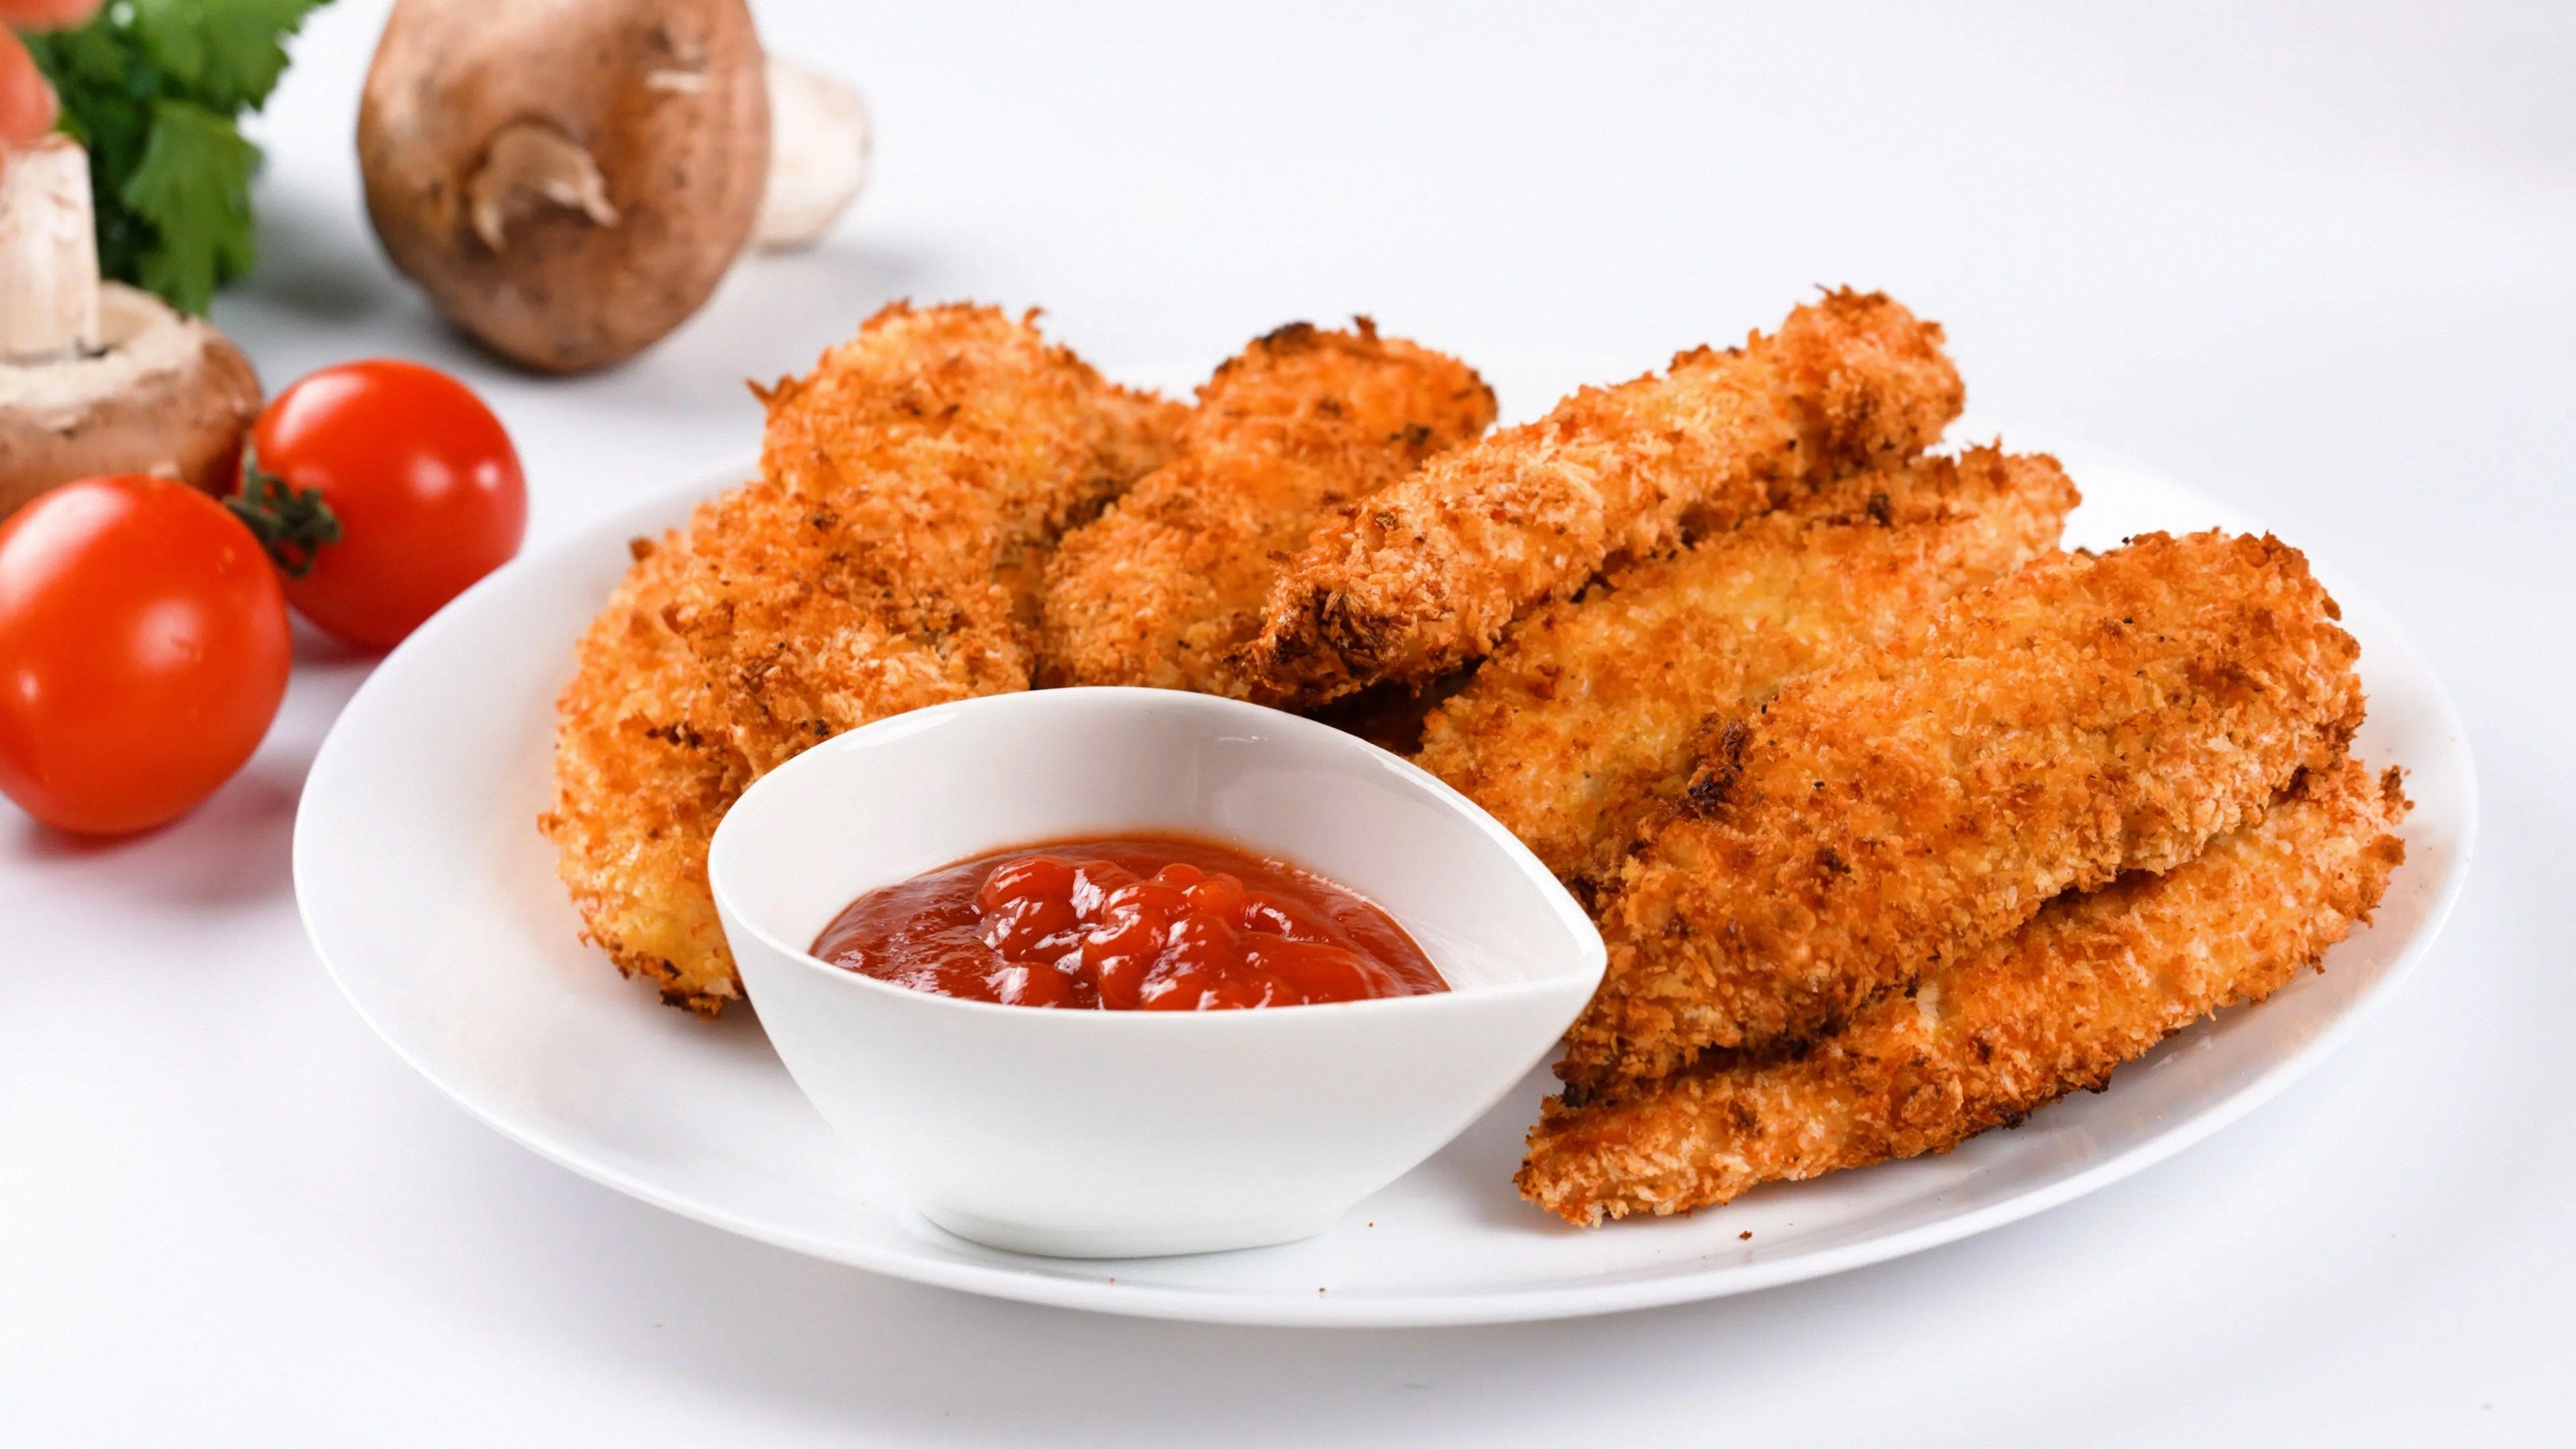
It started with a kitchen catastrophe I still laugh about: a half‑baked chicken tender that turned into a dry, rubbery mess, and a friend’s dare that read, “I bet you can’t make chicken that’s both crispy and tender without the deep‑frying circus.” I stared at that soggy, unappetizing disaster, and the next thing I did was pull out the pantry, grab a handful of panko, a sprinkle of Parmesan, and a dash of paprika, and declare war on the fryer. That night, I tasted a tender that was crisp on the outside, juicy on the inside, and so flavorful it made me question the very existence of greasy oil. I dare you to taste this and not go back for seconds. The moment that first bite hit, the crunch sounded like applause, the savory notes of Parmesan and garlic powder danced in my mouth, and the tender stayed moist like a cloud in a storm. This isn’t just another recipe; it’s a revelation that transforms a simple protein into a showstopper.
Picture yourself pulling this out of the oven, the whole kitchen smelling incredible, the golden tenders glistening with a light sheen of olive oil spray, and the sound of a satisfying crackle as you lift the first piece. The aroma alone can send your taste buds into a frenzy before you even take a bite. I’ve spent the last few weeks tweaking the ratio of spices, experimenting with different breadcrumb blends, and even trying a dry‑brine, but the result always comes back to the same triumphant crunch. This is hands down the best version you'll ever make at home. It’s not just a recipe; it’s a confidence boost in the kitchen, a way to turn an ordinary night into a culinary celebration.
If you’ve ever struggled with chicken that turns out soggy or over‑seasoned, you’re not alone. I’ve seen countless attempts where the coating falls off or the chicken loses its juiciness. The secret, I’ve learned, is in the harmony of texture, seasoning, and the simple act of letting the oven do the heavy lifting. Most recipes get this completely wrong by either over‑browning the coating or under‑cooking the meat. And now the fun part. In this article, I’ll walk you through every single step, from the first whisk of eggs to the final flourish of Parmesan, so that by the end you’ll wonder how you ever made it any other way.
I’m going to keep it real: I ate half the batch before anyone else got a chance to taste it. That’s a confession you can’t help but laugh at. But it’s also proof that once you taste the perfect crunch, you can’t stop. So buckle up, grab your apron, and let’s dive into the ultimate crispy baked chicken tenders.
What Makes This Version Stand Out
- Texture: The combination of panko and Parmesan creates a multi‑layered crunch that shatters like thin ice, while the coating stays crisp even after reheating.
- Flavor: A balanced blend of garlic powder, paprika, and onion powder gives the tenders a smoky, savory depth that’s far richer than plain breading.
- Ease: No deep‑frying, no special equipment—just a sheet pan, an oven, and a few pantry staples.
- Make‑ahead: You can assemble the tenders ahead of time, refrigerate, and bake when you’re ready, making it perfect for busy evenings.
- Low‑fat: The olive oil spray keeps the coating crisp without the extra calories of traditional frying.
- Versatility: Pair it with marinara, honey mustard, or a creamy ranch; the coating holds up to any dip.
- Kid‑friendly: The tender size and mild seasoning make it a hit with even the pickiest eaters.
- Visual Appeal: The golden-brown finish looks as good on a plate as it tastes.
Alright, let’s break down exactly what goes into this masterpiece…
Inside the Ingredient List
The Flavor Base
The foundation of any great chicken tender is the seasoning mix. Garlic powder, paprika, and onion powder work together to create a savory, slightly smoky profile that permeates the breading. If you skip this step, you’ll end up with a bland coating that feels like a missed opportunity. A good tip: let the seasoning sit on the chicken for 10 minutes before breading; it allows the flavors to seep in, ensuring each bite is bursting with taste.
The Texture Crew
Panko breadcrumbs are the star of the show. Their airy, flaky structure gives that signature crunch that’s impossible to replicate with regular breadcrumbs. Parmesan cheese adds a nutty, salty edge and helps bind the coating together. If you’re looking for a gluten‑free version, substitute the panko with crushed cornflakes or gluten‑free breadcrumbs. Remember, the ratio is key—too much Parmesan can overpower the flavor.
The Unexpected Star
Olive oil spray is the unsung hero. A light mist of oil on the coating ensures the tenders crisp up beautifully without absorbing excess fat. Skipping the oil or using too little results in a dry, crumbly texture that doesn’t hold up during baking. If you don’t have a spray bottle, a quick dab with a pastry brush works just as well.
The Final Flourish
The eggs act as the glue that binds the breadcrumb mixture to the chicken. Whisk them until they’re slightly frothy to incorporate air, which helps the coating lift off the surface during baking. If you’re in a hurry, a quick whisk with a fork will do the trick. A note on eggs: if you’re avoiding them, you can use a splash of milk or a vegan egg replacer, but the texture will shift slightly.
Everything’s prepped? Good. Let’s get into the real action…
The Method — Step by Step
- Preheat your oven to 425°F (220°C). Line a large baking sheet with parchment paper and lightly spray it with olive oil spray. The high temperature is key for a quick, even crisp.
- Trim the chicken breasts into 1‑inch strips. If you’re using whole breasts, cut them into even, bite‑size pieces so they cook uniformly.
- In a shallow dish, whisk the eggs until frothy. In a second dish, combine the panko, grated Parmesan, garlic powder, paprika, onion powder, salt, and pepper. The dry mix should look like a fine, golden sand.
- Dip each chicken strip first into the egg, letting the excess drip off, then dredge it in the breadcrumb mixture, pressing gently to coat. The coating should cling firmly without clumps.
- Arrange the coated tenders on the prepared baking sheet, leaving a small gap between each piece to allow heat circulation. This spacing ensures a uniform crunch.
- Spray the tops of the tenders with a light mist of olive oil spray. This step is crucial for achieving a golden, crisp finish.
- Bake for 12–15 minutes, flipping halfway through. The chicken should reach an internal temperature of 165°F (74°C). The edges will start pulling away, signaling that the coating is crisping perfectly.
- Remove from the oven and let the tenders rest for 3 minutes. Resting allows the juices to redistribute, keeping the meat moist.
- Serve immediately with your favorite dipping sauce—marinara, ranch, or a honey mustard drizzle. The tenders are best enjoyed hot, when the crunch is at its peak.
That’s it— you did it. But hold on, I’ve got a few more tricks that’ll take this to another level…
Insider Tricks for Flawless Results
The Temperature Rule Nobody Follows
Many people think 375°F is enough, but that temperature often results in a soggy coating. The trick is to crank the oven up to 425°F (220°C). The high heat instantly vaporizes the moisture on the coating’s surface, creating that coveted crackle. I’ve tested it on a 200‑degree lower temperature and the tenders came out with a rubbery middle—don’t make that mistake.
Why Your Nose Knows Best
During baking, the scent of Parmesan and paprika will rise and mingle with the faint scent of olive oil. Your nose will tell you when the coating is golden. If you’re unsure, use a timer, but trust your olfactory senses; it’s a reliable indicator of doneness.
The 5‑Minute Rest That Changes Everything
After removing the tenders from the oven, let them sit for exactly five minutes. This pause allows the steam to redistribute, preventing the coating from becoming soggy when you bite. I’ve seen people cut straight into the tenders, and the result is a wet center—definitely avoid that.
Use a Cooling Rack
Place the baked tenders on a wire rack instead of a flat plate. Air circulates underneath, keeping the bottom crisp. If you don’t have a rack, simply lift the tenders with tongs and let them cool on a paper towel for a couple of minutes before serving.
Season the Bread Crumbs, Not Just the Chicken
I used to season the chicken alone, but I discovered that adding spices directly to the breadcrumb mixture amplifies flavor throughout. The coating becomes a flavor bomb, and the chicken itself is less likely to taste bland.
The Secret to a Non‑Sticking Sheet
Spray the parchment paper lightly before adding the tenders. This tiny extra step ensures the coating doesn’t cling to the paper and makes clean‑up a breeze. It also helps maintain the crispness of the coating during baking.
Creative Twists and Variations
This recipe is a playground. Here are some of my favorite ways to switch things up:
Spicy Cajun Kick
Replace the paprika with Cajun seasoning and add a pinch of cayenne. The result is a fiery, smoky flavor that pairs well with a cooling yogurt dip.
Herb‑Infused Delight
Swap the garlic powder for fresh minced garlic and stir in chopped parsley, thyme, and rosemary into the breadcrumb mix. The herbs give a fragrant, Mediterranean vibe.
Cheesy Gouda Twist
Replace Parmesan with shredded Gouda for a richer, melt‑in‑your‑mouth cheese flavor. The gooeyness adds an indulgent twist to the crunch.
Asian‑Inspired Sesame
Add toasted sesame seeds to the breadcrumb mixture and drizzle a little soy sauce over the coated tenders before baking. The result is a nutty, umami‑rich coating reminiscent of fried chicken in Asia.
Vegan Version
Use a plant‑based protein substitute like tofu strips or tempeh. Whisk a splash of non‑dairy milk with a tablespoon of nutritional yeast to replace the eggs, and the rest of the recipe stays the same.
Dessert‑Style Sweet Tenders
For a sweet twist, coat the tenders in a mixture of panko, powdered sugar, and a pinch of cinnamon. Serve with a chocolate‑honey drizzle for a playful snack.
Storing and Bringing It Back to Life
Fridge Storage
Cool the tenders completely, then store them in an airtight container or a zip‑lock bag in the refrigerator for up to 3 days. The coating may soften slightly, but it will regain crunch after reheating.
Freezer Friendly
Place the cooled tenders on a baking sheet and freeze until solid, then transfer them to a freezer bag. They’ll keep for up to 2 months. Reheat in a 350°F oven for 10 minutes to restore crispness.
Best Reheating Method
To bring back the original crunch, preheat your oven to 400°F (200°C). Place the tenders on a wire rack over a baking sheet and bake for 5–7 minutes. Add a splash of water to the pan before baking; the steam will help the coating re‑crisp without drying out the meat.