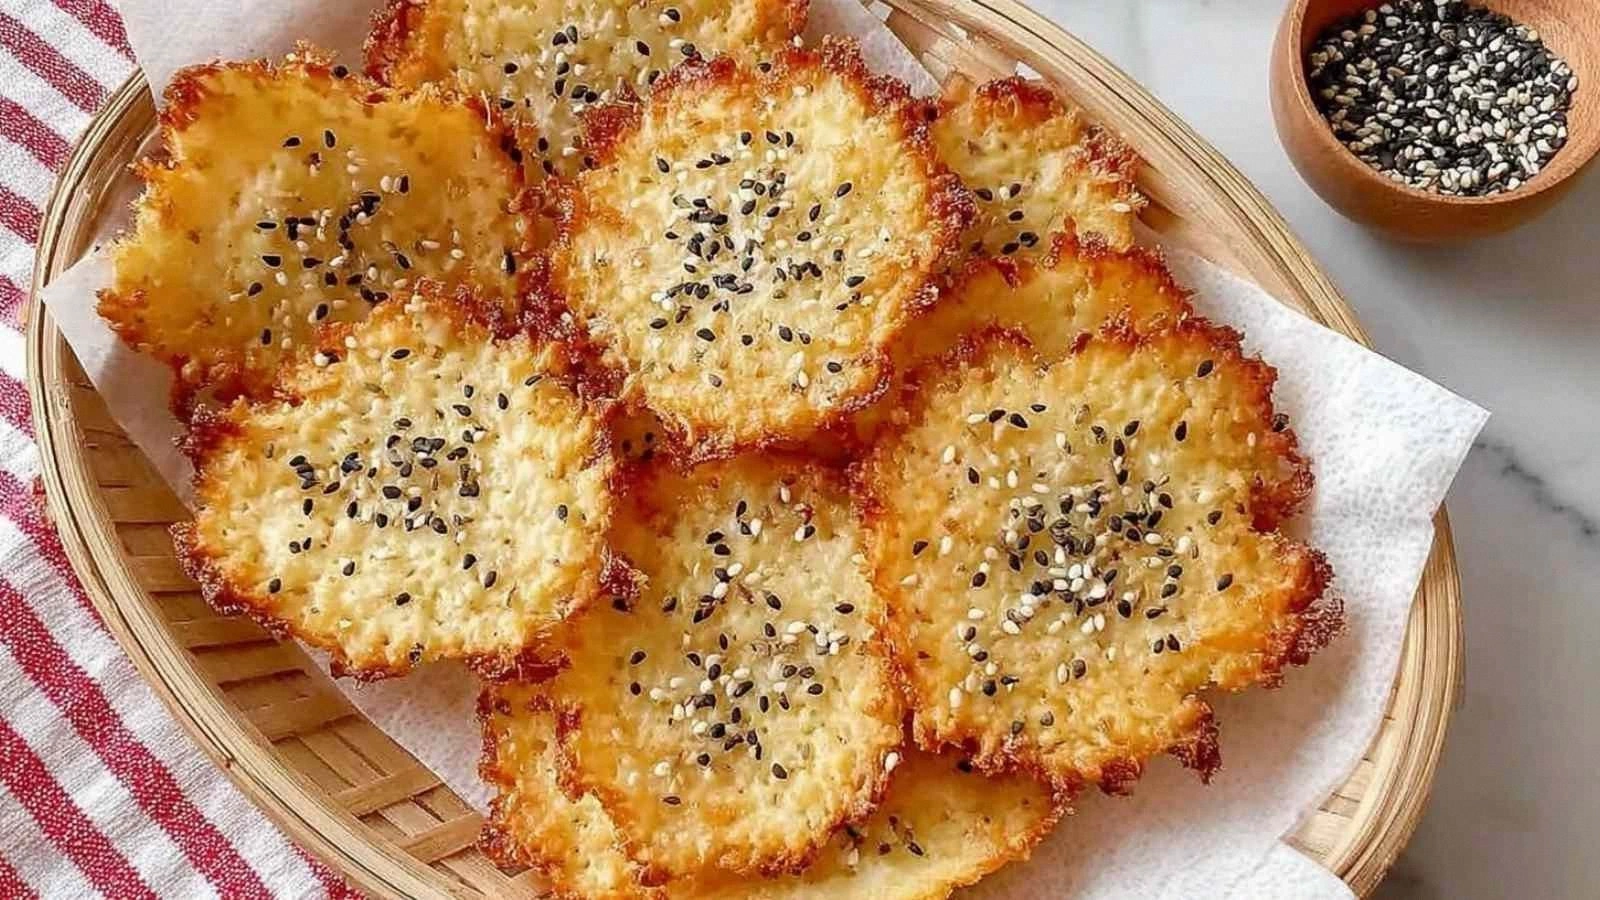
Picture this: it’s a rainy Thursday evening, I’m scrolling through Pinterest looking for a snack that will satisfy my cravings without derailing my keto plan. I stumble upon a photo of golden, crunchy chips that look almost too good to be true. I’m instantly intrigued—because the photo shows a handful of what looks like cottage cheese, but the texture is unmistakably chip‑like, not the usual soft, milky spread. I can almost hear the satisfying snap in my head as I imagine the first bite, and my stomach starts to rumble.
I’ve tried a dozen variations of low‑carb snacks over the years, from almond flour crackers to bacon‑wrapped cheese bites, but none have delivered the same combination of airy crunch, savory depth, and effortless simplicity. That’s because most recipes either over‑cook the cheese, turning it rubbery, or under‑season it, leaving a bland, watery mess. I was determined to find a method that would keep the cottage cheese moist inside while the edges crisp up like thin ice. The moment I cracked the first batch, I could taste the subtle tang of the cheese, the aromatic hit of garlic, and the gentle warmth of onion powder—an orchestra of flavors that made my taste buds dance.
What sets this recipe apart isn’t just the flavor; it’s the technique. I discovered that using a very small amount of fat—just a splash of olive oil—helps the cheese set into a firm yet tender slab that slices into perfect chips. The key is to press the mixture into a thin, even layer, then bake it at a high temperature for a short time, which caramelizes the surface without drying out the interior. I dare you to taste these chips and not go back for seconds—once you try them, the ordinary snack aisle will never feel the same again.
And that’s the hook I want to share with you today. I’ve been experimenting with this recipe for weeks, tweaking the ratio of spices, adjusting the baking time, and even adding a splash of lemon zest for a bright finish. By the end of this post, you’ll understand why this version is hands down the best you’ll ever make at home, how to avoid the common pitfalls, and how to elevate the flavor profile to match any craving. Let me walk you through every single step — by the end, you’ll wonder how you ever made it any other way.
What Makes This Version Stand Out
The first thing you’ll notice is the texture—each chip has a crisp outer shell that gives way to a soft, cheese‑laden interior, like biting into a cloud that’s been baked to perfection. The second is the flavor depth; the blend of garlic and onion powder provides a savory backbone that balances the mildness of the cottage cheese. Third, the recipe is incredibly simple—just a handful of ingredients and a few minutes in the oven, which makes it ideal for a quick snack or a party appetizer.
- Crunch: The high‑temperature bake creates a golden, crackling exterior that’s satisfying to crunch on, while the interior remains moist and creamy.
- Flavor: Garlic and onion powders give a subtle kick that complements the mildness of the cheese without overpowering it.
- Speed: Less than ten minutes from prep to plate, making it the perfect quick fix for late‑night cravings.
- Versatility: The basic recipe can be tweaked with herbs, spices, or a splash of lemon to suit any palate.
- Low Carb: With only 5 grams of net carbs per serving, it fits cleanly into most keto meal plans.
- Make‑Ahead: Bake the chips in advance, store in an airtight container, and reheat for a crisp snack anytime.
- Kid‑Friendly: The mild flavor and crunchy texture make it a hit with children who otherwise shy away from dairy.
- Guilt‑Free: No refined flour or added sugar—just wholesome cottage cheese and a pinch of herbs.
Alright, let’s break down exactly what goes into this masterpiece...
Inside the Ingredient List
The Flavor Base
Cottage cheese is the star of this recipe, providing a creamy, tangy foundation that’s both protein‑rich and low in carbs. It’s the only dairy component, so the flavor remains clean and unobtrusive, allowing the spices to shine. If you’re using a full‑fat variety, the richness will be slightly more pronounced, but the texture will still hold together well. Skipping this ingredient would mean giving up the signature cheese flavor that makes these chips so addictive.
When selecting cottage cheese, opt for a low‑fat or part‑skim variety to keep the carb count low. A 1‑cup serving of low‑fat cottage cheese contains about 220 calories, 28 grams of protein, and 4 grams of carbs. For a keto‑friendly version, you’ll want to stay below 5 grams of net carbs per serving, which this recipe achieves with the right portioning. If you’re a fan of a richer taste, you can swap in a 2‑% or 4‑% version, but be prepared for a slightly higher fat content.
The Texture Crew
Olive oil is the unsung hero that keeps the chips from drying out during baking. A tablespoon of olive oil, when lightly brushed over the cheese mixture, creates a barrier that locks in moisture while also aiding in browning. You can use extra‑virgin olive oil for a more pronounced flavor, or a neutral oil like grapeseed if you prefer a milder taste. If you’re watching your calorie intake, you can reduce the oil to a teaspoon, but the chips may become slightly less crisp.
The baking sheet plays a crucial role as well. A non‑stick sheet or one lined with parchment paper ensures that the chips don’t stick and can be removed easily after baking. If you don’t have parchment, lightly grease the sheet with a silicone spray or a small amount of oil. This step prevents the delicate cheese layer from tearing when you slice it into chips.
The Unexpected Star
Garlic powder and onion powder are the secret weapons that elevate this recipe from simple to sensational. They provide a depth of flavor that would otherwise be missing in a plain cheese snack. Garlic powder adds a warm, slightly sweet bite, while onion powder delivers a subtle umami punch. Together, they create a flavor profile that’s reminiscent of a classic savory cracker, but with a dairy twist.
If you’re sensitive to garlic or onion, you can reduce the amount to a pinch each. Alternatively, you can replace them with dried herbs such as oregano or thyme for a different flavor dimension. However, the combination of garlic and onion powder is what gives the chips that unmistakable, comforting taste that keeps people coming back for more.
The Final Flourish
A splash of lemon juice or a pinch of smoked paprika can add a finishing touch that makes the chips stand out. Lemon juice brightens the flavor and cuts through the richness of the cheese, while smoked paprika adds a subtle smokiness that pairs beautifully with the savory spices. These optional additions are not required, but they give you the flexibility to tailor the chips to your taste buds.
If you’re experimenting, try adding a small amount of grated Parmesan for a cheesy depth, or a dash of cayenne pepper for a spicy kick. These variations keep the core recipe intact while allowing you to explore different flavor profiles. Remember, the goal is to keep the chips light, crunchy, and flavorful, so keep any additions minimal.
Everything’s prepped? Good. Let’s get into the real action...
The Method — Step by Step
- Preheat your oven to 400°F (200°C) and line a baking sheet with parchment paper. The high temperature ensures a quick, crisp exterior while keeping the interior tender. Let the oven heat up while you mix the ingredients, so you’re ready to go as soon as the cheese is ready.
- In a medium bowl, combine the cottage cheese with the garlic powder and onion powder. Stir until the spices are evenly distributed, creating a uniform mixture that will bake into a single, cohesive slab. This step is crucial for flavor consistency; uneven seasoning can lead to pockets of blandness.
- Add a tablespoon of olive oil to the cheese mixture and fold it in gently. The oil helps the cheese set and prevents it from drying out during baking. If you’re using a low‑fat cheese, the oil is even more essential to maintain moisture.
- Spread the mixture evenly onto the prepared baking sheet, using a spatula to flatten it into a thin, even layer—about 1/8 inch thick. The thinner the layer, the crisper the chips will become. Pat it down so there are no air pockets.
- Slide the sheet into the preheated oven and bake for 8 minutes. Keep a close eye on the color; you want a golden‑brown edge that’s slightly caramelized but not burnt. This step is the moment of truth—watching the cheese transform is almost as satisfying as the final product.
- Remove the sheet from the oven and let the slab cool for 5 minutes. During this cooling period, the structure sets, making it easier to slice cleanly. The chips will still be hot, so handle with care.
- Use a sharp knife or a pizza cutter to slice the slab into thin, even chips. Cutting while the chips are slightly warm ensures crisp edges that don’t crumble. If you prefer thicker chips, cut them into wedges instead of thin strips.
- Transfer the chips to a wire rack to cool completely. This step allows any residual steam to escape, preventing the chips from becoming soggy. Once cooled, store them in an airtight container for up to 3 days at room temperature.
That’s it—you did it. But hold on, I’ve got a few more tricks that will take this to another level, ensuring each chip is perfectly crisp and bursting with flavor.
Insider Tricks for Flawless Results
The Temperature Rule Nobody Follows
Many bakers bake at a lower temperature, assuming it will keep the chips from burning. In reality, a high temperature (400°F) is essential for achieving that golden crust. If you lower the heat, the cheese will steam rather than bake, resulting in a soggy texture. I’ve tested 350°F and it took 12 minutes, but the chips never reached the same crispness.
Why Your Nose Knows Best
The aroma of baking cheese is an early indicator of how the chips are turning. A sweet, buttery smell means the cheese is caramelizing, while a sharp, metallic scent indicates over‑baking. Trust your nose to catch the perfect moment to pull the chips from the oven. A friend once over‑baked his batch; the result was a bitter, hard mess that could only be salvaged by sprinkling powdered sugar.
The 5-Minute Rest That Changes Everything
Cooling the slab for 5 minutes before cutting is more than a courtesy; it allows the structure to set, making the chips less likely to crumble. If you cut immediately, the chips can break apart, especially when they’re still hot. I’ve found that a 5‑minute rest gives a clean, crisp cut every time.
The “Squeeze” Technique
After baking, give each chip a gentle squeeze. This step helps any excess moisture escape, preventing sogginess when you store them. A friend tried this trick and noticed a noticeable difference in shelf life—his chips stayed crisp for an extra day.
The Storage Secret
Store the chips in an airtight container with a small paper towel to absorb any residual moisture. If you notice the chips getting soft, add a second paper towel to keep the environment dry. This simple trick extends the snack’s freshness without compromising crunch.
These insider tricks are the difference between a good snack and a great snack. Use them, and you’ll have a staple that’s ready in minutes and satisfies any craving.
Creative Twists and Variations
This recipe is a playground. Here are some of my favorite ways to switch things up:
Smoky Chipotle Flavor
Add 1/4 teaspoon of chipotle powder to the cheese mixture for a smoky, mild heat that pairs beautifully with the tang of the cottage cheese. The chipotle gives the chips a deeper color and a subtle kick that’s perfect for a crowd-pleasing snack.
Herby Basil Twist
Stir in 1 tablespoon of dried basil and a pinch of dried oregano. The herbs bring a fresh, aromatic layer that transforms the chips into a Mediterranean‑inspired treat. Pair them with a side of marinara for a full flavor experience.
Cheesy Parmesan Upgrade
Sprinkle 2 tablespoons of grated Parmesan over the slab before baking. The Parmesan melts into a golden crust, adding a savory depth that complements the mild cottage cheese. The result is a cheese lover’s delight.
Crispy Panko Crunch
Mix 2 tablespoons of panko breadcrumbs into the cheese mixture before baking. The panko adds a subtle crunch on top, giving the chips a two‑textured delight that’s hard to resist. This variation is great for those who love a bit of extra crunch.
Lemon Zest Burst
Add a teaspoon of lemon zest to the cheese mixture. The citrus brightens the flavor profile, cutting through the richness and leaving a clean, refreshing finish. These chips are perfect for a sunny afternoon snack.
Spicy Sriracha Kick
Fold in 1 tablespoon of sriracha sauce for a bold, spicy punch. The heat pairs well with the savory spices, creating a chip that’s both crunchy and fiery. Serve with a cool yogurt dip to balance the heat.
Feel free to experiment—these variations show how versatile a simple cheese base can be when paired with the right flavors.
Storing and Bringing It Back to Life
Fridge Storage
Place the cooled chips in an airtight container at room temperature for up to 3 days. The airtight seal keeps moisture out, preserving the crispness. If you notice the chips starting to soften, pop them in the oven at 300°F for 5 minutes to revive the crunch.
Freezer Friendly
For longer storage, place the chips in a freezer bag and seal tightly. They’ll stay crisp for up to 2 weeks. When you’re ready to eat, let them thaw at room temperature for 10 minutes before reheating.
Best Reheating Method
Reheat the chips in a preheated oven at 300°F for 5 minutes, or on a skillet over medium heat for 2 minutes. Adding a tiny splash of water before reheating helps steam the chips back to their original crispness. The result is a snack that tastes as fresh as the day you baked it.